Article by TMY Editorial Staff. Photos by John Stoudt.
There are two aspects to the mast step [R41] on a model boat, the piece that mounts on the deck and the piece on the bottom of the mast that engages that piece on the deck. AJ Fisher had a notched, T-shaped step that mounted on the deck and a round collar that was pinned to the bottom of the slotted mast. This can be replicated but takes some time and skill. There is a simpler combination that includes a ⅛-in plate mounted to the deck and a pin in the bottom of the mast. With the correct rigging, this works well on all types and sizes of model yachts.
Materials
- ⅛- by 1-in brass bar (available on Amazon)
- Two ½-in, #4 flat head brass wood screws
Tools
- Hacksaw or metal cutting bandsaw
- Drill press or electric hand drill
- Various drill bits
- 82-deg countersink
- Center punch
- Files, sandpaper, sanding block, or band sander
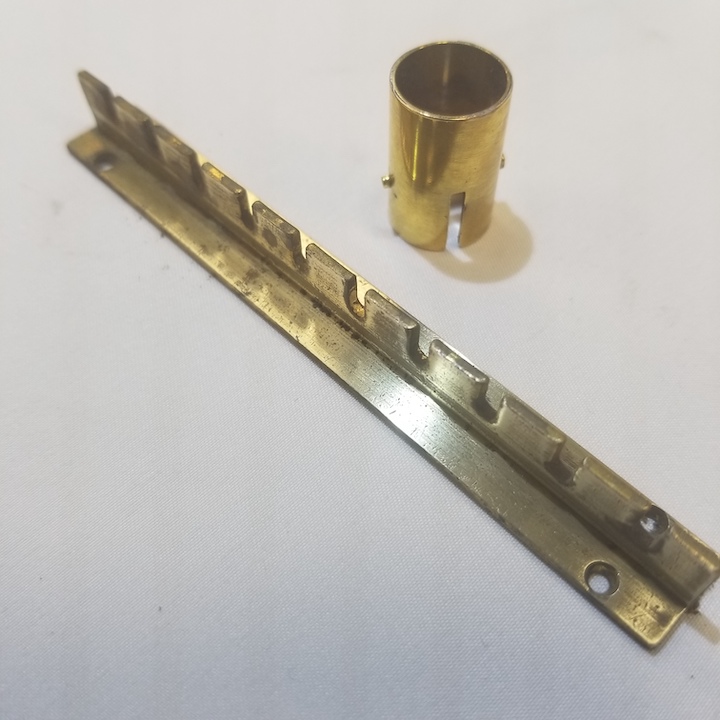
mast step.
Procedure
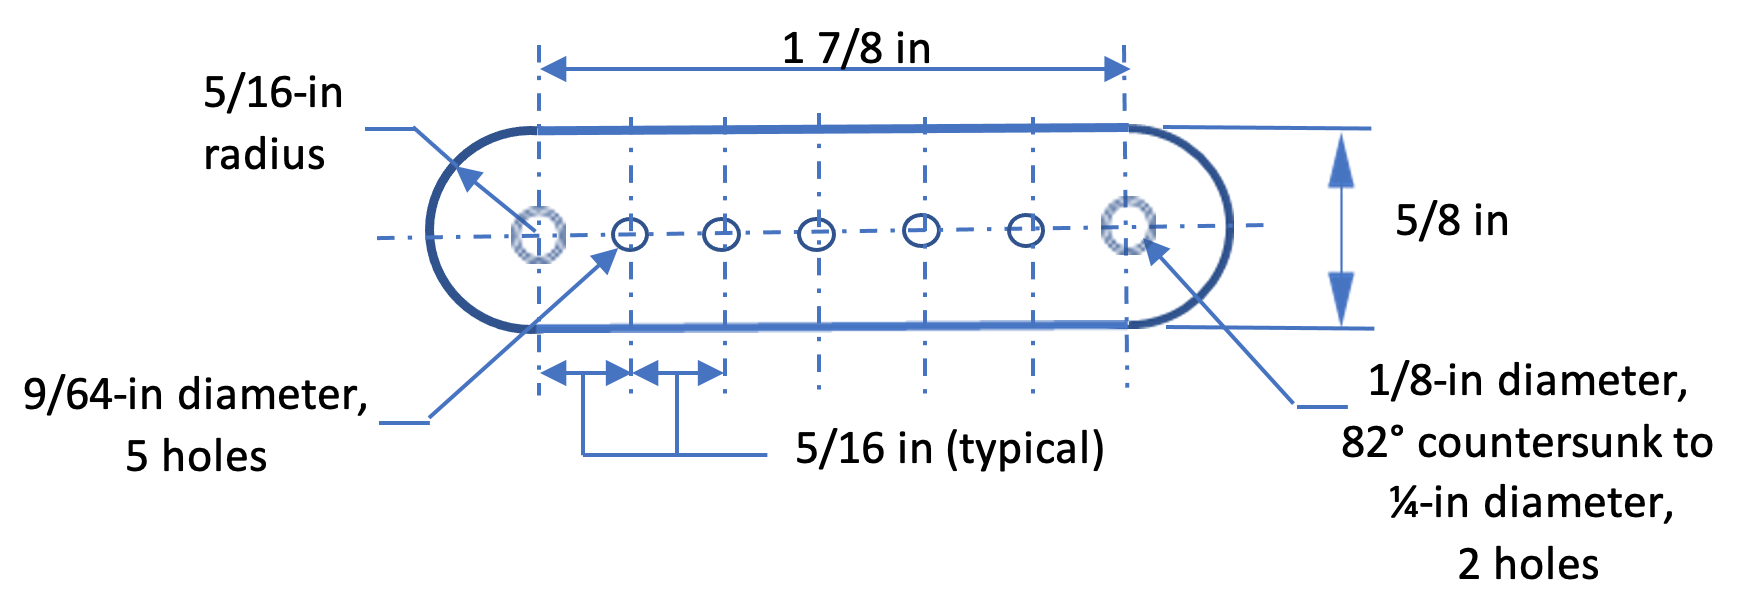
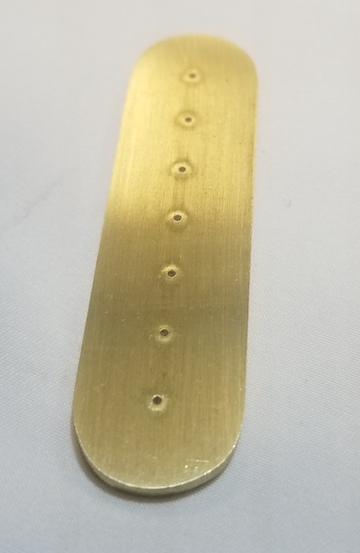
Cut a piece of ⅛-in bar stock ⅝- by 2 ½-in long.
Shape the piece by rounding the ends, smoothing the edges, and sanding smooth.
- Round the ends using a file and sandpaper or a 1-in band sander.
- Use a sanding board to sand the long edges smooth.
- Using a foam sanding block, you can round the upper edges and get a nice finish on all surfaces.
NOTE: If you are using aluminum fittings substitute ⅛- by 1-in aluminum bar, ⅛-in aluminum rod, and stainless-steel screws.
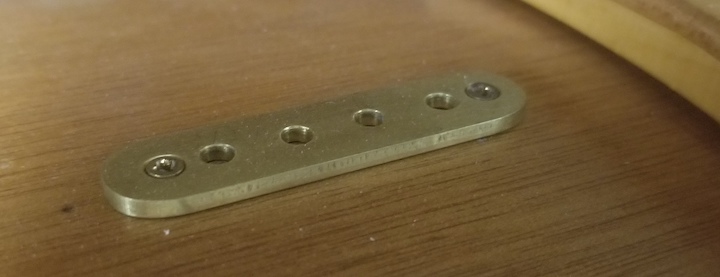
Layout out the centers of the holes to be drilled.
- Mark off the locations for the pinholes and the screw holes using the dimensions provided on the drawing.
- Using a center punch mark all of the centers.
Drill the holes with two different size drill bits.
- Drill a clearance hole for the screws in the two end positions. Use a ⅛-in drill bit.
- Countersink these holes so the head of the screw drops in flush with the surface of the step.
- Drill the five middle holes using a 9/64-in drill bit. Carefully “round” the top edge of each hole using a larger drill bit. This can be done by rotating the bit between two fingers with the end of the drill bit on the top of each hole. You just want to put a slight bevel at the top of each hole. This will make it easy to engage the pin on the bottom of the mast when you are rigging the boat.

The Mast
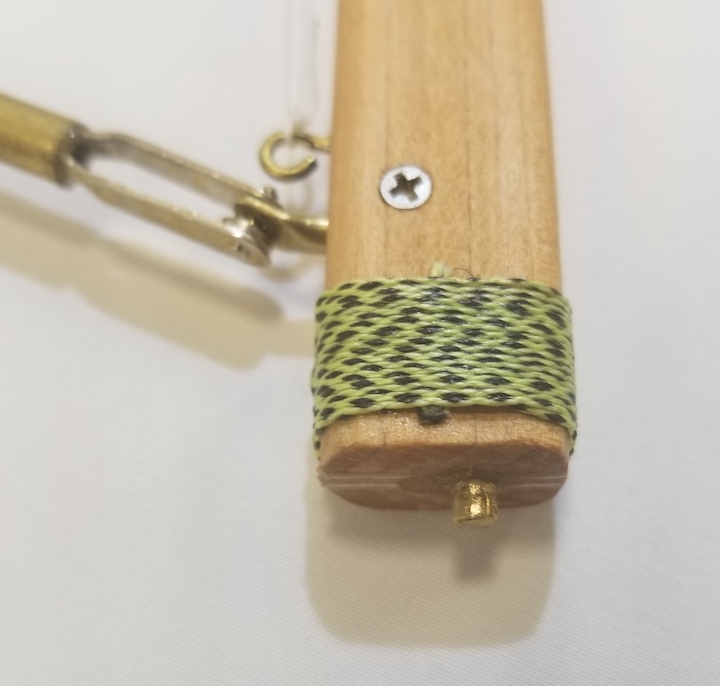
The bottom end of the mast gets fitted with a piece of ⅛-in brass rod and lashed to prevent the end from breaking from the pressure placed on the rod.
Materials
- 1 ⅜ in of ⅛-in round brass rod (K & S Product)
- 30 in of 80-pound fishing line with an embedded Kevlar fiber
- Cyanoacrylate adhesive
- 1-hour 2-part epoxy
Tools
- 5/32-in drill bit
- Electric hand drill
Drill the bottom end of the mast with a 5/32-in drill bit approximately 1 ⅛ in deep. Make sure you keep the drill parallel to the length of the mast in all directions.
Rough up the surface of the ⅛-in brass rod and insert it into the hole that has been filled with two-part epoxy. Wipe off any excess epoxy. Use a piece of masking tape to align the pin so it sits straight in the bottom of the mast.
Now lash approximately ½ in of the bottom of the mast using the 80-pound fishing line with the embedded Kevlar fiber. Pull the one end so the loose end goes behind the lashing and cut the ends off. Coat the entire lashing with CA and dab dry with a paper towel. This is an extremely strong alternative to fitting a brass collar on the bottom of the mast.
This system has been installed on a number of boats and is effective and durable over time. If the boat is rigged correctly the pin will not come out of the mast step. This mast step combination is easier to construct than the AJ Fisher version.