Article and photos by Ivor Walton
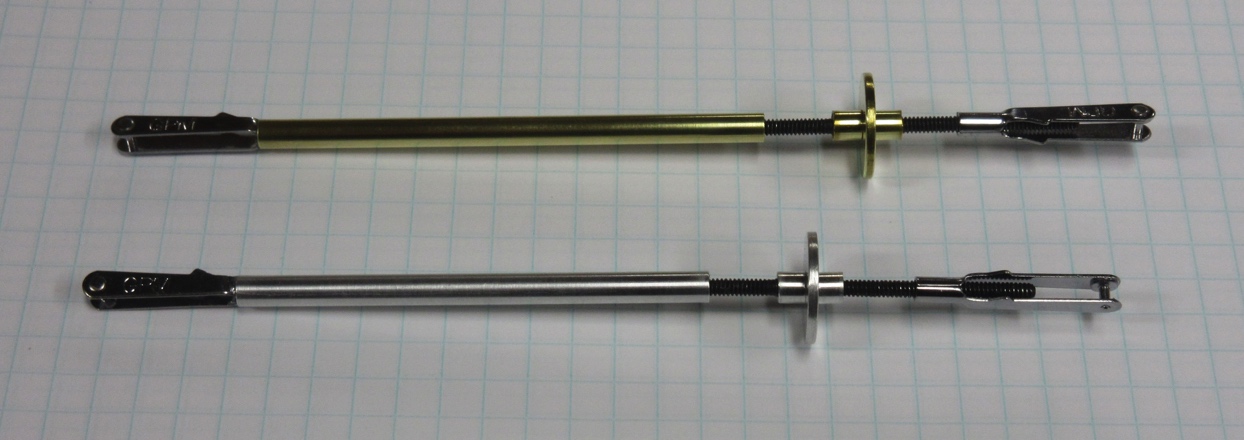
This article describes how to make a boom vang with a turnbuckle. It can be whatever length is needed to fit your boat and have either a brass or aluminum finish. Fig.1 shows two completed vangs: one brass and one aluminum. The dimensions given here are for a 6-in vang.
Materials for a 6-in aluminum vang
- 1/8-, 5/32-, and 3/16-in diameter nested aluminum tubing. (Each tube fits exactly into the next size. Hobby shops and hardware stores carry these tubes in 12-in lengths.)
- 1/16-in sheet aluminum
- A Dubro 4-40 turnbuckle
- Two 4-40 threaded steel clevises from Great Planes
- 5-min epoxy with micro-balloon filler
- Two 4-40 left hand taps: a starting tap and a bottoming tap
I use either a Dremel rotary tool with a cutoff wheel or, better yet, a Drillmaster 2-in bench-top cutoff saw to cut the tubing. Both tools are very effective for cutting small tubes because they cut without distorting the tube. It’s better to cut the lengths slightly oversize and then trim to the correct length after gluing. A bench disk sander with a 90° sliding guide is a good tool for squaring tube ends. Deburr the inside ends of finished tubes with a sharp drill. Roughen gluing surfaces with a file or sandpaper and use slightly thickened epoxy for gluing.
Directions for a 6-inch aluminum vang
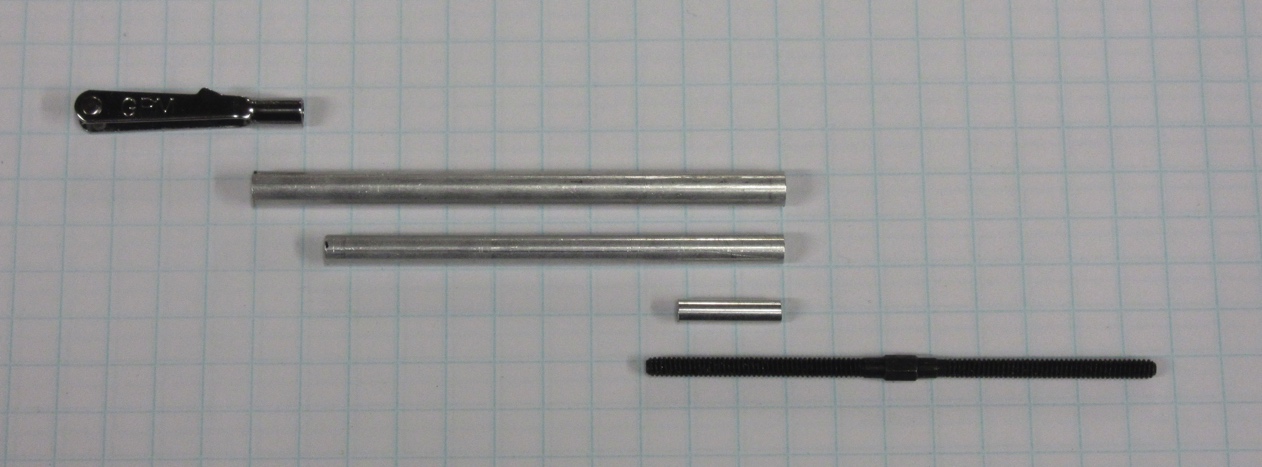
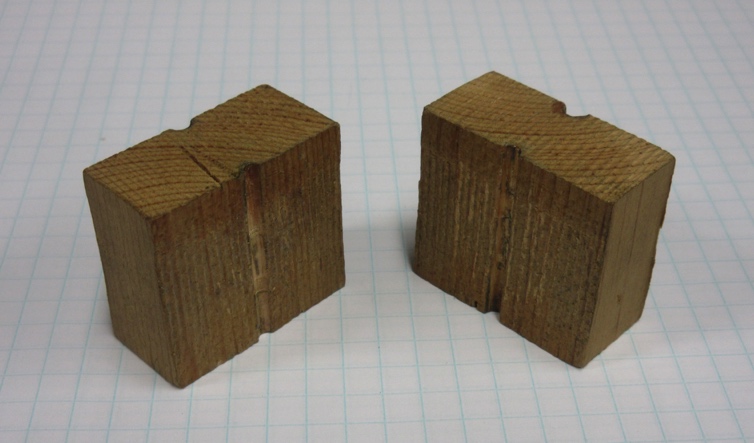
Fig. 2 shows all the parts for the vang body: 2 3⁄4 in of 3/16-in tube, 2 3⁄8 in of 5/32-in tube, 1⁄2 in of left-hand threaded 1/8-in tube, a turnbuckle, and a clevis. I use a jig to hold a 12-in length of 1/8-in tube while tapping the 4-40 left-hand thread and then cut off the 1⁄2- in threaded piece. The jig is made from two pieces of one-by lumber, each 1 1⁄2 in square. Clamp them together to make a cube and then drill a 7/64-in hole vertically down the line of the join, at the center of one side. When you unclamp the two pieces there should be a semi-cylindrical groove down the middle of each piece (see Fig. 3). Clamp the two pieces together in a vise with the 1/8-in tube in the grooves, and it will be held securely so that you can tap the left-hand thread.
It is important to get a full half inch of thread. You will need a bottoming tap in addition to a starting tap in order to achieve that.
Epoxy the 1⁄2-in threaded piece into the end of the 2 3⁄8-in length of 5/32-in tube, being careful not to get glue on the threads. Then epoxy this assembly into the 2 3⁄4-in length of 3/16-in tube. All three tubes should be flush at the threaded end. There will be a 3⁄8-in long opening at the other end to accept a clevis.
Before proceeding further, make sure the turnbuckle turns freely all the way through the threaded piece.
Now epoxy a clevis into the open end of the main body. Be sure to roughen the surface of the clevis thoroughly because the Great Planes clevis is chrome-plated. You can even file some grooves in it to help the epoxy get a good hold.
Screw in the turnbuckle, add a clevis to the other end, and you have a fully functional boom vang. However, I like to go one step further and add a turning wheel as follows.
Turning Wheel
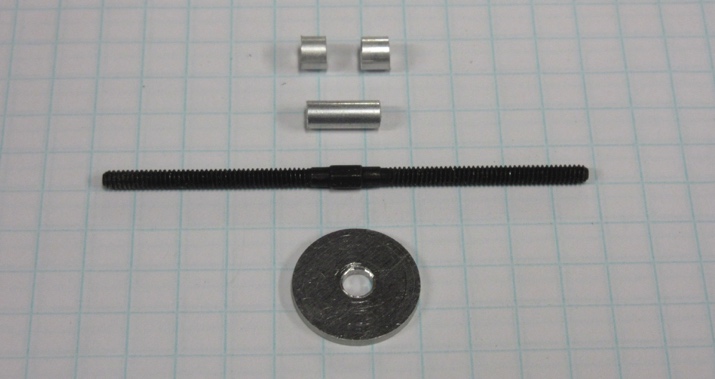
This is not a simple process, but it can be done with a little care and patience. Fig. 4 shows the parts needed: the turnbuckle, a 5⁄8-in diameter aluminum disk with a 5/32-in hole at the center, a 3⁄8-in length of
5/32-in aluminum tube, and two 5/32-in long pieces of 3/16-in aluminum tube. Cut and file the 5⁄8-in disk from 1/16-in aluminum sheet and drill a 5/32-in hole at the center. The 5⁄8-in dimension can be smaller or larger depending on personal taste.
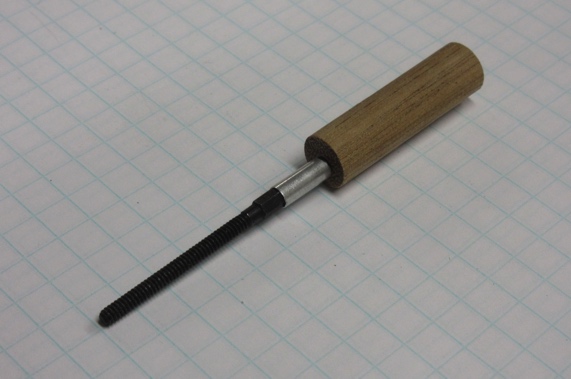
Force the 3⁄8-in piece of 5/32-in aluminum tube over the hexagonal section at the center of the turnbuckle so that it is equally spaced on either side of the turnbuckle center. I made a tool for doing this from a short length of 3⁄8-in hard wooden dowel with a 7/64-in hole down the middle. Place the aluminum tube onto the turnbuckle, followed by the dowel, and hammer the tube over the hexagon (see Fig. 5).
This process expands the aluminum tube slightly, and it must then be filed back down to the original 5/32-in diameter so that the disk fits over it.
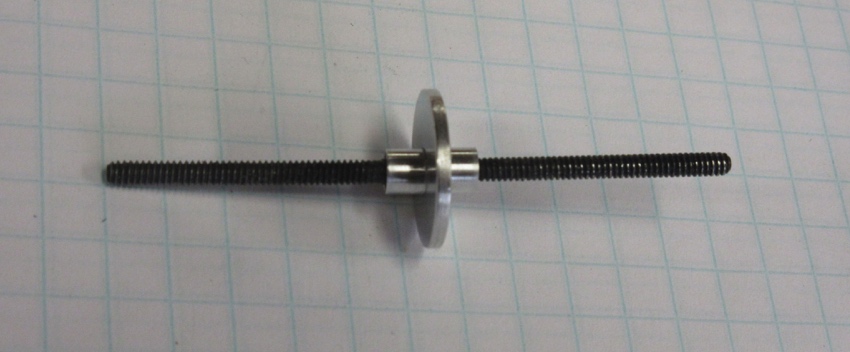
Now cut two pieces of 3/16-in tube 5/32 in long. These will hold the disk in place. Put a slight countersink on both sides of the hole in the disk and on the end of each small tube that will butt up against the disk. These countersinks will provide more gluing surface for the epoxy. Now epoxy the three pieces together on the tube at the center of the turnbuckle to complete the wheel.
Polish all the aluminum surfaces with very fine steel wool, and the boom vang is complete.
Other Options
For a brass vang, just substitute brass tubing for the aluminum tubing. The only exception is the 3⁄8-in piece for the wheel assembly. Stay with aluminum for that piece because it is not possible to force a brass tube over the hexagonal section on the turnbuckle. If you want an all-brass look,you can use Sullivan brass clevises instead of the steel ones from Great Planes. However, the Sullivan clevises are shorter and will give less total vang travel than the Great Planes clevises (1 in versus 1 1⁄2 in). If you prefer a ball link at the mast end, epoxy a 7/32-in tube over the main body and use a Dubro 2-56 swivel ball link instead of a clevis. It will fit exactly into the 7/32-in tube.