Article and photos by John Stoudt
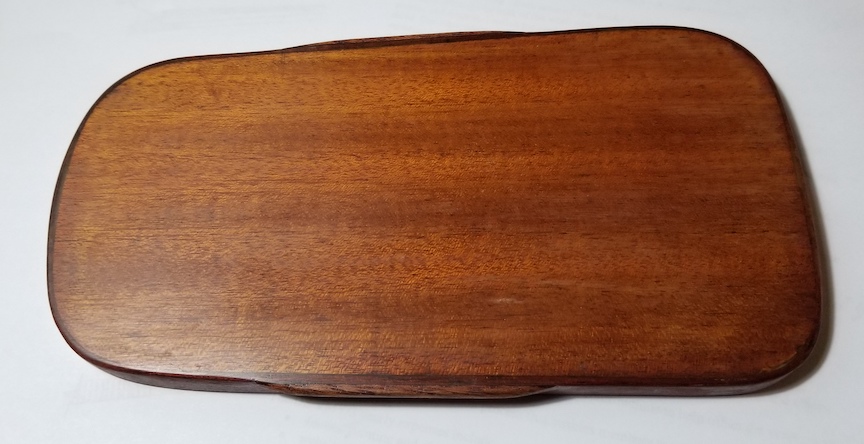
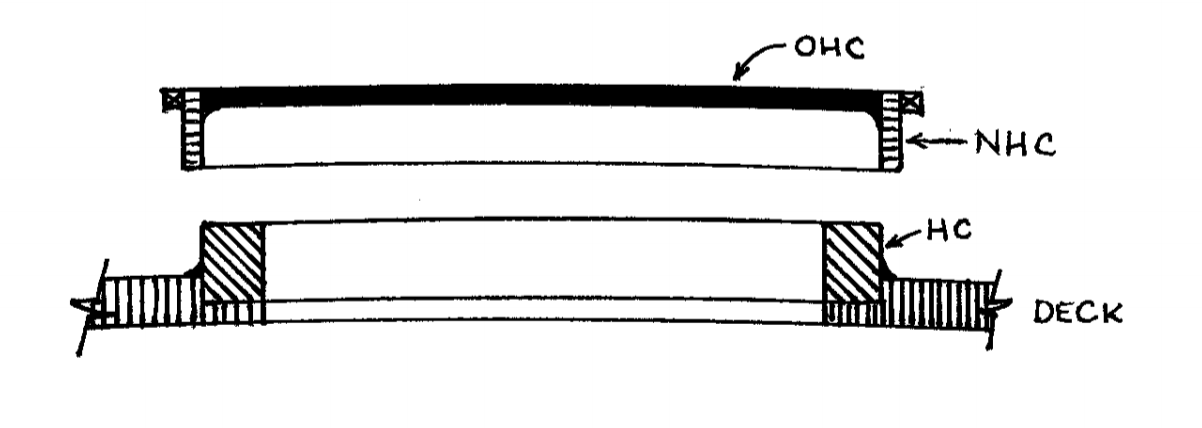
This article is not technically about bending wood. It is about using the bent wood hatch rim, made using the ammonia process, to complete the new hatch on BlackWatch, a classic Marblehead. The new hatch is designed to use the original hatch cover to keep the grain match between the cover and the deck on the boat. The reason for this exercise is that the original hatch cover (OHC) did not fit correctly on the deck opening on the boat.
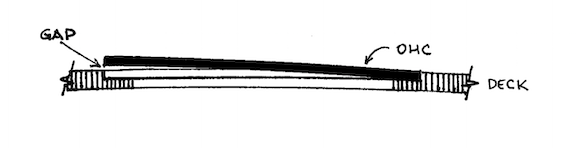
The hatch cover did not have the same curvature that the deck had; therefore, it would not seat on one side of the opening. This allowed water running along the deck to spill into the bilge.

I described the procedure to make the bent hatch cover frame in The Model Yacht, Volume 20, Number 1, page 19.
Making the new waterproof hatch was a multistep process. The bent wood hatch frame was built directly on the cowling, using the cowling as the mold. The fit of the new hatch cover was controlled by the masking tape placed around the cowling where the bent hatch frame was constructed. Refer to Part 3 of this series.
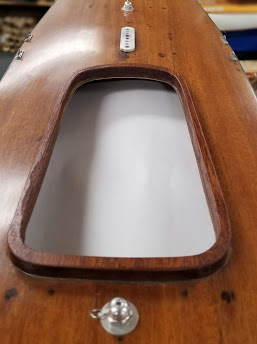
- A hatch cowling was cut out of a 3⁄4 x 6 x 8-in mahogany. This was carefully fitted into the groove on the deck and adhered with thickened 1-hour epoxy. A small fillet was formed around the outside seam between the cowling and the deck. The inner edge between the deck and the cowling was sanded fair.
- The original hatch cover was carefully epoxied into the top of the bent wood hatch frame. A fillet was formed around the inside corner of the hatch cover and the hatch cover frame.
- Finger grips were fastened to each side of the new hatch cover to assist lifting the hatch cover off the boat.
- The entire assembly was sanded to fair in the cover and the finger grips, and to round the edges and shape the bottom of the new hatch cover.
- Finishing the cowling and hatch cover began with a coat of epoxy. Both areas were sanded to remove excess epoxy, smooth out the area and prep it for the application of the waterproof finish. Multiple coats of WaterLox were applied and allowed to dry. After each coat dried, the surface was sanded lightly to control high spots and increase the smoothness of the surface finish. The final coat was applied with a lint-free rag and rubbed out to allow for a semi-gloss finish. Care was taken with the deck area around the cowling installation to not damage it much by the sanding process.
The new hatch cover performs well, allowing no water into the boat and incorporating the original hatch cover into the new design.