Article and photos by John Stoudt
In the last article in the series I discussed making the mold for bending items for use on a model yacht. This article describes using a mold to assemble a curved shape— in this case an oval- shaped hatch cover.
The first things you must do is choose your wood. Mahogany veneer was chosen for this application because mahogany is easy to bend, and the veneer is a nice thickness. I purchased a package of veneer from Woodcraft that included three 12- by 12-in pieces of Philippine mahogany.
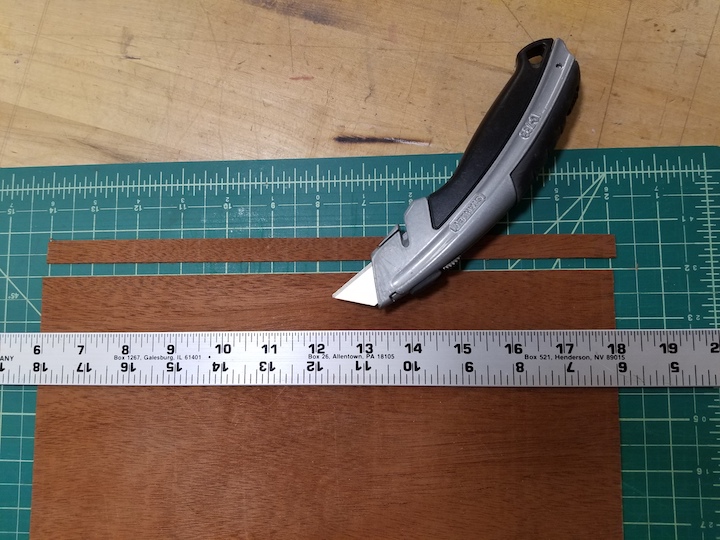
I calculated how many pieces I would need to construct the edge of the hatch cover using three layers of veneer. I added two pieces to the count, making it 11 pieces total. The veneer was cut into 3⁄4-in strips using a utility knife on a cutting mat with a metal straight edge. Hold the straight edge tight to avoid slipping.
I chose the smallest “cooking chamber” and added aqueous ammonia to the container to within two inches of the top. The wood strips were then placed in the container and the lid secured. The wood was allowed to cook for 24 hours.
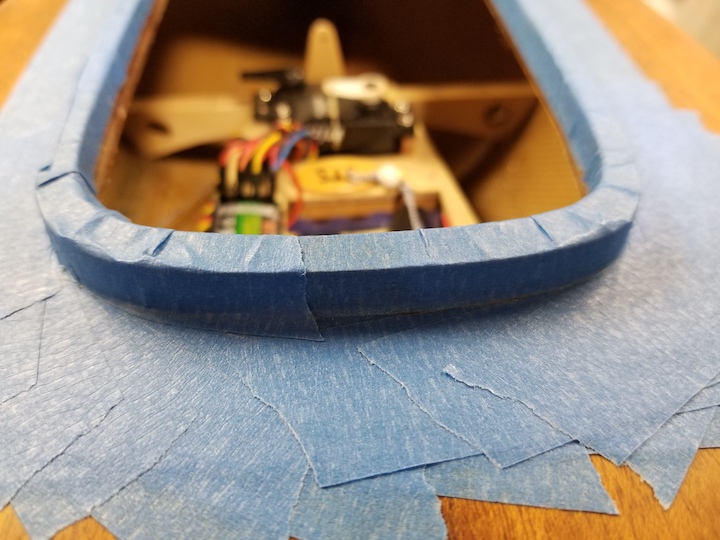
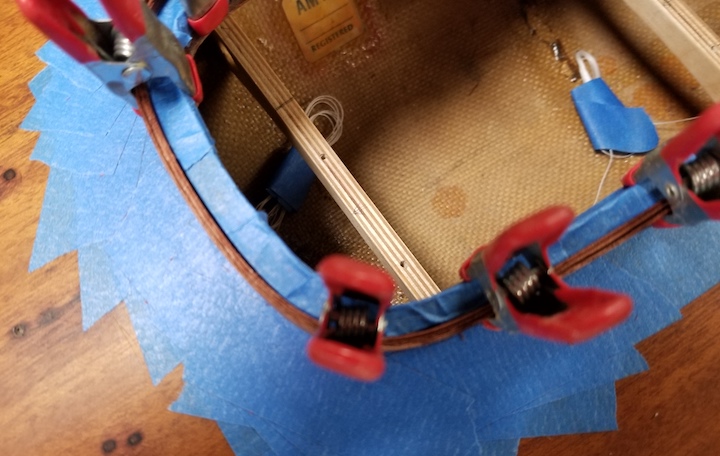
I decided to use the hatch opening (cowling) on the boat as the mold in this application. This cowling sticks up ~1⁄2 in above the deck and could be accessed easily with the clamps necessary to hold everything in place. A control band of aluminum would not be necessary in this application unlike with the mold described in Part 2.
Cover the area around the hatch on the boat completely with masking tape. This keeps the glued-up assembly from sticking to the hatch cowling and deck while the glue is setting.

Remove the veneer strips from the chamber when they are ready and wrap them around the hatch with some overlap and without cutting them. Consider the location ofeach butt joint: keep the joints away from the harshest curves on the oval. Wrap the strips around the cowling and clamp it in place with 3⁄4-in spring clamps. Pay attention to the tightness of the assembly as the clamps are placed. Allow the assembly to dry overnight.
When the strips have dried completely, remove the clamps. Arrange the bent strips on a flat surface in their relative position to each other— the way they came off of the “mold”. At this point the strips will hold the relative shape that was obtained through the bending process.
Begin to assemble the first layer of veneer. Select the pieces of veneer that will form the first inside ring of the of the hatch frame. Cut the ends of the first piece square, keeping the joints away from the most severe curves of the shape. Clamp this piece into place with a few clamps. A good pair of sharp scissors works well for this. Cut the ends of the next piece of veneer square and clamp it into place butting one edge against the edge of the first piece. Use only a few clamps. The last piece of veneer for the first ring should be cut to fit in the opening left by the first two pieces of the first ring of the assembly. The second ring nee
ds to be cut and fit around the first ring. Make sure you stagger the joints—keep the joints at least one inch apart. Staggering the joints ensures the integrity and
of the final assembly. Clamp this ring in place to the first ring and the cowling using a few clamps to hold everything in place. Repeat this process with the third and last ring. You now have a dry assembled hatch frame clamped to the hatch opening cowling secured with enough clamps to give you an idea of the final assemble.
Now take it all apart and carefully lay all of the pieces in the relative relationship on a the workbench. Re-clamp the first ring onto cowling with a few clamps. Take one piece of the second ring and apply a generous amount of glue to the inside surface.
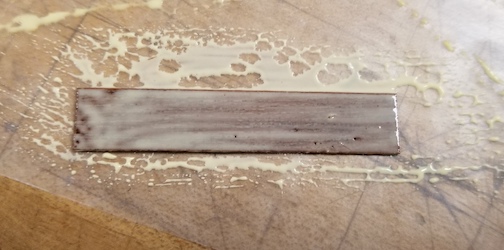
I use TiteBond II for this application. Remove enough clamps to apply this piece in location to the first ring. Make sure the top edges align. Replace the clamps. Repeat this process with the remaining pieces of the second ring. You only need enough clamps to hold the assembly in its general position at this point. Make sure that you have good glue coverage at the butt joints. Repeat this process for the third and last ring. Clamp the entire assembly with clamps placed around the entire assembly as close together as possible. This will help to give your assembly good shape and ensure joint integrity.
When the glue has dried completely, remove the clamps and carefully pry the hatch cover frame from the cowling. This assembly is very strong at this point. It will be tight and may be sticking to the tape. Remove the tape from the hatch rim and the deck/cowling.
The construction of the hatch cover will be discussed in part 4.
Sources
3⁄4-in spring clamps – 20-Piece 3⁄4-in (19 mm) and 1- in (25 mm) Jaw Open Steel Spring Clamp Set – they can be found on Amazon.
Veneer Package – Woodcraft Mahogany Veneer 1/16-in thick 3-ft2 pack.
TiteBond II – Available at any hardware or large box store.