by Earl Boebert
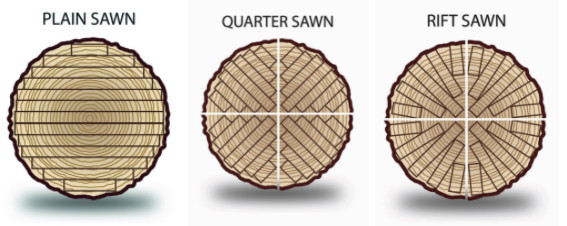
Constructing hulls from laminated wood is a technique that has been used at least since 1854, when the tea clipper Vision was built in Aberdeen, Scotland of four plies of larch planking. A year later the royal yacht Victoria and Albert II was constructed in the same way.
Cold molding is so named to distinguish it from hot molding, where laminated hulls were vacuum bagged and baked in large ovens. The technique of laminated hulls migrated from New Zealand in the late 1800s and builders there were, and continue to be, experts in the method.
Throughout time the limiting factor has been the adhesive used to join the layers. The tea clippers were nailed and the early New Zealand boats used either nails and copper rivets. The advent of suitable modern adhesives coincided with the rise of fiberglass construction for mass-produced hulls and cold molding was limited to one-off construction – such as the hulls we make. In full size practice, cold molded wood is slightly superior to fiberglass in strength to weight an only a little below carbon fiber in that regard. New Zealand builders were, and continue to be, experts in the method.
In the 1950s the West Coast builders such as Gus Lassel and Ted Houk were masters of the cold molded process and we documented Houk’s technique in a previous issue. My experiments were aimed at updating those methods in light of progress in adhesives. In the last issue I documented my attempts at cold molding using epoxy, which basically were a flop.
I then came across an Internet posting by Dick Lemke in which he described constructing an International One Meter hull using self-stick veneers. This caused an aha! moment and the next series of hulls and partial hulls were blessed with success.
General Arrangement
The hull cross-section consists of three layers: from the inside out they are:
- An inner reinforcing layer of relatively heavy resin-impregnated cloth.
- A layer of self-stick veneer.
- An outer reinforcing layer of lighter resin-impregnated cloth.
This provides a true composite construction in which the cloth provides strength and the wood provides stiffness as well as beauty.
Materials
The hull in the pictures had an inner layer of 5 oz Kevlar, because it was for a free sailing 36R boat where material is not restricted by rule. Kevlar is not legal in the VM or V36 classes. I have made another 36R hull using loose-weave 5 oz fiberglass and it came out just fine.
I used Rockler brand veneer, obtainable over the Internet from www.rockler.com which comes as 1⁄64-in thick wood attached to 10 mil mylar coated with adhesive.
This brand uses 3M 486MP paper-backed 200MP pressure-sensitive adhesive. This is plainly printed on the paper. 200MP adhesive is pretty impressive stuff, having high strength and resistance to solvents. If you want to use your own supply of veneer, rolls of 486MP adhesive are available from: www.tapecase.com
I have made hulls from both cherry and mahogany veneer. Although the mahogany is more traditional, the hull came out a little heavier than the one in cherry, probably be- cause the mahogany absorbed more resin.
For the outer layer I used 1.4 or 2 oz fiberglass. An outer glass layer is mandatory to prevent twisting or “cupping” of the veneer strips.
I use two brands of resin, West System for pure wood-to-wood joints and Aerospace Composite Products for laying down cloth, as I find the latter wets well enough to permit the “tape it dry” technique I use for the cloth layers.
First Steps
The process of making a hull begins with the construction of a mold. This can be made from just about anything that can be carved. In fact, since the final shell is less than 1⁄16 in thick, an existing hull could be effectively copied in wood this way. Alternatively, a mold could be quickly planked up from balsa. The mold should be about 3⁄4 in deeper and longer at each end than the final hull to allow the cloth layers to be taped down.
The one requirement for the mold is that it be strong enough to take the 10-20 psi pressure required to “set” the 200MP adhesive. I have made molds from both structural foam and blue insulating foam. I much prefer the structural foam since the blue foam is just barely strong enough to take the pressure. In either case I recommend giving the mold a coat of epoxy to increase the surface strength.
The mold is first coated with plastic package wrapping tape, laid diagonally on each side. Laying the tape will give you your first indication of how hard or easy it is going to be to lay the veneer strips. After the tape is down it is given a heavy coat of paste wax; this combination will act as a parting agent when time comes to pull the hull from the mold.
The next step is to make the inner shell to which the veneer strips will be glued. This is done by first stretching the reinforcing cloth over the mold and taping it securely with masking tape. It is then loaded with epoxy. For the early hulls I just used plain epoxy. Now I mix up about half again as much epoxy as I estimate will be needed. I give the cloth a coat of clear epoxy and then mix West ultralight fairing filler into the rest until it is almost as thick as putty. I lay this on the hull with a wide stick or plastic card, getting it as smooth and even as I can. When sanded fair this will provide a smooth surface for the veneer glue to adhere to. I recommend using slow setting (60 min) epoxy and checking on it every hour or so for the first several hours to see if there are any sags smoothed out with your stick or card.
After the epoxy cures I pull the shell from the mold while it is still flexible and then tape it back down in place. A barbecue skewer makes a good “persuader” to slip between the shell and the mold.
The next step is to lay out the sheer line on the shell with a batten and masking tape. The line should be drawn with thick marking pen. This
will show through from the inside and guide you in setting the sheer strakes. You should also carefully lay out the center- line of the shell, checking it by sight and measurement, and then lay a false keel or keelson of some wood compatible with the color of your veneer. The keelson should be about 3⁄32 in thick to form a surface for the strips to butt up against. It will be sanded to shape after the planking is done.
Planking
There are two problems that need to solved for a proper planking job. One is getting the planks to lay flat and the other is getting them to properly adhere.
Taking the second problem first, the 200MP adhesive requires two things to set properly: pressure and a clean surface. The latter is critical; the adhesive does not appear to contain any solvents that would penetrate a dust or grease layer. The resin-impregnated glass shell should first be scrubbed with a green “Scotchbrite” pad and warm water to remove the so-called “amine blush,” a waxy film that is formed as a by-product of the curing proc- ess. Then the surface should be sanded with 150 grit sandpaper to smooth the surface and give a “tooth” for the the adhesive. Then scrub it good with denatured alcohol and be careful not to leave fingerprints.
Pressure is applied with a wallpaper roller, as much as your mold can stand. The adhesive bond increases with time. For the first ten seconds or so you can pull off a plank in one piece. After about a minute you can carefully peel it of. From the then to around 24 hours later you might be able to scrape it off in one piece with a chisel. After that it’s there for good and will only come off in fragments. You should wait several days before applying the outer resin coat. I put one on right after applying a course of planks and the resin seeped into the space under the planks and caused the 200MP to come unglued. The same advice holds true if you’re in the habit of using water based filler and dampen the wood before applying – give the 200MP ample time to set up.
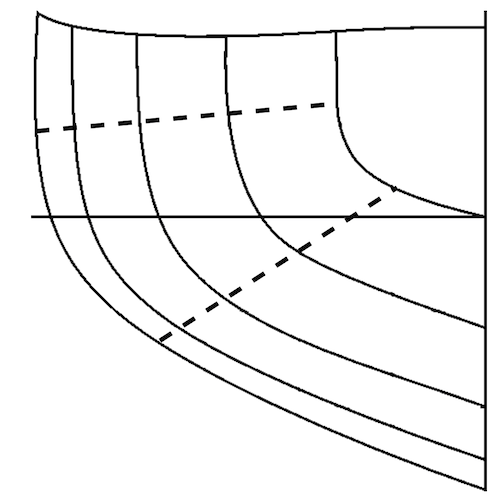
The second problem, getting the planks flat, is the one tricky part of the process. A strip of veneer can only be bent in one direction; in our case the long way. This means that a plank can only assume the shape of a cylinder or a cone. A typical hull curves in two directions, forming a surface that can only be approximated by a row of bent strips. The errors in approximation show up as “bumps” at the seams between planks. In full-size cold molding the strips are relatively thick in relation to their width, and the errors can be faired out by planing or sanding the surface. In our case, the thinness of the veneer pretty much limits how much we can sand down, so we must be careful to get our planks to conform to the surface as exactly as possible.
The difficulty of the problem depends on the design of the hull. Taking M Class boats as an example, early boats had gently curved sections and modern boats have sections made of arcs of circles, both of which can be approximated by planks with relative ease. Boats from the late 1940s and 1950s, such as Rip Tide, are a different matter. These boats have hulls whose bilge curves decrease in radius, or “harden” toward the transom. This change occurs in the same area as the sides of the boat curve inward, producing a difficult compound curve. It is almost certain that at some point in laying diagonal planks on such a hull you will have to taper one or more of the planks to get them to lay flat and fair to the inner shell.
The description that follows is for these difficult hulls; simpler shapes can, of course be planked in a more straightforward way. Before beginning, it is worth noting that you need to to leave a small gap of 1⁄64 in or so between planks. Attempting to lay the planks as a seamless whole is liable to cause buckling if one plank swells, from humidity change or other reason, before the wood is sealed with epoxy.
The first decisions to be made are width of the planks, the location of the starting plank and the angle at which it is to be laid. After much disappointment I finally settled on starting the planking process at the most difficult part of the hull, where the combination of bilge curve and taper of the hull forms a compound curve. Testing with trial strips will show how wide a plank can be and still lay tight over the curve; for an M Class hull whose hardest bilge curve has about a 1⁄2 in radius this was 3⁄8 in; gentler hulls can be planked with 1⁄2 in or even 3⁄4 in strips. While experimenting with width you are also determining the one angle that permits the plank to fit the the curve and lay tight above and below the curve of the bilge. Mark the position of the one edge of the plank by drawing a line along its length on the shell and cut a strip of veneer to the proper width. The veneer is best cut from the paper side; simply score a deep line with a sharp, thin knife like a scalpel or small utility knife and then snap the wood back.
The second decision you must make is whether to have a keelson or false keel, the narrow strip that runs down the center of the hull and against which the planks are butted, and if so, how to handle it. If the hull is difficult it is best to lay one side of planks and then trim the inner ends by cutting along a straightedge. Tape down a strip of waxed paper along the edge to prevent the planks from the second side from adhering to the first, plank the second side, trim, and lay the keelson in the resulting groove, tacking it down with drops of CA glue. The reason for this somewhat elaborate process is to give yourself the greatest degree of freedom in positioning a plank without having to fit the curve and tightly butt against the keelson. For simpler hulls you can lay the keelson first, attaching it with epoxy, and just trim the end of each plank to fit as you go. And, of course, you can leave it off altogether and just butt the planks against each other down the centerline.
Laying the first plank is easy–just cut to length, peel off the backing paper and lay it along the line you’ve drawn. Set the adhesive by pressing it down with a wallpaper roller. Every one after that has to be checked to fit its neighbor. The process is as follows:
- Cut a planking strip to length and place it next to its neighbor with the backing paper still on.
- Bend it around the bilge curve and note where the portions of the plank above and below the bilge curve naturally lie.
- If one or both of these portions overlap the neighbor plank, taper the new plank as necessary.
- Mark the beginning, end, and middle of the bilge curve on on the plank.
- Using a thin knife or scalpel, score the plank lengthwise every 1⁄16 in or so along the portion that will cover the bilge curve. Score deeply; it won’t hurt if you cut through. These score marks will only be noticeable on the closest possible inspection, and will allow the plank to conform to any compound nature of the surface at the bilge curve.
- Lightly cut the backing paper crosswise at the mid point mark, and peel back each end of the cut so that an inch or so of the adhesive is exposed.
- Carefully lay the plank in place with light finger pressure, wrapping it around the bilge curve, then pressing down the upper and lower portions as you peel away the backing paper.
Step 2 is the critical one; you must resist the temptation to force the upper and lower portions of the plank into place by pulling them sideways even the smallest amount. To do so will inevitably cause the portion at the bilge curve to lift at one side or another.
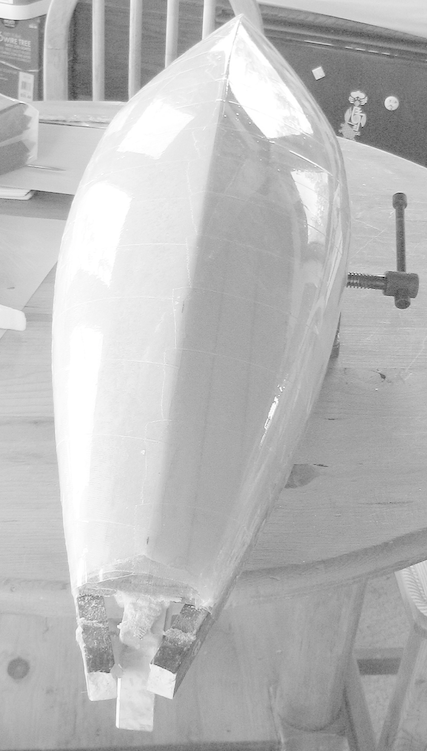
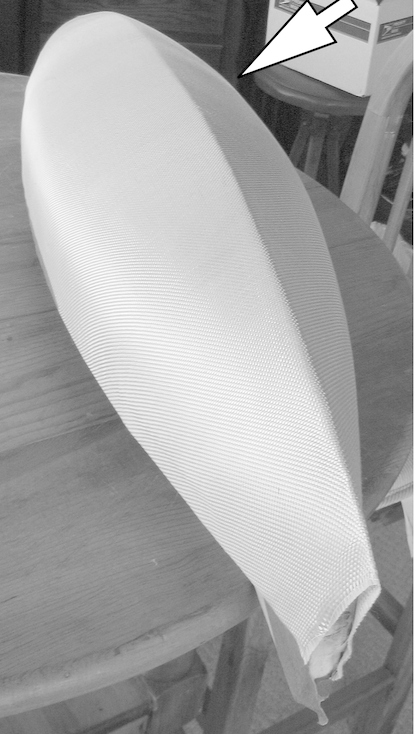
Finishing
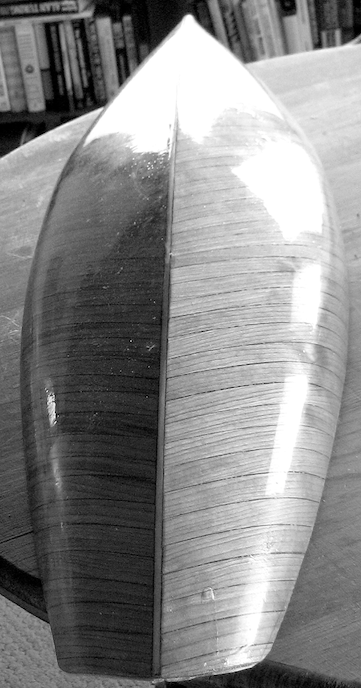
A finished shell from cherry veneer. This shell weighed 9 and a fraction ounces with a surface area of about 400 square inches.
After the surface is covered with wood, you will be tempted to smooth it with sandpaper. Don’t do it. The planks are now attached to the inner shell, but they are not attached to each other. The pressure of smoothing will cause them to move relative to each other and frustrate any attempts to get a fair surface. Instead, wait at least 24 hours to allow the 200MP adhesive to set and then give the hull a coat of epoxy.
The best tool for smoothing epoxy is a cabinet scraper, not sandpaper. This is especially true if, as in this case, you want to carefully control how much material you want to take off. If you go through to bare wood at any point, stop removing material and put on an- other coat of epoxy. When the hull is smooth and fair, apply an outer coat of 1.4 or 2 oz fiberglass with epoxy to keep the planks from “cupping” over time.
Purists will finish with varnish, but I find Krylon clear finish to be satisfactory and a lot quicker. Last step is wet sanding with 600 or 800 grit for speed.
Concluding Observations
Unless some reason such as scale appearance dictates the use of mahogany, I would reject it in favor of a harder wood such as cherry. The latter has a tight, straight grain that behaves much more predictably than the swirling grain of mahogany. This may be coincidence, but I seem to have much more problems with “cupping” and other strange behavior with mahogany over cherry.
Results to date indicate that a single layer of veneer is adequate for boats up to 36 in and two layers is advisable for anything larger.
I’m just finishing up a two-layer VM hull which has longitudinal strip planking over diagonal. If I had it to do again I’d avoid the greater complexity of the diagonal planking and just strip plank two layers, with the planks of the second layer laid over the seams of the first. This hull came out at 1 lb 7 oz, and is impressively strong.