Model Yachts: How to Design and Build Them
Part IV. Rigging — Cutter — Schooner — Penzance Lugger
You must all know the shape of sails which constitute the most commonly used type of yacht—viz., the cutter’s (Fig. 14), but I doubt if you are as well acquainted with the Penzance lugger represented in Fig. 15. The schooner, which I daresay you also know, is shown in Fig. 16. Now these three are the best adapted for model yachts, and I shall there- fore confine myself to them, especially as space compels me. When you have done a little more in model sailing, you will begin to get ideas of your own with regard to the different styles of rig, and I hope will carry your ideas out, but for the first attempt or two you had better confine yourself to these three. The cutter’s, as I said before, is the style of rig most universally adopted, and you may there fore take it for granted, is considered by most yachtsmen the best; but I am an exception to the rule, although not the only one by a long way, and think that the Penzance lugger will hold her own against a cutter on any tack. In sail- ing, the great object is to be able to make your boat go as nearly as possible in the direction from which the wind blows, and the closer you can make her “lie” in the wind the better sailer she is considered. To attain this quality there is one point among others to be considered, and that is to have your total area of sail as little sub-divided as possible—that is to say, the less number of sails you get (keeping the same area, and allowing of easy handling) the better for this purpose. You will see then that in the lugger this point is better attained than in the cutter, and that in the schooner it is far from being anything like equal to the other two. However, the schooner, although not patch on the cutter or lugger in sailing “close to the wind,” has her good points, and is therefore not to be put on one side. But you must choose for yourself, only I should strongly recommend the lugger.
The length of spars and masts you will have obtained by drawing out your sail plan: you should leave about 3/8 in. beyond the sail, each end for lugsails, and 1/2 in. for gaff sails, and the mast should be about 2 in. longer than the height of the sails.
For the masts get, if you can, some nice bamboos tapering towards the top, and shave off the knots; but if you cannot obtain these use nicely grained pine. If you are able, make the lower and top- masts all in one, and then cut them in half afterwards, joining, them again with a brass ferrule about 2 inches or 2 1/2 inches long let flush. This ensures their being nicely tapered to the top. You may give up all idea of caps for your topmast and cross-trees, and all this sort of paraphernalia, the great object in models being to get all top weight as little as possible, and so not only to get more weight on the keel, but to make the rigging sim- ple, so that it can easily and quickly be taken down or put up.
Make your spars out of the same stuff as your masts, and do not let them be too thick and so look heavy, but at the same time they must not be too thin so as to be weak. Your own judgment must guide you in this. When nicely sand- papered up they should have a coat of varnish.
To ship your mast, get a piece of brass tubing of the same diameter as the lower end of the mast, and long enough to reach down to the bottom of your boat and to project 1/2 inch above the deck, and plug up one end of it with a piece of hard wood. Then, having determined the position of your mast in the bottom of the boat, not forgetting to allow for the “rake” (or inclination), fasten a small chock of wood there, and drill a hole in it just large enough to admit the lower end of the brass tube, which should be passed through the deck and fit tightly. Cut away the lower end of your mast, as shown in Fig. 17, and drop it into the tube having previously put a flattened out curtain ring between the collar left on the mast and the tube. The object of this you will see further on.
In this way you obviate any chance of water com- ing in through the mast hole, and have not the nuisance of fumbling about for the said hole in the bottom of the boat when putting the mast in place. An india rubber ring may be put round the tube on the deck, by the by.

Fig. 14. Rigging, and shape of sails of ordinary cutter yacht.
The bowsprit must next be shipped. This spar should be made flat where it lies on the deck, and the end should fit into a brass cap or a block of wood screwed to the deck, and a band of metal should pass over it near the stem-post, also screwed to the deck. As the deck is rather thin, you will find it advisable to fix little pieces of wood underneath it in all places where screws are put in. So now you see why the deck should be fastened down last of all.
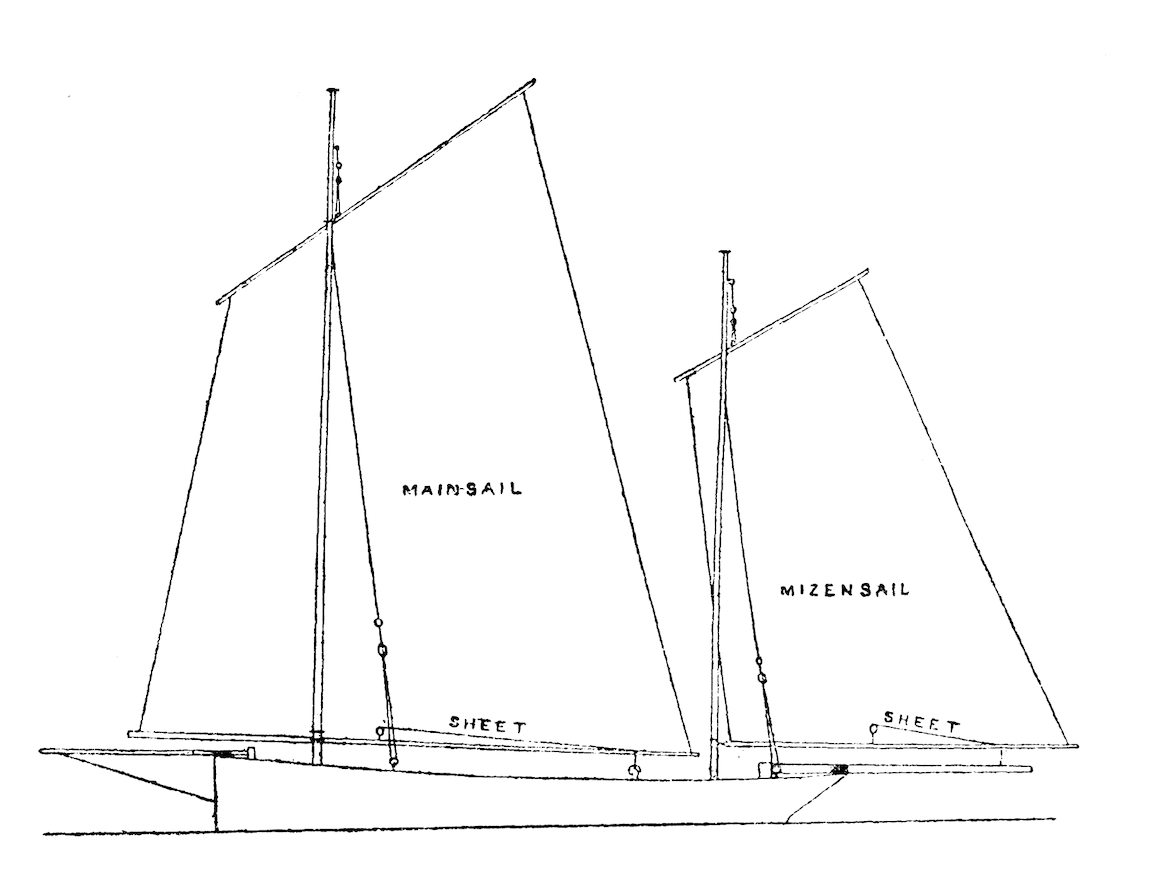
Fig. 15. Penzance lugger.
Having got all your spars ready, and the mast, or masts, and bowsprit in place, you can begin the ropes. Get some good whipcord, and see that it consists of three strands. You will want various thicknesses as you will see presently; so get some fairly thick stuff, and then some very fine cord, and some a bit thicker than the latter. Use the thickest for the backstays (Fig. 14). To fix these, screw some few inches abaft the mast on the sides of the deck two “screw eyes,” and fasten two, one on each side, into the mast just below the ferrule, or better still, right through the ferrule, about one- third way up it and into the mast. Now get some brass wire and make a few hooks, as shown in Fig. 18. Take one of these, and having cut the length of your backstay about six inches longer than necessary, splice one end into the eye. If you do not know how to splice, I should advise you to get some one to show you; or if you can’t do that, you must knot all the things instead of splicing, though the latter looks a thousand times neater. Pass the other end of the stay through a double eye, as shown in Fig. 19, and having put another hook on the cord, splice the loose end on to the lower eye of the double eye. Then fix the two hooks, one to the mast and the other to the deck, through the “screw eyes,” and tighten by pushing up the running eye or double one. These double- ended eyes for tightening up the stays or any rope in models that require to be lengthened or shortened a little are termed “slides.”
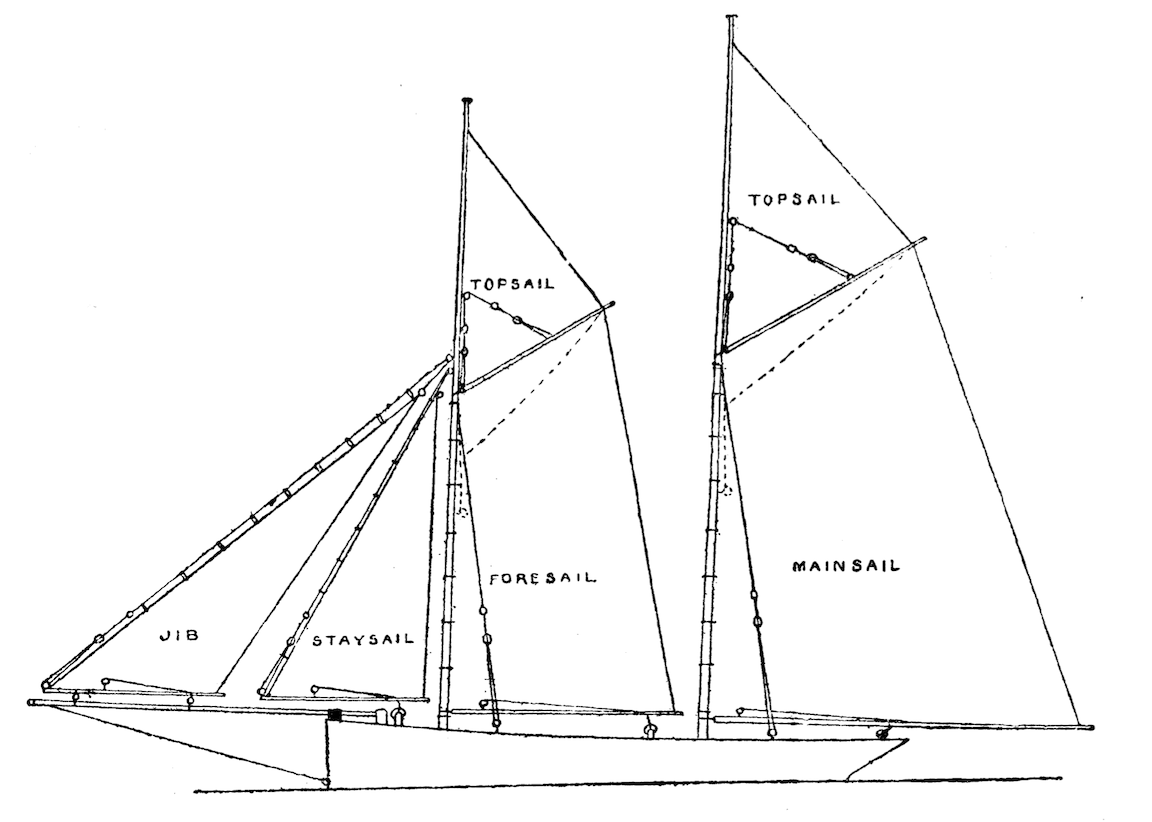
Fig. 16. Schooner.
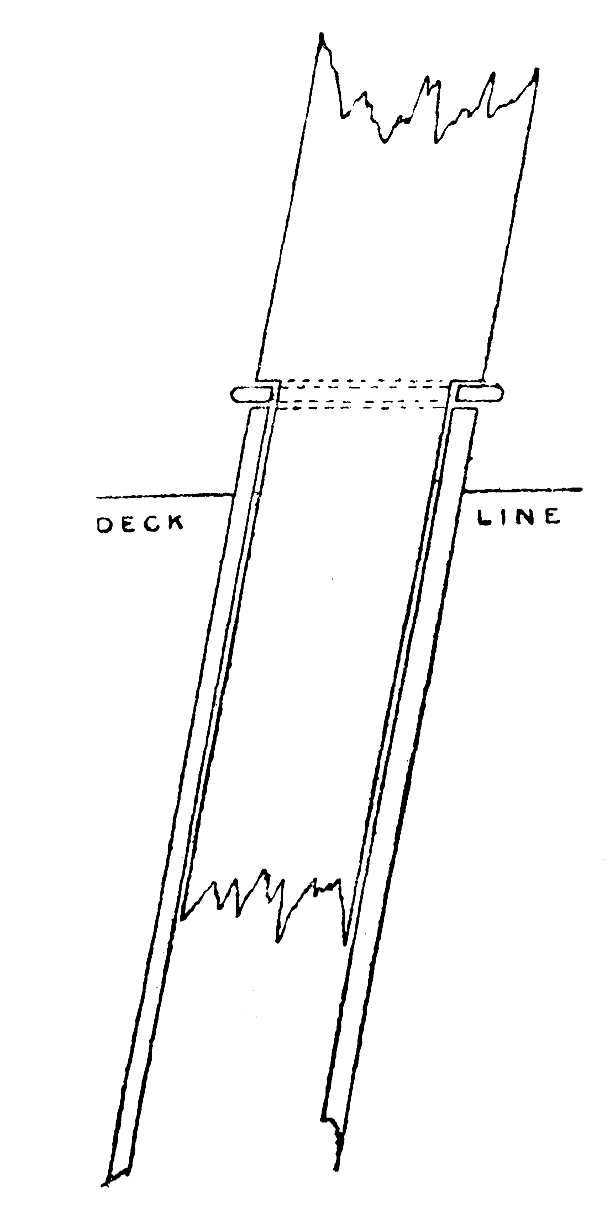
Fig. 17. Brass tubing and rake for mast.
The next stay to be set up is the bob-stay. This, though, should be made of picture wire, as the ordinary cord would shrink too much with the wet, as it is so often under water, and should be of such a length that by bending the bowsprit down a little you can hook it on to an eye made of wire fastened round the end of the bowsprit, the other end being hooked into an eye screwed into the stem-post a little above the water-line.
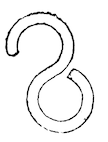
Fig. 18. Brass hook.
These are all the stays that can be fixed up at present, in fact, they are the only ones that are fixed, so to speak, the other two, or one, as the case may be, moving with the fore-sails. But you will see this presently when you have sewn your sails, which is the next job. For these get some jaconet, or very fine long cloth, because you must have them as light as possible. Dip your stuff in boiling water before using it, and let it lie there for some hours, then take it out and stretch it on the floor, nailing it down at each end, not along the selvedge, and in this position let it dry. When you take it up there should not be a crease or pucker in it.
Fig. 19. Backstay.
Now carefully mark out the sails on it, taking care that the “after leach” of every sail be along the selvedge and cut them out, leaving about three- quarters of an inch round each sail for hemming. If you can sew yourself, hem the sails up to the line marked,
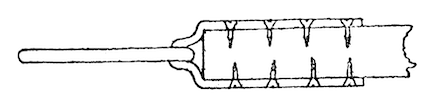
Fig. 20. Strip of metal flattened with screws to end of boom.
if not, get some one to do it for you that can, but
in any case it must not be done with a sewing-machine, because, as you would after- wards find out to your cost, the sewing-machine stretches them dreadfully, and they never “stand“ properly, there being always a lot of creases and puckers
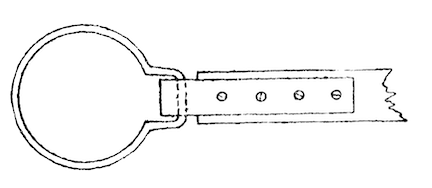
Fig. 21. Ring at end of boom.
round the head and foot of each sail. So never mind the little extra trouble, but sew them by hand.
In cutting out the sails the head should always be rounded, and the foot the same, more especially in lug-sails. The “luff” of the sail should be cut just a trifle hollow.
In larger sails it is necessary to sew tape along all
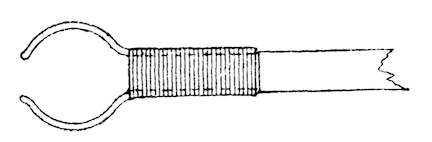
Fig. 22. Jaws to gaff.
the edges, over the hemming (except, of course, along the after leach), as the strain on the sails would tend to stretch them materially out of shape.
When your sails are all sewn, iron them over care- fully, and then you can think about “bending” them.
First let us begin with a “gaff-sail,” that is to say, one like a cutter’s or schooner’s mainsail. You have, of course, got your boom and gaff cut to the right length, so to the end of the former fasten a strip of
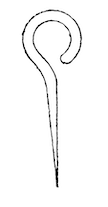
Fig. 23. Eye for stay.
metal, about three-sixteenths of an inch wide, with small screws, as shown in Fig. 20, having previously slipped a curtain ring, bent as shown in Fig. 21, and large enough to fit easily on to the brass tube in the deck, into the bend of the metal strip. Now with some fairly stout wire make some “jaws” to the gaff (Fig. 22), and bind them on with fine binding wire, leaving them open enough to allow of their being “sprung” easily round the mast.
Then sew rings to the luff of the sail large enough to slip easily over the mast, and at distances of about a couple of inches from one another. Slip the ring on the boom over the tube in the deck, put the mast in place (not forgetting the flattened ring), then put the rings on the sail over the mast, and slip the jaws of the gaff on. The gaff, by the bye, should have been laced to the head of the sail, the latter being well stretched. Now fasten the tack of the sail down to the boom by passing a piece of fine whipcord through the strip of metal on the end of it, and through a small hole in the sail, and tying but not too tightly.
For the clew fasten a piece of whipcord to the corner of the sail, and having passed it through a hole near the end of the boom, fasten the loose end to a pin of wire, Fig. 23, and pin to the underside of the boom.
Now fix the throat and peak halliards in the same way as the stays, to “screw eyes” in the gaff, and the mast, tighten them up and your sail will be bent.
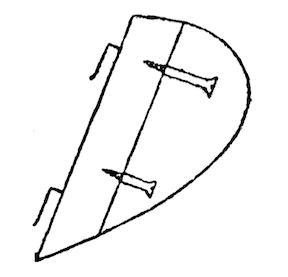
Fig. 24. Rudder.
To bend a jib or foresail make a boom for it, and at one end of the boom make an eye of wire. Into this hook a stay prepared in the same manner as the backstays, the other end being hooked into the corner of the sail, and with another hook into a screw-eye in the mast through the ferrule. Now fasten the tack of the sail down to the eye on the boom, and with small wire-rings fasten the luff to the stay and haul the clew tight in the same way as the gaff-sail. Now at about two inches from the fore-end of the boom fasten a wire eye round it, and tie this down to its corresponding place on the bowsprit. In this way the leach of the sail is always kept stretched, and the more you tighten up the stay the more you stretch the sail (Fig. 1 4).
For a lugsail you lash the head of the sail to the gaff, and the tack to the fore end of the boom and pull out the clew as before. The mast being stepped in the same way as for a gaff-sail you have simply to fasten a ring to the boom at about one-third from the fore end and the same on the gaff, and pass the former over the tube in the deck and the latter over the mast. The flattened ring will hold the boom down, and allow it at the same time to turn easily. The gaff should be tightened up with a “slide” to a screw eye a little way above it in the mast.
Topsails are swung as lugsails, the clew being fixed to the end of the gaff and the tack pinned to
the mast. I have not said anything about the “sheet” yet. This should be fixed as near the end of the boom as practicable, and made to work through a ring running on a “horse” and then pinned to the deck. Most pin the sheet to the boom, but it weakens the boom very much, and, besides, it is much easier to get at the deck.
A “horse” is merely a piece of stout wire bent in the form of an arch, and screwed across the deck, the one for the mainsail being as near the end of the counter as practicable, and the one for the foresail between the mast and end of the bowsprit.
I think you have enough instructions here for rigging a model thoroughly, and I will, just to finish my papers, give you a hint or two for sailing.
When you first try her, make her go to windward, i. e., in the direction from which the wind comes. For this pull the sails in to a small angle with the centre line of the deck and let her go. If she comes up into the wind and shakes, you must either tighten in the head sheet or “loose the after sheet,” if she falls away from the wind do vice versa.
For “reaching,” that is with the wind at right angles to the direction in which you want the boat to go, let all the sails out to about 45 deg. and then treat her the same, if she comes up, or falls off, as for going to windward.
For a “quartering” wind let the sails out at rather more of an angle than for “reaching,” and for “running” put on a rudder (Fig. 24), and let out the mainsail if a cutter on one side at right angles to the boat, and the mainsail on one side and the mizzen on the other if a schooner or lugger, and flatten the head sails down well and let her go.
Last, but not least, comes the rudder. As you will have seen from the above, I only use one, and that is running, and this one cannot be too heavy, in moderation of course. It is made as follows:
Take a strip of wood about 1 inch shorter than the stern-post, and of the same thickness and about 1 inch wide. Screw into it two screws, (Fig. 24), and then having made a mould to something of the shape place this piece of wood in it, and pour lead into the other part of the mould, so that the melted lead may run round the screws and against the wood. Trim this up afterwards nicely and you will have your rudder, which should be fixed by two pieces of wire bent at right angles and driven into the wooden part of it, dropping into two screw eyes in the sternpost.
One little thing I should like to mention before I bid adieu to my readers, and that is to put a strip of brass all along the bottom of the boat; they will find this saves the paint being scratched, and prevents the lead getting knocked about.
I hope the outcome of these papers will afford many hours’ amusement to some readers.
Arthur C. Hide (1885)