A Simple Turnbuckle
Jack McKie
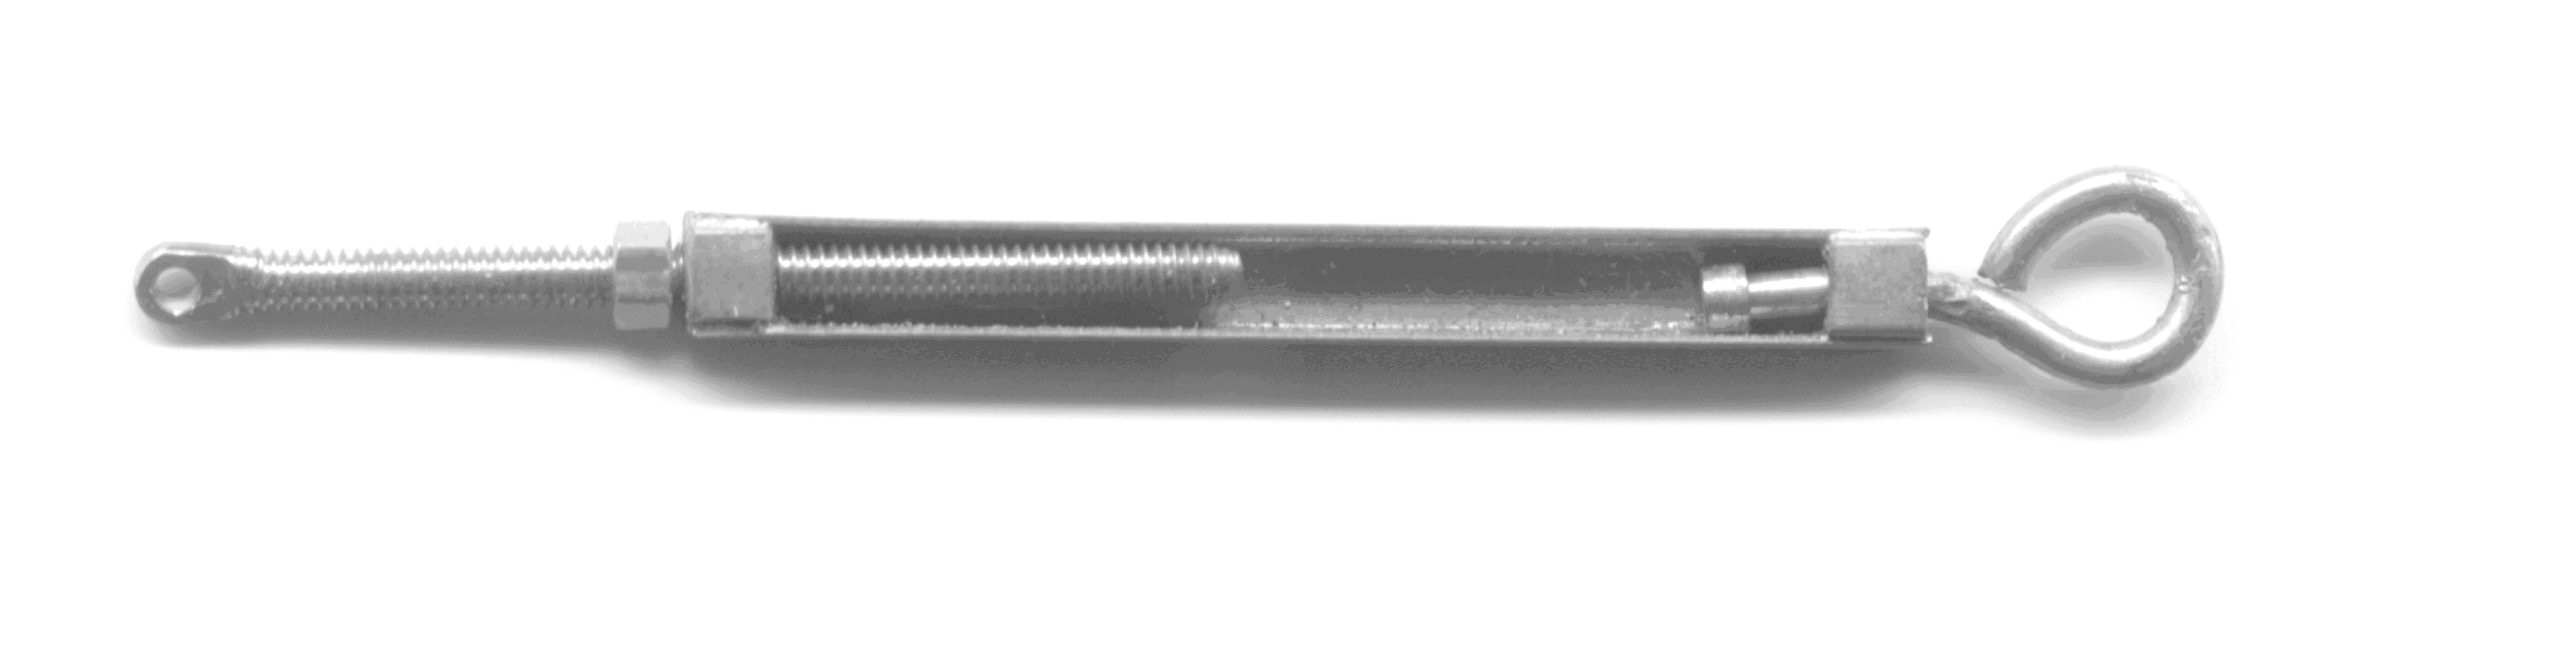
Not a beautiful fitting but cheap and relatively easy to make and I think very functional. This might help some folks get boats in the water until we have a new source of Fisher type turnbuckles.
Materials:
- K&S 5/32-in Brass Channel
- K&S 1/16-in Brass Rod
- K&S 1/16-in Internal Diameter Brass Tube
- Special Shapes 1/8” Square Brass Stock
- Solder
Tools:
- Drill press or very good hand/eye coordination and
- Dremel tool w/chuck.
- Solder, Flux, and Torch
- .070 Drill.
- 2-56 tap and wrench 2-56 die and die stock
- X-ACTO® saw
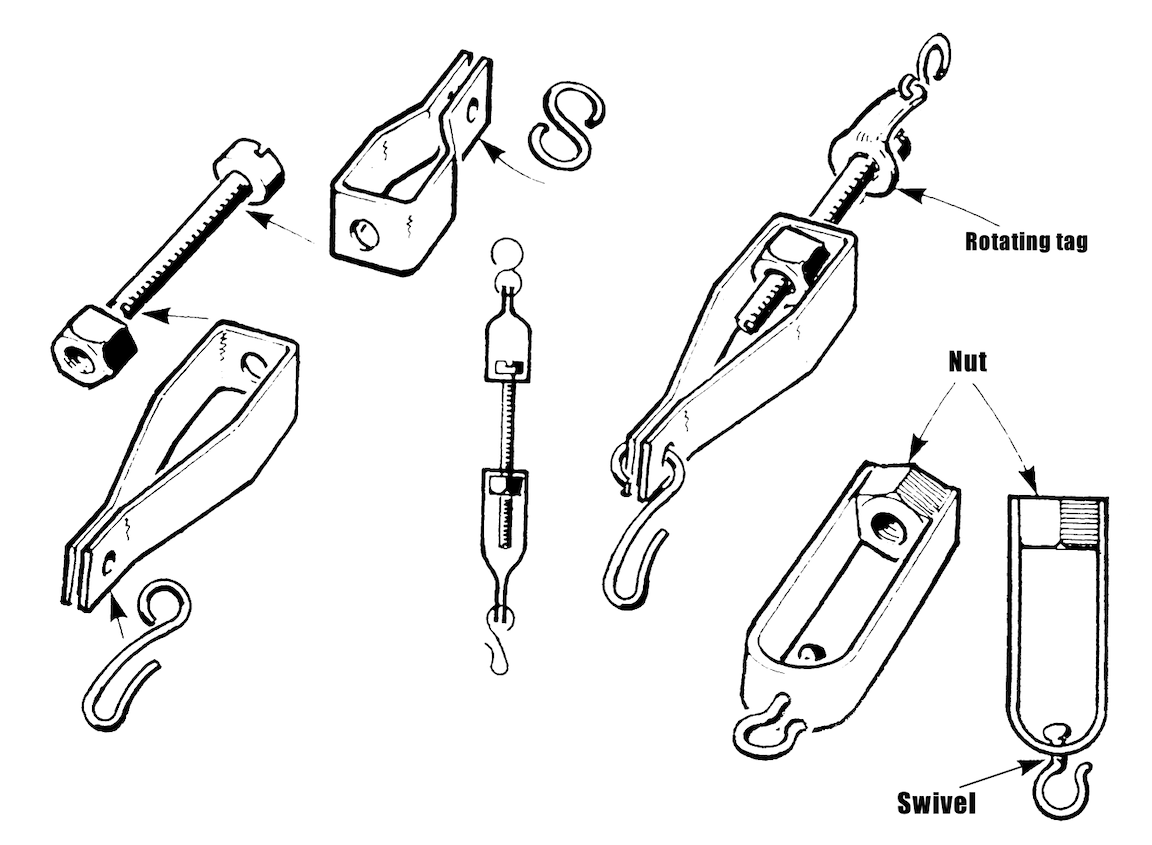
To Make:
- Cut length of channel for body and set aside.
- Cut a short length of 1/8-in square stock ~1 in for ends.
- Smooth off end of square stock. Mark center of square stock.
- Center punch location of hole fit in drill press vise.
- Drill.070 hole about 5/16 in+ deep.
- Cut two 1/8-in pieces with hole in center. Use fine file to clean up burrs.
- Solder 1/8-in pieces in ends of channel. Mind the hole orientation and use minimal solder.
- Use 2-56 tap to put threads in one end. Cut length of .081 rod. Clean up the end and cut 2-56 threads.
- Using a hammer and blunt punch smash one end of the threaded rod and drill hole for stay.
- Cut length of tube about 1/16 in long. Solder piece of tube to the 1/16-in rod end.
- Cut 1/16-in rod with tube so that it is just short enough to fit between ends and insert through the unthreaded end.
- Form eye in 1/16-in rod to suit.
A simple turnbuckle, made from sheet stock and fasteners
Vic Smeed
The above sounds harder than it really is. It takes me about an hour to make four. What I would really like to see is real looking turnbuckles with lost wax cast bodies at a reasonable price. The only tough part is finding left-handed taps and dies.
Afterword
Small Parts sells telescoping hexagonal brass tubing, which means that you could use a brass 2-56 nut and save the tapping step. Likewise, they sell 2-56 threaded stainless rod; this would require heating to red hot to form the flat on the end, but would save the trouble of threading. Small Parts is also a source of high quality taps and dies, both right and left handed. If you come up with a design of your own for a home-made turnbuckle, let us know and we’ll run it in an upcoming issue.