Article and photographs by Joseph Valentine
Setting up your boat correctly can be the difference between a successful or disappointing day at the lake. A lot of people use mast calipers to make sure their mast is square side-to-side. It is an iterative process of check, adjust, check, adjust. This hands-free mast caliper allows you to put the caliper in place and then adjust your rig.
By notching the bottoms of your calipers to fit on top of the deck and just over the edge of the hull, you can use a rubber band to pull the calipers together so that they hold themselves in position leaving both of your hands free to adjust the shrouds and plumb the mast. This makes plumbing the mast very easy.
Materials
- Two pieces of ¼- ⨉ ¾-in straight, clear wood
- stock long enough for the caliper legs
- One strong rubber band
- One ¾-in #8 stainless steel machine screw
- One #8 stainless steel nut
- Two #8 stainless steel flat washers
Tools
- hand or bandsaw
- drill
- 5/32 drill bit
- sandpaper and/or file
Procedures
- Cut two strips of ¾-in wood stock to be ¼ in thick for the legs of the calipers.
- Measure 3 in down from the top end of one leg and mark the center. Place both legs together and drill a 5/32-in hole for the pivot pin.
- Install the bolt just tight enough so the legs can move but hold their position. Use a washer under the head of the bolt and under the nut.
- At the end away from pivot pin, mark the center of both legs. Spread the legs so that the center of each leg is set to match the beam of the boat at the mast location (see Fig. 2).

- With the legs still spread to the beam width, set the calipers vertically on a flat surface and use a piece of the ¼-in stock to mark a straight line parallel to the surface to mark the top of the notch.
- While the calipers are still upright, use a square on the flat surface and mark a vertical line from center of each leg to the line that was drawn parallel to the flat surface. This marks the notch that will be parallel to the deck and just over the side of the hull.
- Cut the notches out.
- Spread the calipers to the exact beam width and mark the legs are the width of the deck, the two leg ends will form a single point to sight against the mast (see Fig. 3).

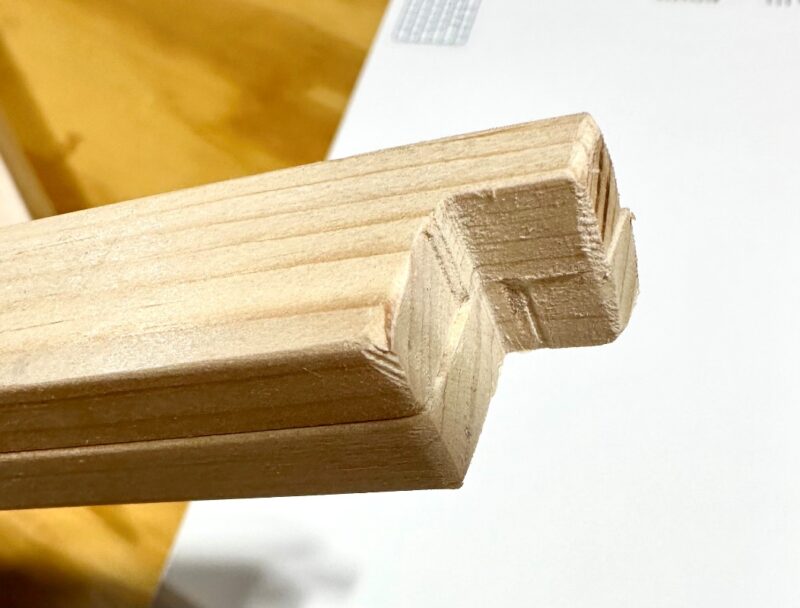
- Remove the bolt and cut the tips.
- Put the legs back together so that the notches on the bottom are together so they can be adjusted for length. File or trim them so that they match,
- Remove the bolt and reposition the legs so that the notches oppose each other and will clasp to the hull.
- Install a rubber band, and you are ready to plumb the mast without having to hold the calipers with your hands. With both hands free, it is easy to adjust your shrouds with your calipers free standing.
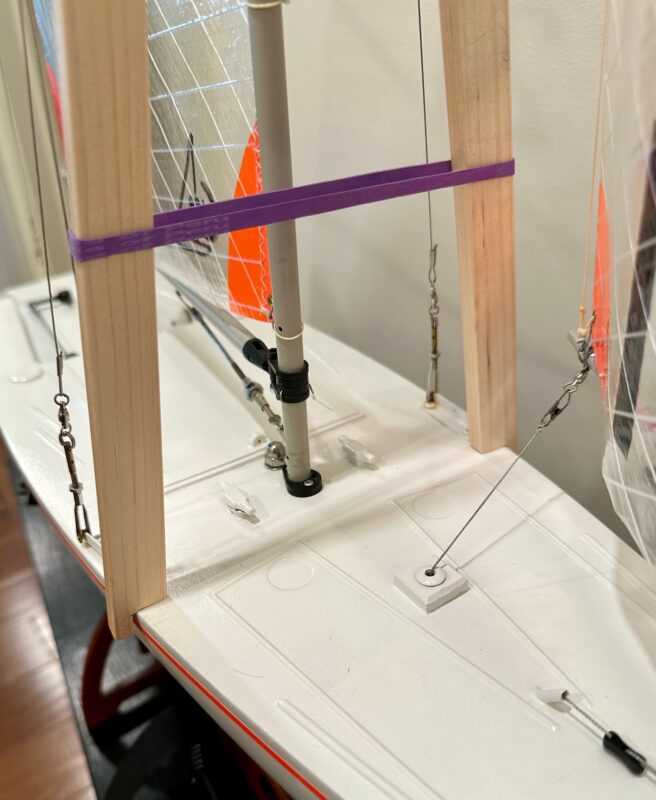
with the rubber band.
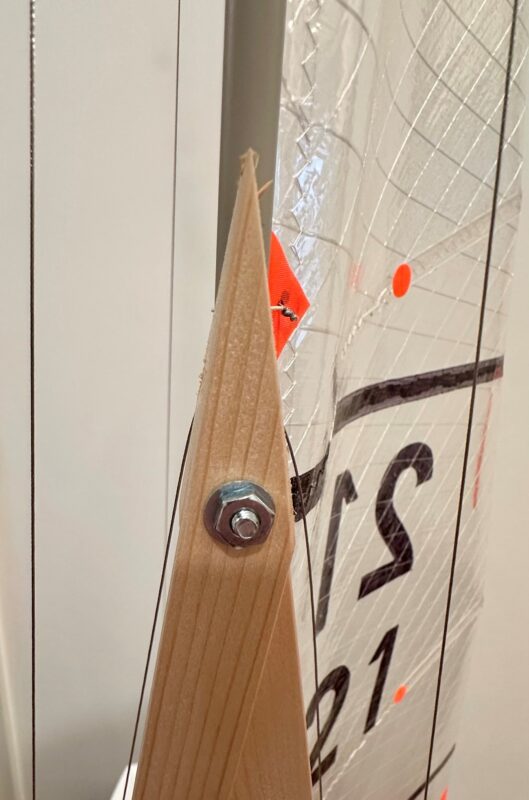
defines the centerpoint of the mast