- In the Tideway
- R/C YACHTING IN THE U.S.A. Part Two of Laurance V. Goodrich’s account of the ‘experiences of the Eastern Division, Model Yacht Racing Association of America, in ‘marrying’ radio yachts to well-established vane clubs.
- RANGER Winner of the Australian 10-rater Championship, Sept. 1973. By D. V. Billing
- GENIE Part 4 of Vic Smeed‘s ultra-simple Marblehead class yacht for vane or radio-control sailing.

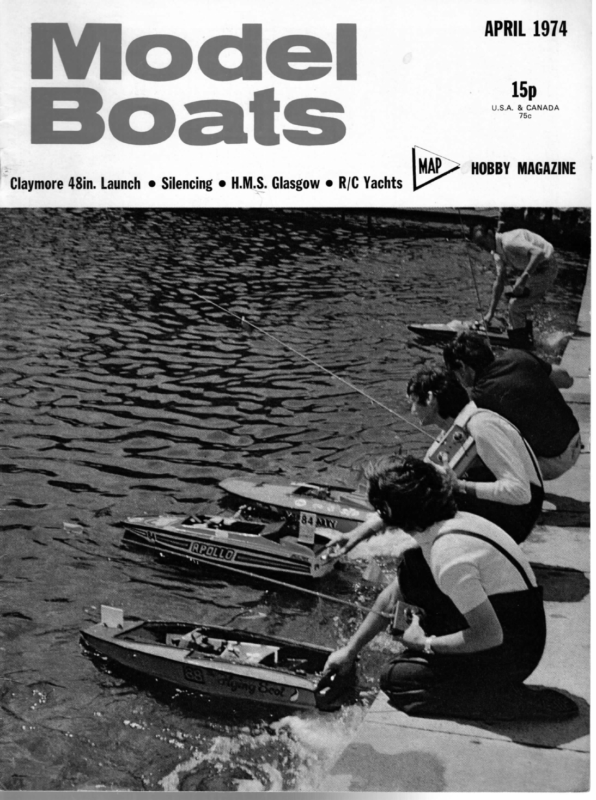
15p U.S.A. & CANADA 75c r Claymore 48in. Launch « Silencing ¢ H.M.S. Glasgow @ R/C Yachts HOBBY MAGAZINE
APRIL We liked the story in the San Francisco M.Y.C.’s newsletter (one of a number we receive and study) of a member’s scale model of Jules Verne’s submarine Nautilus. A dive resulted in a large stream of bubbles and that was it. Rescue attempts were many, includ- ing a scuba diver with tanks and a bystander who stripped to his jeans and went in when he heard that a reward had been offered. Eventually the operator (he wasn’t the owner) recovered it after dark — he’d hooked up the cabin lights before releasing it and the glow showed up forty feet away! This club is one of the oldest – formed 1898 — and caters for both sail and power. If you’re in the ’Frisco area, Spreckels Lake is where it all happens. Including random checks by the city’s Noise Abatement Team, out to nail non-club, unsilenced boats! Lifeboats Judging by reaction to the Oakley articles recently, those who like lifeboats really do. A special exhibition at the Science Museum, South Kensington, from February 21 for two months (gallery 1, ground floor) celebrates the R.N.L.I.’s 150th anniversary, and should attract all enthusiasts. It includes an Atlantic 21 ft. inshore boat, a full-scale superstructure mockup for a 52ft. Arun, and technical displays of the 37 ft. Rother, 44 ft. Waveney, 48} ft. Solent, 50 ft. Thames, and 70 ft. Clyde lifeboats, plus engines and other equipment. Club Notes Guildford M.Y.C. is pushing ahead with R/C yachting as well as vane. A number of club R/C meetings are planned at which newcomers would be welcomed: most of these are of the ‘bring a prize’ type where every entrant provides a small prize, and all classes of R/C yacht can take part in them. Dates for these are Mar. 31, April 15 (Mon.), May 25, July 27, Sept. 1, Nov. 24 ‘and Dec. 22. There is an open race for RMs on June 23 and one for RAs on Oct. 20. Sunday races start at 10 a.m., Saturday ones at 2 p.m. The water is Elstead Moat, about a mile S.W. of Elstead, which itself is about seven miles S.W. of Guildford, and the RM National Championships will be held there on Sept. 21/22. A similar number of vane races are programmed. Secretaryis R.P. Stollery, 6 Little Tumners Court, Ballfield Road, Godalming, Surrey. Etherow M.B.C. will hold an electric and R/C yacht regatta at Etherow Country Park, Compstall, near Romiley, Stockport, Cheshire, from 11 a.m. Events will be electric speed, steering, eyeball scale, multi, R36r, and RM. Trophies and prizes. Pre-entry 10p per boat per event, on day 15p. Free car park, cafe, loos, nature walk for family etc. Write to the Secretary at 74 Osborne Street, Lower Bredbury, Stockport (tel. 061-430 2657) New R/C yacht club is Leicester M.Y.C., just formed, with five members all sailing RM_ boats. Newcomers joining will have the opportunity of obtaining one of three modern Marblehead g.f. hulls from club moulds and use of a local reservoir has been obtained for sailing. Regatta dates already arranged are Mar. 31, April 21, May 5 and 19, and June 2. The Chairman is G. Thornhill, 6 Capers Close, Enderby, Leicester, and new members would be cordially welcomed. Off-shore power at Folkestone: this year’s race could be a three-day event on May 25/26/27, i.e. the Spring bank holiday week-end, if enough entrants would like it that way. Write now to D. Perry, 2 Priory Gardens, Folkestone, Kent CT20 15W, to give 1974 In the Tideway your views; in any case, a meeting will be run that week-end and the closing date will be May 14. New secretary for New Forest R/C M.Y.C. is D. J. Robinson, 25a Becton Lane, New Milton, Hants. Membership grew in 1973 from 8 to 32, all with R/C Marbleheads. The club will be host for the M.Y.A. Southern District R/C Marblehead Championship at Setley Lake on April 28, and as well as a number of meetings for club members (second Sunday each month, May-September), there will be an open R/C M event for the Nylet Trophy on June 30. To ensure perfect conditions the club recently hired a £16,000 excavator and dredged the lake to remove any shallow spots. Club champion for 1973 was A. Abel (Moonraker), second, C. R. Jeffries (Electra X), and third, J. Clarke (Oedian); 22 entries sailed 70 heats throughout the summer. Mr. R. D. Barnes is running a regatta at Alexandra Park, Hastings, on July 28, and states there will be trophies for ‘the best scale model, helmsman of the day, and every race winner in the 0-34, 34-64, over 64 i/c engines, electric-powered and steam-propelled classes’. S.a.e. for details to H. B. Promotions, Brentwood House, 11 Battle Crescent, St. Leonards-on-Sea, Sussex TN37 7AW. Southend M.P.B.C. new secretary is D. J. Wiggins, 35 Oakhurst Road, Southend-on-Sea, Essex SS2 SDT. The club will not be running an open SR regatta this season, but R/C and Hydroplane opens will be run as usual, dates to be announced. Inquiries, prospective members, etc., please write to the sec. Easter Model Railway and Transport Exhibition, April 12-15 inc., Holker Street School and Yards, Holker Street, Barrow in Furness, will include Barrow Shin Model Society exhibits plus a combination 00 railway and dock layout, the marine side by the S.M.S. and the rest by the exhibition organisers, Furness Model Railway Club. List of features sounds as though it’ll be a very fine show — lots of working layouts, live steam, vintage motor bikes, etc. Apropos the World Championships, M.P.B.A. President Frank Bradbury writes: ‘T would now like to make an appeal similar to the one 1 did for 1973 but this time for helpers to volunteer to assist the Keighley club in putting on the 1974 World Multi-Racing Championship. 1 earnestly hope that we get more replies than the five I received from the previous appeal. Mike Varley and Keith Parkin, the stalwarts of Keighley, have only a few members they can call on and so every volunteer will be welcomed. The more they get the better it is for everyone, so that the operation of a shift system will ensure that workers will be able to spend more time watching than working. Don’t leave it and say “Mike Varley knows I will help so there is no need to let him know”. Send in your name and any of your friends, how long you can stay and on what days. Mike’s address is 10 Briarwood Avenue, Riddlesden, Keighley, Yorks. ‘If you’t can find time to come yourself, let your friends know about the event as it will be quite a spectacle with two-hour races and entrants from all over the world. There will be plenty of facilities for parking and light refreshments for spectators’. 115 na
APRIL 1974 R/C YACHTING IN THE U.S.A. Part Two of Laurance V. Goodrich’s account of the ‘experiences of the Eastern Division, Model Yacht Racing Association of America, in ‘marrying’ radio yachts to well-established vane clubs. Tuning for R/C. It may surprise you, as we have repeatedly demonstrated here, that a well-tuned vane boat sailing to windward in a steady wind will normally be faster than an equally fast boat operated by a skilled R/C skipper. The reason apparently is that the R/C skipper on the shore cannot detect the minor variations in wind as well or as quickly as the vane and he tends to oversteer. Since all steering by rudder really involves a braking action, you want to use rudder very sparingly. That puts a heavy emphasis on careful tuning. Most of us here in the Long Island clubs use a sliding rig which, I understand, is rarely used elsewhere, perhaps because of the belief that it weighs too much and adds too much windage. We are now making them out of 3/16in. aluminium rod, and we find they weigh less than the assortment of fixtures others use in their place. The beauty of the sliding rig is that, in a matter of seconds, you can change the mast position without affecting sail shape or trim at all. When wind velocity changes, we usually slide the rig instead of adjusting the sheets or the vane settings. To tune we lock the rudder on centre and keep sliding the rig to the fastest beat to windward, (Incidentally, while we cannot do so on an R/C course, under vane we can slide the rig all the way aft to keep the bow up downwind to help get the boat planing.) : Tuning for R/C without a sliding rig will be more difficult, but the same principles apply. Keep in mind three new factors: you have added two pounds of ballast, you have removed the vane, and your rudder connected to the servo will be somewhat more rigid than under vane. These factors in an M may require that the mast be set back perhaps an inch from the comparable vane setting. It is extremely important to tune for the best pointing position because you cannot effectively compete to windward with even minor constant rudder pressure. Contrary to Mr. Ball’s experience, we have not had much trouble manoeuvring with our large jibs, perhaps because our sliding rigs allow us to balance the boat for them. If you have trouble tacking, try dropping the rudder an inch or so. If that does not restore manoeuvrability, try cutting away at the skeg area. We have not found it necessary to go to the spade rudder yet, and early experiments with spades on A boats showed they sometimes went out of con- trol downwind, (Incidentally, constant rudder control is essential in R/C racing and the skipper who loses control even for a few seconds may find himself way behind the others who have not lost control.) For that reason, the OD in an R/C race should check with each skipper at the start to make sure his controls are not being interfered with by the transmitters of the other skippers or by outside interference. Top, American X Class yachts racing under R/C at the Salisbury M.Y.C. pond in Eisenhower Park, Long Island, New York. In the foreground is Central Park member Alan Wasserman’s Whirlwind 10 R hull with a 1,000 sq. in. X Class sail plan, and at the right is the author’s unique X-Rated with a displacement of under 23 Ib. which is still competitive more than 25 years after it was designed and built by Henry Kellman. (Photo: Neil McIntosh.) Right, Niel Goodrich’s R/C hatchbox with the bottom and the winch and R/C battery packs removed. The winch motor and its rather heavy gearbox appear at the left with its limit switch arrangement toward the centre. The winch reversing servo is at the right, and the rudder servo and the receiver are stacked behind it out of sight. Double-sided tape used by aircraft modellers is used to mount the servos and the receiver. A Plexiglass side is used to permit checking the reversing servo eccentric cam travel and for spotting condensation. Total weight is slightly over 2 Ib. 119
MODEL BOATS The author’s M with its R/C hatch box in its testing position before it is dropped down flush with the deck. In rouch weather, the box is taped in to keep water away from the R/C gear in the box. The rudder servo it attached to an @TM on the tiller by a rod with Kwik-links on either end. Note the synchronous sheeting running from the booms to the sliding rig and then to the winch drum. Vane pintle, vane sheets and the ‘Liverpool Boy’ remain on board. Cost and Choice of R/C Equipment. Cost figures will vary greatly in different countries, but it might be helpful to list here the cost of the commercial R/C equipment a typical ED member might have purchased this past season: – 3. 4. MRC F-713, a three-channel set consisting of a transmitter, a receiver, two servos and _ charger batteries NiCad for (1) Extra frequency crystals for (1) Dumas SCU and surplus NiCad 5. 4 limit switches and 2 miniature 2. battery for it 25.00 10.00 2.50 rudder arm $195.00 (about £80) My SCU and battery cost $40 and the friend who made it did not charge for labour; but as indicated later, if the second servo can be modified to act as an SCU, for about $5 you can eliminate the $35 or more for items (4) and (5). If a club will concentrate its purchases at one hobby shop, some discount tions. may be available. Many of our ED members are using the MRC set listed above and have found it quite reliable, although the electronics purists prefer the more expensive brands which are more interference proof. While MRC has discontinued the distribution of this three-channel set here, it is still being manufactured by Futaba and may be available abroad under that name as it is here. Our Central Park Club was probably the first club to require that each member be able to operate on at least two frequencies and to be able to switch from one to the other in not more than five minutes. The MRC (Futaba) set became popular here because it was one of the few brands which offered interchangeability of frequency crystals. Clubs interested in moving into R/C should take note of the fact that it is extremely important for the club to assign the available frequencies to the members before they purchase their R/C gear to avoid the unnecessary frequency conflicts of random purchases. Central Park assigns the second frequency as well to obtain the maximum number of frequency combinations. I am sure that abroad, as here, there are many heavy.) I worked at developing the single uniform box concept because I could not see buying separate onboard equipment for five models. I gather that R/C equipment may be relatively more expensive in Europe and that the budgets of model yachtsmen in Europe may be relatively tighter than here. If that ‘is true and the members of some clubs find it difficult to make full individual investments in R/C equipment, perhaps the members who want to could pool their funds to buy one R/C set for each available frequency, to be used on a pooled basis. The on-board gear could be built into uniform hatch boxes and the members could cut hatches in their boats to take the boxes. Since at the pond you can never use at one time more transmitters than there are available frequencies, under this method you would not have the surplus of investment in R/C gear we have. We have not tried this in MYRAA and it would take a lot of co-operation, but we do quite a bit of R/C equipment lending and find that it is carefully treated and returned in good shape. Incidentally, a good source of used R/C equipment may be the model aircraft clubs. The model aircraft hobbyist moves quickly to the latest and most sophisticated equipment, which we do not need – a slight malfunction of a second or two for him may crash an expensive plane but it is of no consequence 30.00 7.50 connectors 6. Kwik-link rudder control rod and R/C Gear in the Yacht. There are many ways to mount the R/C gear in the boat. Some use several hatches with the batteries forward, the receiver and SCU in the middle and the rudder servo back near the tiller. Some mount the gear on a platform low in the hull, which is quite easy in an A boat but much more difficult on a M because of space limita- I prefer mounting all the R/C gear in a waterproof box hung from the hatch. My son and I have three 10-Rs and two Ms, each of which we can convert to sail on vane or R/C in less than five minutes. We have each made an identical hatchmounted box, 4 in. long, 3 in. wide and about 3 in. deep in which we have mounted the on-board gear: (i) the receiver and its battery; (ii) the rudder rotary servo; and (iii) the SCU, its battery pack and its reversing servo. The whole box weighs just over two pounds. (You should be able to keep it lighter than that because our SCU motor needs 10 volts which makes its battery pack too heavy and our gears too $120.00 brands of R/C gear which skippers will find very reliable for model yachting. It is best to consult with local R/C clubs before buying. Keep in mind that you want a set which will be as interference free as possible and that the ability to switch to another channel will greatly increase your ability to sail with others. Some of our members have purchased 5-channel sets although I know of none who is using all five functions. The idea is that their R/C gear will not be limited to three functions if new R/C uses are developed. Three channels will give rudder and individual jib and main sail control. Some are thinking about ‘using another servo to control the side on which (continued on page 133) to us. 120
APRIL 1974 Two pictures of a prototype taken at Poole Quay. The three launches of this type have been used in a R.N. recruiting ‘commercial’ on television. photograph of the plug is shown and this could, of course, be used as a hull if desired. A plug of this size by this method needs to be very strongly made as considerable force is used removing it from the mould. The plug for the deck house was almost solid and was produced with a gauge and rasp working to marking out and templates. Obtaining a good finish on the plugs was given some thought, and I did this by painting and rubbing down several coats of polyurethane. I find this method good because surface blemishes are much more readily seen at each stage than if working on natural wood. Making the Moulds So far I had been working with familiar materials and methods and with six coats of wax on the plugs I was pleased with their finish. Working in G.R.P. would be new, and as a start I read the New Glass Fibre Book and attended a demonstration at Strand Glass Ltd., Southampton. These are arranged at their various branches and are quite useful. I purchased all the materials necessary from here and started. The hull was tackled first using an old sheet of ply as a base plate. The mould was laid up with one layer of surface tissue and four of 1 oz. mat, on a Saturday morning, and the plug removed 48 hours later. Sufficient has been written about the ease of laying up G.R.P. and also its constraints, but if a beginner can advise, the most likely cause of disappointment can be summed up in two words, air GENIE (continued from page 130) centre of this length, leaving a clear space for the vane feather. These eyeplates also anchor the spinnaker backhaul on whichever side it is set, so can with advantage be double eyes. Next is the rudder mounting and tiller. A simple, inexpensive, and entirely satisfactory system is shown on the drawing, but pintles can be purchased from either of the suppliers mentioned if preferred. On most systems it is desirable to block the lower end of the tubular rudder stock; a phosphor bronze bearing ball is ideal but a stub of brass is adequate. Put a dab of epoxy in the tube and tap the plug in. Use a sharp lower pintle pin for minimum friction. Keeping to our inclusions. Really thorough precautions are needed to ensure these are eliminated. I did not escape this trouble but fortunately I was able to effect repairs by filling with gel coat, covering with Sellotape to harden, and then rubbing down. Having met this trouble once I avoided it with the deck house and after rubbing down with 800 grit wet-and-dry followed by Bluebell polish the two moulds were ready. The finish was semi-matt but as it was a warship I was concerned with, this was about right. Making the Mouldings The hull was laid up with two layers of 1 oz. mat with strengthening at bow and transom. With pigment added to the resin even more care is needed to ensure air inclusions are not present, because the resin is now opaque. Profiting from earlier experience, I obtained a moulding of good strength and small air inclusions that were treated as the mould. The strengthening in the engine mounting area was added after removal from the mould and consists of two layers of woven cloth. Doing this at this time makes removal from the mould easier as the moulding is more flexible. The deck house was of necessity built up from a large number of small pieces to accommodate the shape, but with improving skill the moulding was sound. The general thickness of the deck house is one layer of 1oz. mat but with strengthening on all internal corners and all round the aperture at the aft end. The mould is as shown in the photograph. (To be continued) mixture, we used a Jones lower pintle and Roberts upper pintle…. The tiller depends on the purpose. A short athwart- ship clamp-on arm (E.D., etc.) is fine for radio, but for vane we need one with a slot (for the vane arm) extending aft, and a forward projection for a lightlytensioned centring-line. A clamp-on type is fine, but it is advisable to drill and pin it to the tube as well. We have seen a top skipper puzzled by his boat’s performance until he discovered that the tiller had slipped 5 deg. on the rudder stock. That completes the deck fittings except for three eyes for the sheeting system, which we will discuss next time. 123
Ce eee MODEL BOATS % RANGER pionship, Sept. 1973. By D. V. Billing work COPIES OF THIS DRAWING (LINES HALF-SIZE, BODY PLAN FULL SIZE) ARE AVAILABLE REF. MM1179, PRICE 65p INCLUSIVE. Winner of the Australian 10-rater Cham- ®i5} ed we st Shit 3] =i 3 | T 2 EO Witen cass vant = 2 ss 124 eg eee eo ee – ® Wil the advent of lighter designs and W.L. lengths of 60 in. and longer in the 10-rater class I decided to stretch out my Turi M class design* to a 60in. LWL which would give an overall displacement of 221b. To keep hull weight to a minimum, an overall length of 65in. was decided on. The same sections were maintained but spaced out at 6in. centres instead of 4.8in. When lines were studied it could be seen that the underwater run of hull was fairly flat as the maximum basic hull depth excluding spine is only 23 in. This will give a hull that will plane under most conditions. A keel of wedge shape, short length and draft of 144in. was fitted; a moderate lateral area was maintained in the keel to assist in windward work in light conditions. A medium height sail plan of conventional appearance was fitted, the foot of main and jib being kept the same length. I did not design a masthead or larger footed jib as I think they are very sensitive to sail adjustment. Once you get the centre of effort of the sail suit in front of the mast, you do not have to be very much off your optimum sail setting to reduce a boat’s performance. Also in this class, are we attempting to carry too large a spinnaker, as these lighter-designed boats do not require much power to push them along? I am more convinced in our model sailing that we are not putting enough flow in our sails under allsheetsconditions, also we are pulling in too tight. You see a lot of boats sailing in a rail-down condition. If the boat was allowed to stand up more by easing sheets and putting more flow in the sails, the skipper surprised. would be * See next issue. agreeably
MODEL BOATS GENIE Part 4 of Vic Smeed‘s ultra-simple Marblehead class yacht for vane or radio-control sailing. Drawings for this 50 in, model are all full-size (except sail oe), and show fittings based on Stollery/Shepherd simplicity. Full-size copies (two_ sheets) available, MM1175, price £1.10 including V.A.T. and post, from Model Maker Plans Service, P.O. Box 35, Bridge Street, Hemel Hempstead, Herts HP1 1EE. ore s. Sessa oe BEFORE carrying on with building notes, there are two points which several readers have raised which we can perhaps clear up. Firstly, length. A yacht’s speed is dependent to a large extent on its waterline length — the longer the w.l., the faster the potential speed. With a rule like the Marblehead, the overall length only is limited, so we can make the waterline length the full length of the boat to get the maximum potential; hence the modern M is ‘plumb-ended’, i.e. has a vertical bow and stern. Now the rule limits the length 0.a. to 50in., plus or minus | in., plus in. maximum for a bow bumper. Thus our maximum legal length is 50}in., and by making the bow bumper of cork shaped into the hull, we can sand it until the length is just within the 503 in. allowed and in effect produce a boat with a 503 in. waterline. This is 14 p.c. longer than a 50 in. boat, and, everything else being equal, the longer boat should be a yard and a half ahead — one boat length, roughly — after sailing 100 yards. It doesn’t sound much, but it’s a good winning margin and we would be foolish not to take advantage of it. Genie is thus 50} in. length actual, and perfectly legal. The second point concerns registration. An M.Y.A. class yacht can only be registered with the appropriate M.Y.A. registrar, and only on his receiving a certificate and declaration from an official club measurer. So to get registered you need to talk to your nearest yacht club. After all, you really only need registration if you wish to race officially, and to race officially you have to be an M.Y.A. member. If a group of you get together, it takes a minimum of six and an official race programme (which need not be extensive) to form a club which can be affiliated to the M.Y.A. A stamp will bring the address of your nearest club secretary, or club affiliation information, from the M.Y.A. Hon. Gen. Sec. R. Gardner, 6 Rowner Close, Rowner, Gosport, Hants. At the time of writing (early Feb.) the number of Genies being built is well into three figures and several are actually finished. Feedback on completed models, vane or radio, could be helpful to other builders (not only of this design) so anyone who has had trials and who has a minute to write is invited to do so. One omission so far is a stand for the model; once the lead is fitted a stand is needed. The simplest is probably a piece of thick ply about a foot square, with a thinner piece of ply glued, screwed, and braced to 128 one end, the top of this piece being cut out to fit round the hull at section 4, allowing for ‘softening’ in the form of foam or rubber strip to be glued round the cut-out. Strips nailed to the baseboard and lined with foam provide a pocket for the lead bulb. The lead can reasonably be fitted at this stage, with or without the deck permanently attached. Try the slot in the bulb for fit on the fin; it can be scraped or chiselled on its inside faces, or, if there is a blob inside, a drill can be used in conjunction with a chisel to clean it out. If you haven’t a small enough chisel, a sharpened screwdriver will enable the inside to be pared or scraped. Try for a fit which will allow the bulb to stay in place without adhesive. If the fit is sloppy, as may happen if you have to re-align the bulb, it can be wedged with paper or card while the balance is checked. The plan shows the balance point without mast or fittings (the deck can be laid in place if not already fitted) for a level waterline, which is a practical help in checking the lead position. Adjust the position of the lead if necessary, then epoxy it in place with a slow epoxy and check balance again. When dry one (or two) stainless steel or brass wires or rods can be epoxied in holes drilled right through, if desired. Assuming that the deck is not yet fitted, this must be the next stage, so a final check on what fittings require blocks etc. and a check on the hull interior must be made; access, even with a hatch, will be very restricted once the deck is secured, so be surg there are no missed areas in the internal varnish or paint. The deck can be glued on with Aerolite etc. or slow epoxy resin, but should a builder think he might one day want to remove it, it can be bedded on thick wet varnish and pinned or screwed. Most people, if they got to a stage where such major refitting was called for, would probably be prepared to sacrifice the deck and fit a new one, so glue or epoxy might just as well be used. Make sure the deck is stuck to the deck beams and that the line of glue round the edge is unbroken, to avoid a possible leak spot. When dry, sand the deck edge flush and varnish or paint the deck two or three coats before moving on to the rest of the hull. This is important if a varnished deck is to be used, as paint creeping over from the topsides can be cleaned off the deck once varnished, but will form an unsightly blotch under the varnish if it gets on the bare deck. If the whole boat is to be a light colour, including deck, then the whole can be
APRIL 1974 Photo opposite shows the Roberts top rudder pintle and tiller; don’t worry about the complex-looking vane gear yet! Backstay eyeplates can be seen on deck edges. The hook in the fore-end of the tiller is on a cord and bowsie which is attached to a rubber band anchored on the main sheet eye (photo at right) to provide a slight tension rudder to central. biasing the undercoated at once, hanging it up by a wire passed through the rudder tube. The rudder must be made in order that it can be painted and rubbed down with the hull. It is cut from the same material as the skeg and its foreside grooved, with a sawcut followed by a rat-tail file, to receive a 7s in. brass tube or rod which is epoxied in place before further shaping. Scratch the brass with a coarse file and clean it before epoxying. File and sand the rudder to the section shown. Some novices are worried by a #s in. rudder stock passing through a much bigger brass tube, but the tube only makes a waterproof tunnel through the hull and the rudder stock doesn’t touch it, being supported only by the top and bottom pintles. This helps to ensure the complete freedom of the rudder for a vane boat; the force produced by the vane is small and no trace of sticking or binding must occur. For radio installation friction is slightly less important Which brings up the question of radio rudders. A lot of sailors favour a spade rudder, i.e. one which has no skeg, but is simply a rudder sticking down, pivoted with about 30 p.c. of its area ahead of the pivot line. This gives a more manoeuvrable boat, but on the other hand one which could be a little over-sensitive when sailing straight. Is it better to have a boat which sails straight and fast naturally, with a skeg, but may lose a little time rounding a buoy or dodging other boats, or one which is nippy in the ruck but which may hunt a little on long legs? To some extent this must depend on the length of the course and the precision of the rudder servo; converts to spade rudders swear by them, others think a compromise of moving a skeg and rudder forward (10-12 in. on a Marblehead) is better, and some feel that a conventional layout is adequate. Our own model is dual-purpose, so we have a conventional skeg and rudder; the best advice we can give, perhaps, is that if you are going in for radio racing mostly on a fairly small pond, a spade is probably worthwhile. Otherwise — h’mm. It is perhaps significant that experienced vane skippers converting to R/C usually like to retain a skeg, while R/C-only ones country, and in the meantime, horrific though it may sound, Genie is quite simple to modify in the light of an Owner’s own experience. The bow bumper is cut from a cork tile, 4 in. thick, three vertical laminations epoxied in place, sanded to blend in with the hull. Its shape is thin at the bottom, gradually increasing in radius to the deck-line. Check (more than once) that the overall length does not exceed 503 in., and use fine glasspaper to prevent tear- ing the cork. If you ask, you might pick up a broken tile from a D.I.Y. shop cheaply. Back to painting. Gaboon mahogany, used for the hull, has many advantages, but it does have rather an open grain. Ideally it needs a primer followed by three or four undercoats, each rubbed practically away with wet and dry paper except the last, which should be flatted down with about 400 paper, using plenty of water, and sponged off and allowed to dry. Inspect carefully to ensure that all grain and blemishes are filled before applying a final gloss coat. After a week or so the gloss can be rubbed over with a very fine cutting compound (Johnson’s T-cut or similar) and the hull wax polished. It has been said that you should be able to lift a boat out of the water, hold it for a few seconds, and all water should run off, leaving just one drop hanging from the lead… The prototype (see January cover) has a peacock blue hull and bulb, with a white hull below water and a red waterline stripe or boot-top a little under }in. wide. The bottom of the red is the 154 1b. vane waterline and the addition of radio weight still leaves the top of the red showing. The deck is white with a very pale blue (mixed hull colour) striped effect, king-plank, and deck edge. It was possible to use white undercoat over the entire model (except the transom, which we left as varnished mahogany) and, after marking the waterline (hull upside down, w.l. measured level, prefer the spade. We think a lot more sailing is neces- sary under British weather conditions before this divergence of views can be completely settled for this The forestay eye (at the bow) and the commercial jib fitting which comes ready for use. When the photo was taken the jibstay had not been tightened. Flow in the jib is adjusted by fore and aft movement of the boom pivot; this also allows jibs of different foot dimensions to be rigged. n,n 129 See
Ta MODEL BOATS The mast are for takes in a commercial slide; ‘black spots’ on slide edge locking pivot pin adjustment. Arrowed hole on of spinnaker boom when rigged. chainplate visible in background. gooseneck Starboard A plain jib-rack could be used, in which case the tack hook should be sited 3 in. back from the boom tip and the stay run to the tip. The pivoting action of the stay then keeps the outer boom end down and avoids the need for a kicking strap; the tack hook should incor- porate a fishing swivel in order to allow the boom to swing easily. A better arrangement is shown on the plan, and is not difficult to make if you can obtain 7 in. Tufnol or a similar hard and tough material. Paxolin, Oroglas, and Holoplast are three names; Perspex is nearly hard enough but is likely to snap. Tufnol off-cuts can be bought from Thomas Foulkes Ltd., Arch 280, Lansdowne Road, London El, who would prefer you to send an S.A.E. for a current price list before ordering. Use a hacksaw and files or sharp woodworking tools on this material. The slide wires are self-explanatory and work very well; alternatively, bend the sides of a rectangle of 20 or 22g brass or stainless steel to form a slide tray trapping the Tufnol slide, drill and countersink well, and screw in place. On the prototype we used a lot of ready-made equipment and a complete jib fitting including wood boom, kicking-strap, cords, bowsies, etc., is available from J. Roberts. This is fully adjustable for tack position and any length of foot for an M jib. We reduced the cordage to one sheet only and substituted a wire and pencil on block slid round) to mask off and paint the underside gloss white. The tape mask can then be cut to just under { in. wide and the topsides painted, ideally a thin blue undercoat (rubbed down lightly) and the blue finish. After peeling off the narrow tape, more tape can be applied each side and the boot-top painted in. Since time was pressing, we painted the deck gloss white at the same time as the hull bottom. The kingplank ({in. wide) was marked down the centre and # in. Sellotape laid up to it. Further Sellotape was then laid 7s in. away from the first strips and repeated out to the deck edge. A keen knife was then drawn round the deck 7% in. from the edge, and surplus tape removed. A couple of bits were stuck across fore and aft of the hatch, then the gaps were all painted with very pale blue. When dry the tape was all peeled off and the result seems to appeal to people. It’s quick, but uses a lot of tape! Deck Fittings Starting from the bow, we have an eyeplate for the forestay, one of five required. The best is an eye silver-soldered in a central hole in a slip of 20g brass (or stainless steel) about { x }in., a hole being drilled at each end to pass a ? in. No. 2 brass screw. The eye can be a 00 screweye with the shank cut off underneath after silver-soldering. Quite a bit of tension can be exerted by the forestay, which can be used in con- junction with the shrouds and a slackened backstay to put a slight curve in the mast to adjust the set of the mainsail. A two-hole (or even three) eyeplate can be used at this point for vane boats, to provide an anchorage for a hook on the spinnaker boom forehaul. It can either be two silver-soldered eyes or filed from a piece of T section brass (see photo). Next comes the jib fitting. This again takes a fair pull, since the efficiency of the jib depends on the tautness of the jib-stay, so it needs to be firmly secured. turnbuckle kicking strap, the former because it suits synchronous sheeting better and the latter because it is easier to adjust. Moving aft we next have a centrally placed eyeplate for the jibsheet and, immediately behind, the mast slide. This can be made exactly as the jib slide (as drawn) or a metal slide tray can be used. Note in this case that a slot has to be cut in the tray with width of the mast and about 2 in. long, so that the mast can move fore and aft with the slide. If you hadn’t noticed, a similar slot is needed in the deck(!) so cut this if not previously done and varnish or paint the cut edges. Again, you can buy a finished mast slide assembly from J. Roberts or W. Jones if preferred. It is best to have the mast ready to insert before screwing the slide, etc., in place, to check that the mast is upright (from ahead or astern). Countersink the securing screws well or the slide will foul them, and don’t omit a locking pin or screw so that the slide stays in the tuned position. On the deck edge, slightly aft of the mast position, a chainplate is screwed each side. These can be T section (see plan) and it is convenient if they have three or four holes. On the original they are double, again for vane racing; some skippers like two shrouds each side, the after pair being hooked higher in the mast and used when beating or reaching (into or across wind) but being slacked off or removed for running (downwind) in order to allow the mainboom to be nearer square across the hull. The backstay takes most of the strain then. There is quite a pull on the chainplates, so they need firm attachment. If in doubt you can screw in place, then remove the screws and introduce a little epoxy before replacing the screws. Aft again is an eyeplate for the mainsheet, then eyeplates each side for the split backstay. For radio versions, this can be one eye in the centre of the transom top, but to allow freedom for vane gear to operate, two eyes are used and a three foot length of rigging cord tied to them. The backstay then hooks into the (please turn to page 123) 130
APRIL the Braunschweig Class, formed the German Second Squadron at the Battle of Jutland (what the Ger- given the same treatment. mans call the Battle of the Skagerrak) May 3lst- June Ist 1916. This was the only occasion that the two fleets, in their entirety, came face to face. The Second Squadron was the only group of pre-dreadnoughts employed in the battle by either side. The battle has been described in more detail in earlier articles in this series (see article on HMS Jron Duke, MB October 1972). The pre-dreadnoughts, with their inferior speed, must have been something of a liability. In the pre-dawn hours of June Ist as the German Fleet was making for home they were attacked by the British Twelfth Destroyer Flotilla who launched torpedoes at the Second Squadron from a range of one mile. One torpedo found iis mark in the side of the Pommern. The battleship was racked by a series of explosions culminating in one final blast as her magazines went up. There were no survivors. The Pommern and 1974 the battle cruiser Lutzow were the principal German casualties in this epic battle. Most of the pre-dreadnoughts were taken out of active service after Jutland and Schleswig-Holstein became an accommodation ship in 1917. The peace treaty permitted Germany to retain only a few old battleships and cruisers. She was allowed to keep the surviving battleships of the Braunschweig and Deutschland Classes. Deutschland was broken up almost immediately but the others continued in service in a variety of roles. The longest-lived were the Hessen, converted to a target ship and taken over by the Russians after World War II, and the two sisters Schlesien and Schleswig-Holstein, both of which became cadet training ships. Apart from the initial attack on Poland, in which Schlesien also participated, neither ship played any significant role in the Second World War. The Schleswig-Holstein A very fine model of the Schleswig-Holstein appeared at the 1973 Model Engineer Exhibition. Built by Harry Woodman, it received much critical acclaim. A photo of the model appeared in MB in March 1973. Photographs of good models are an excellent guide to the modeller and are far easier to use for detailing purposes than pictures of the actual ship. Pictures of models on display at museums such as the Science Museum in South Kensington can be purchased for a very nominal cost, the only drawback being that they are not easy to obtain by mail. Most of the mode!s shown at museums are builders’ models and, as such, show the subject as originally built. With the exception of some merchant ship models which have been converted to later appearance for publicity purposes, the details of modifications have to be obtained from drawings and photographs. The details of Schleswig-Holstein were as follows: Built: Displacement: Machinery : Armament : Germania, Kiel —August 1905 to July 1908. 13,200 tons (std); refit. 13,040 tons after 20,000 HP = 18 knots. 4-1lin. 14-6.7in. (replaced by 10- 5.9 in. after refit); 20-3.4 in. (4-3.5 in. AA after refit); 6-17.7in. TT (removed during refit). Complement: Over 800 during World War I; 718 as training ship. The same colour scheme was retained throughout the ship’s life, ie. light grey with hull just a few shades darker than the upperworks. Decks were planked as indicated. Upper decks were covered with brown corticene in Word War I and were painted a dark grey after refit. Waterline was very dark grey. Relating these to Humbrol colours, use four parts flat white to one part flat black for the hull and six parts white for the upperworks. Waterline is HN 2 (Dark Grey), corticene decks Number 29 (Dark Earth), and upper decks Number 27 (Sea Grey). Next month: HMS Arethusa of World War I and World War II. was sunk by British bombs in December 1944, and Schlesien by mine and bomb in May 1945. As will be seen by the drawings, the profile was radically altered by the trunking of the first and second funnels during reconstruction in 1926-28. Both ships were R/C YACHTS (continued from page 120) close to the ideal. It should be possible to reduce the servos outweighs the potential advantages at this point, except for the skipper who really wants to experiment with such ideas. However, if you have the opportunity to buy a good second-hand 5-channel set with servos that can be modified as discussed below, by all means take it because it will give you more flexibility and may be more interference free. weight of the on-board R/C gear to one pound or less by one or both of the two approaches we are now concentrating on. The first approach is to reduce to one pound the conventional winch like the one my son and I have been using for the past two seasons. It consists of a motor driving a set of gears to turn a drum on which the sheets are wound and uses a separate battery and a servo wired to two limit switches to act as a reversing switch. We have had no trouble finding light, strong and efficient 6-volt motors, but the gears have given us a real building problem. Mine were assembled and fitted laboriously by an expert machinist with his own Vortex which costs $75 and uses rotating arms and in 10 days and the cost of parts was pretty high on such a small production scale. We hope to find a commercially available set of worm gears which any average builder can fit to the motor and the drum. the jib is carried downwind, and others have speculated about trying to set a spinnaker by radio. To my mind the added cost of the two extra channels and The SCU. Our main R/C problem has been to find or develop a really good SCU. At least two are commercially available here: i) the Dumas which costs about $20 and consists of a jockey riding on a long threaded rod turned by a heavy motor, and ii) the lathe, but he could turn out only about five winches is quite sophisticated mechanically. Quite a few of our members have successfully adapted the Dumas, but it is rather heavy and bulky and requires a rather long hatch. The high cost, the bulk and the weight of the Vortex have meant that only a few of our members are using it, principally on the Vortex Soling M which was designed to take it. Our extensive experiments over several years indicate that neither the Dumas nor the Vortex comes Although opinions here differ widely on the desirable power and speed, I think the ideal would be a winch which will pull in 10 in. of line in 15 seconds with eight pounds of pull. (I would greatly appreciate hearing from anyone who can help us in finding the ideal combination of motor, gears and drum.) (To be concluded) 133


