
- A Balanced Helm for Model Yachts. Artuur H. Myhre. Haven’t you often wished, you model yacht sailors, that you were an ant, a spider, or some other bug passenger or crew on board your sailing model, so that you could keep the old thing on her course without jibing, falling off, or luffing up, only to go off on the other tack where you could not reach her?

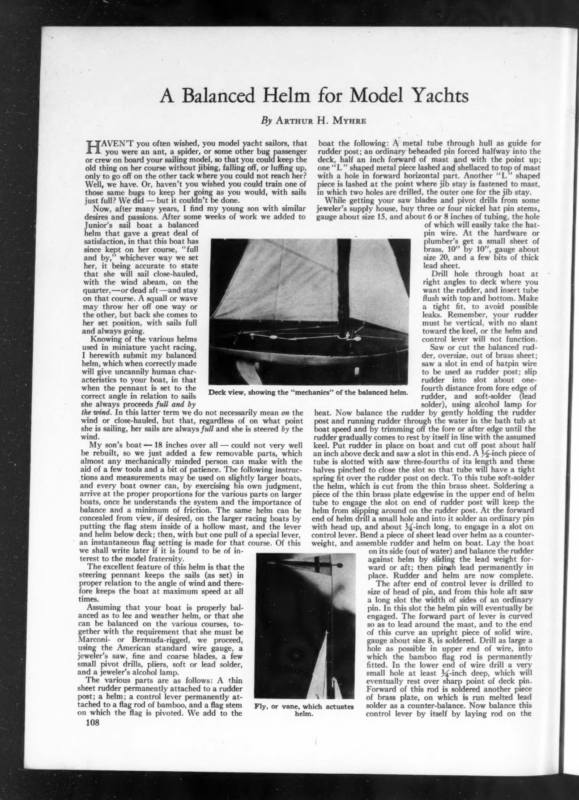
A Balanced Helm for Model Yachts By Artuur H. Myure AVEN’T you often wished, you model yacht sailors, that you were an ant, a spider, or some other bug passenger or crew on board your sailing model, so that you could keep the old thing on her course without jibing, falling off, or luffing up, only to go off on the other tack where you could not reach her? Well, we have. Or, haven’t you wished you could train one of those same bugs to keep her going as you would, with sails just full? We did — but it couldn’t be done. Now, after many years, I find my young son with similar desires and passions. After some weeks of work we added to Junior’s sail boat a balanced helm that gave a great deal of satisfaction, in that this boat has since kept on her course, “full boat the following: A metal tube through hull as guide for rudder post; an ordinary beheaded pin forced halfway into the deck, half an inch forward of mast and with the point up; one ‘‘L” shaped metal piece lashed and shellaced to top of mast with a hole in forward horizontal part. Another ‘“‘L”’ shaped piece is lashed at the point where jib stay is fastened to mast, in which two holes are drilled, the outer one for the jib stay. While getting your saw blades and pivot drills from some jeweler’s supply house, buy three or four nickel hat pin stems, gauge about size 15, and about 6 or 8 inches of tubing, the hole of which will easily take the hatpin wire. At the hardware or plumber’s get a small sheet of brass, 10’ by 10”, gauge about size 20, and a few bits of thick and by,” whichever way we set lead sheet. her, it being accurate to state Drill hole through boat at that she will sail close-hauled, right angles to deck where you with the wind abeam, on the want the rudder, and insert tube quarter,—or dead aft —and stay on that course. A squall or wave flush with top and bottom. Make may throw her off one way or a tight fit, to avoid possible leaks. Remember, your rudder the other, but back she comes to her set position, with sails full must be vertical, with no slant and always going. toward the keel, or the helm and Knowing of the various helms control lever will not function. used in miniature yacht racing, Saw or cut the balanced rudI herewith submit my balanced der, oversize, out of brass sheet; helm, which when correctly made saw a slot in end of hatpin wire will give uncannily human charto be used as rudder post; slip acteristics to your boat, in that rudder into slot about onewhen the pennant is set to the fourth distance from fore edge of Deck view, showing the ‘“‘mechanics’’ of the balanced helm. correct angle in relation to sails rudder, and soft-solder (lead she always proceeds full and by solder), using alcohol lamp for the wind. In this latter term we do not necessarily mean on the heat. Now balance the rudder by gently holding the rudder wind or close-hauled, but that, regardless of on what point post and running rudder through the water in the bath tub at sheby sailing, her sails are always full and she is steered by the wind. My son’s boat — 18 inches over all — could not very well be rebuilt, so we just added a few removable parts, which almost any mechanically minded person can make with the aid of a few tools and a bit of patience. The following instructions and measurements may be used on slightly larger boats, and every boat owner can, by exercising his own judgment, arrive at the proper proportions for the various parts on larger boats, once he understands the system and the importance of balance and a minimum of friction. The same helm can be concealed from view, if desired, on the larger racing boats by putting the flag stem inside of a hollow mast, and the lever and helm below deck; then, with but one pull of a special lever, ‘ an instantaneous flag setting is made for that course. Of this we shall write later if it is found to be of interest to the model fraternity. The excellent feature of this helm is that the steering pennant keeps the sails (as set) in proper relation to the angle of wind and therefore keeps the boat at maximum speed at all boat speed and by trimming off the fore or after edge until the rudder gradually comes to rest by itself in line with the assumed keel. Put rudder in place on boat and cut off post about half an inch above deck and sawa slot in this end. A 44-inch piece of tube is slotted with saw three-fourths of its length and these halves pinched to close the slot so that tube will have a tight spring fit over the rudder post on deck. To this tube soft-solder the helm, which is cut from the thin brass sheet. Soldering a piece of the thin brass plate edgewise in the upper end of helm tube to engage the slot on end of rudder post will keep the helm from slipping around on the rudder post. At the forward end of helm drill a small hole and into it solder an ordinary pin with head up, and about 14-inch long, to engage in a slot on control lever. Bend a piece of sheet lead over helm as a counterweight, and assemble rudder and helm on boat. Lay the boat on its side (out of water) and balance the rudder against helm by sliding the lead weight forward or aft; then pingh lead permanently in place. The size of a long pin. In times. Assuming that your boat is properly balanced as to lee and weather helm, or that she can be balanced on the various courses, together with the requirement that she must be Marconi- or Bermuda-rigged, we proceed, using the American standard wire gauge, a jeweler’s saw, fine and coarse blades, a few small pivot drills, pliers, soft or lead solder, and a jeweler’s alcohol lamp. The various parts are as follows: A thin sheet rudder permanently attached to a rudder post; a helm; a control lever permanently attached to a flag rod of bamboo, and a flag stem on which the flag is pivoted. We add to the 108 Rudder and helm are now complete. after end of control lever is drilled to head of pin, and from this hole aft saw slot the width of sides of an ordinary this slot the helm pin will eventually be engaged. The forward part of lever is curved “Tt Fly, or vane, which actuates helm. so as to lead around the mast, and to the end of this curve an upright piece of solid wire, gauge about size 8, is soldered. Drill as large a hole as possible in upper end of wire, into which the bamboo flag rod is permanently fitted. In the lower end of wire drill a very small hole at least 14-inch deep, which will eventually rest over sharp point of deck pin. Forward of this rod is soldered another piece of brass plate, on which is run melted lead solder as a counter-balance. Now balance this control lever by itself by laying rod on the
109 March, 1930 Bamboo Psi ts Rudder” lead ‘Flag frame. ~ Blade-> act as counter-balance. A ten-inch wire, for flag stem, is slotted for larée models, older “ring on post. – not toTMscale. Detail only Detailed diagram of parts. table with lever over the edge, cutting off or adding to the lead counter-weight until properly balanced, the rod being the center of balance. Over the upper end of rod is permanently fitted an inch of tube, half its upper length slotted with saw and pinched, to spring fit, tightly over the flag stem. This is the friction tight point at which flag adjustments are made. The completed rod should reach to just below the lower “L”’ shaped piece on mast when lower end is resting on deck pin. DE DEER alt saan aeery. The diagrams included here will show all these parts. This helm can be added to your best boat without altering it in any way. Size of flag or vane and rudder can best be determined by trial. Rubber bands, in the main sheet, between the main boom and the traveler, and possessing the proper tension, will ease the mainsail in a hard blow, and make for better speed than the heeled boat with a heavy weather helm. This tension should act directly on the boom and not through blocks or eyes, as the friction retards the easing and hauling in of the mainsail. There are a hundred and one different methods of making and improving this balanced helm, and once you recognize the importance of balance and the minimizing of friction, the pleasures of sailing or racing your boat with a balanced helm are trebled. With sails always full, at maximum speed, she just keeps on going, going, going! = ‘\. friction on bost ‘\ – Reduced v 2. lashed to mast. 12 3 INCH | ed Various parts for a balanced helm. —- “L’ shaped & Kune —— at one end, and a hole drilled through slotted end. Drill a like hole, slightly larger, on the horizontal balance arm, just ahead of flag, and assemble stem and flag with a small rivet through holes and balance flag so that same gradually comes to rest in a horizontal position. Assemble, on your boat, first rudder and helm; engage helm pin in lever slot with rod resting over deck pin; run flag stem through both ‘“‘L” pieces on mast and into tight fitting tube at top of rod. Hold the boat in position of the course desired, adjust sails, then hold lever so that rudder is centered, and while centered turn flag stem to proper wind angle with relation to sails, and let go. Pay no attention to rudder action while boat is out of water, as the wind pressure on the rudder will confuse its behavior, while sailing in disturbed winds in the lee of large objects may lead you to believe that something is not functioning properly. All action between parts must be absolutely free, but very close fitting to insure a minimum of loose play. The photographs show the assembled and finished device. Ae | lever: aD , Paint both sides of a sheet of tissue paper with aeroplane dope, celluloid lacquer, or ‘“‘make your own” by dissolving clear celluloid in amylacetate, and hang up to dry. This makes a stiff, light flag or vane to put over flag frame. My son simply had to have a flag on his boat, so flag it was. However, many other types of wind vanes can be made that are much more powerful in action when the small part of same is next to mast and the widest part at the free end. The flag frame is cut from brass sheet in shape of a cross, all arms about the same length. On the outer end of one horizontal arm solder a triangular frame of about gauge 24 wire; this is for widening the free end of flag to something like a wind vane. This triangle, being horizontal and covered with material, acts as the elevator. After this, add main flag material to both sides, using celluloid lacquer and strips of flag material to fasten flag to frame. This