- SIGMA, Simple 24 in. sailing model By I. A. Wright
- Useful Plastic Bottle
- In Part 9 A. Wilcock discusses the basic function of the Fisher type of vane gear
- Experimental Fins D. M. J. Hollom

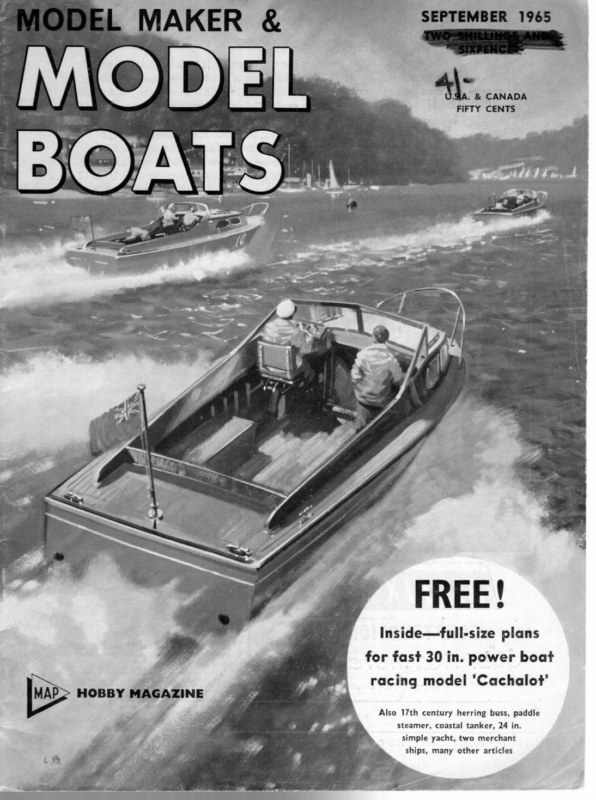
FREE! Inside—full-size plans for fast 30 in. power boat racing model ‘Cachalot’ Also 17th century herring buss, paddle steamer, coastal tanker, 24 in. simple yacht, two merchant ships, many other articles
MODEL BOATS SIGMA Simple 24 in. sailing model By I. A. Wright CoN construction by pin pricking through plan, cutting out, and cementing together the two halves of D2. After cutting out the hatch, pin to a flat building board protected by wax paper. Mark out positions of Fl to F8 and cut these from & in. balsa sheet. These can now be glued to D2. Cut out and cement the two halves of D1 and, when dry, cement to hull together with FIA, F3A, F4A, FSA, KIA, KIB, F7A. Leave to dry and remove from building board. Consiruct keel from § in. balsa sheet and lead and check fit into keel slot. Insert the length of 8 in. sq. balsa between D1 and D2 and glue to F3 to form mast support. Fit and cement brass rudder tube (18 s.w.g.) in correct position at stern. Fit and cement all screw eyes in their correct positions. Give ail interior parts one coat of sanding sealer. Place the side of the hull on a ;% in. sheet of balsa and mark the outline of the side of the hull. Cut out and place on another ;!; in. sheet of balsa, and cut out second side hull sheeting. Cement first side to hull, holding it in position with pins and elastic bands. When firmly cemented trim sheet down to D1 and D2. Repeat procedure for the cther side of the hull. When the sides are completed place one side of hull bottom on ;!; in. sheet balsa and cut out outline. Repeat for other side of hull bottom, remembering to cut out recess of keel slot on each piece. Cement one side in place, hold with pins and elastic bands and leave to dry. Repeat for other side. When both sides are dry trim down to D1. Lightly sand hull and apply three coats of sanding sealer, lightly sanding down in between each coat. Although it is not absolutely necessary to tissue cover hull, if an excellent finish is required this should be done at this stage. Apply tissue with sanding sealer and dope brush, taking care to keep hull surface free from wrinkles in the tissue. Sand hull lightly before applying final paint work. The prototype was completed by giving hull and deck three coats of clear varnish, lightly sanding down between each coat. The mast is constructed from 4 in. dowel and is 32 in. long. A hole is drilled in top and bottom to accommodate & in. of 18 s.w.g. brass tube, at the top for burgee bearing and at the bottom for mounting the mast on the hull. The top tube should project é in. and the bottom tube ; in. Drill hole horizontally through mast at position shown on mast plan for bracing strut. Screw in screw eyes at 73 in. from tip of mast facing forward and 2 in. from bottom facing forward. Give one coat of sanding sealer and one of varnish. The boom is constructed from ;%; in. sq. hard balsa and is 9 in. long and slightly tapered at one end. Round square section to approximately circular sections, screw in screw eyes 3 in. from either end. Give one coat of sanding sealer and one coat of varnish. The rudder is constructed from 4 in. balsa and mounted on a 20 s.w.g. rudder pintle as the plan. The rudder pintle is bound to rudder arm with strong cord and cement, Fit skeg to hull. Both the rudder pintle: shown on the autoas shown. and auto- rudder arm are constructed from 20 s.w.g. piano wire. The rudder pintle is placed in the rudder tube and then bent to support the rudder. The jib horse is constructed from a large paperclip opened out or piano wire about 18 s.w.g. and slightly curved to radius of jib. This is mounted on the foredeck as shown on the plan. The mast and boom pivot is constructed from 18 s.w.g. brass tube and 20 s.w.g. piano wire. Bind ? in. 18 s.w.g. brass tube to mast as shown. Construct pivot from 20 sw.g. shaped to an “L” shape of approximately 3 in. outside. Push one end into boom end and cement in place. When dry place in 18 s.w.g. bush on mast. Construct kicking strap from a paper clip forming a hook at one end and fit into bottom of brass bush, bend other end at right-angles and push through screw eye then bend round to side of kicking strap. The diamond bracing strut is made from 5 in. of 18 s.w.g. brass tube pinched at each end. Insert through hole in mast before pinching the other end. Cut ;/; in. slots in each end with a small hacksaw to accommodate diamond bracing. The burgee is made from a triangle of polythene cemented to 2 in. of 20 S.W.g. piano wire. Step mast on to hull by drilling a hole in the correct position for the brass tubing to fit into. Support mast by fore stay and the main stays. The rigging was made up from Terylene cord and used bowsies, screw eyes and shroud hooks as shown on plan. The large overall stays are fixed by looping the Terylene cord through the shroud hooks and fixing by bowsies. The top of each shroud is made into a small loop and fitted over the projection at the tip of the mast. 364
SEPTEMBER SIGMA 1965 ne CoPYRian? MODEL MAKER PLANS SERVICE The diamond bracing is fitted over and around the projection at the top of the mast, fitted into a slot in each side of the brace and finally threaded through a hole 2 in. from the base of the mast and tied and cemented around the mast. The sail shapes should be construcied on cartridge paper, using the sizes given on the detail plan. The paper pattern should be pinned to the sail cloth after they have been cut out, the jib pattern should be pinned down with the aft edge along the selvedge of the cloth. The mainsail pattern should also have the after edge along the selvedge. Cut round the patterns % in. out from each side—this forms the hem. Fold the hem in once and pin in position, remove the pattern from the cloth and fold hem inwards once more. This brings the hem to the correct sail shape and size. The hems are machine sewn, removing pins as you progress with the sewing. Tie loops of cord on to sails at places shown on plan and secure mainsail to boom as shown. Thread a stay from the bows to the mast through all the loops on the stayside of the jib and secure as on plan using a bowsie. Secure the top of the mainsail using a stay hook and threading it through a brass tube as shown, then tie loops around mast and through sail edge to secure edge to mast. Screw a screw eye into the end of the boom and rig the auto-rudder as shown on plan, choosing an elastic band that is not taut when connected in the correct way. The jib horse should be cemented in place after threading one end of a hook along it. Connect the other end of the hook to the bottom of the jib and attach jib sheets as shown. The foot of the jib is secured as near the deck as possible by threading a loop of cotton through a screw eye. When sailing lock rudder central, adjust jib at 10 deg. and mainsail at 15 deg. If the boat turns into the wind and then backs off and continues to do this, forming a series of arcs, move the mast forward; if the boat falls off the wind, move mast aft. Useful Plastic Bottle A clever little item in the Gadgetry category comes to us from reader Guy Batho in the form of a mini-squeeze bottle for priming small motors and a host of other jobs. This, the ‘Moulin Rouge’ perfume spray filler can be obtained from most chemists for a few pence—Guy’s cost him 1/-—and has been useful for topping up miniature accumulators, as an oil dispenser for poking into difficult to get at places, filling miniature fuel tanks (on aircraft with .020 glow motors). Furthermore, by removing the hollow needle and slicing off a portion of the polythene bellows, an elegant seal for the mounting of a deck whip aerial from piano wire can be formed. The wire should be given a kink to hold it secureo a ly in a small bore brass through passing tube the deck. The bottom end of the tube is sunk in a block of timber and a lead to the Rx is taken out from this end. The top of the squeeze bottle when Araldited over the head of the protruding brass tube keeps water from washing into the tube and from here into the model. To prevent damage to the eyes the top of the piano wire aerial can be protected by Aralditing on the plastic stopper from an old 3 in 1 oil can. you Guy for a useful little item. 365 MI Thank really
‘0 MODEL BOATS Notes for the Novice Yachtsman In Part 9 A. Wilcock ELASTIC discusses the basic function of the Fisher = S Fig. 30 type of vane gear ee Fisher gear is the next to be described; Fig. 13 gave a simplified illustration and, again, because it is a gear in very common use, we give an exploded diagram to enable you more readily to make one yourself. The Fisher gear is in some respects a mixture of the Lassel and Ballantyne gears in that it uses the pin and slot motion of the Lassel and the three pintle balanced assembly of the Ballantyne. It is probably the most extensively used type of gear, but this may well be due to it being, so far as the author is aware, the only gear that has been produced commercially in this country. The number of model yachtsmen who are also model engineers is limited, but one hopes that this present series will encourage more to “have a go”. Fig. 29 shows the author’s concept of the Fisher gear in exploded form. Fig. 30 shows the more conventional form that has been available commercially for some years. Both the forms and their operation will be described. The similarity of many of the features of Fig. 29 to those of Fig. 28 will be immediately seen. The quadrant with the slotted tail on the rudder post, main pintle, centre tube with scale and the main body with its side pintles are the same except that the side brackets to hold the top plate are better set near the side pintles as shown so that they do not impede the pin and slot motion. There is of course no reason why four side brackets as shown here should not be used with the Ballantyne gear. We then come to the vane and counterweight assemblies with the pin and slot motion g aracteristic of the Fisher gear. The top plate iwrangement of Fig. 29 enables a scale showing the ~ ‘broken vane angle to be readily observed; it also ~ atléws for the use of a guying/locking elastic as was described for the Lassel and Ballantyne gears. The locking lever or slide as illustrated can also be placed in this very convenient operating position. It will be realised that for commercial production it would involve more “fiddly” bits in both manufacture and assembly and no doubt these factors have influenced the very streamlined model of Fig. 30. The method of preventing the vane and counterweight assemblies of Fig. 30 type lifting off in the absence of a top a» plate should be noted. The fundamental operation of the Fisher gear is, however, the same whichever model is considered. Like the Lassel and Ballantype gears, the Fisher gives positive LEE helm by the pin being driven to the end of the slot. Weather helm is not positive, al- though as described with the Lassel gear, some slight locking action can be obtained with the pin in the slot. This is where some further action can be obtained from the tension of the guying elastic in the neutral or guying position of the Fig. 29 type. It is again necessary with this gear to sail with the sail plan very close to the balanced position, as would be the case for the Braine gear. The guying arrangements for the Fig. 30 design usually consist of two separate guy elastics, one on each side. The arrangements of these are legion and that illustrated using a cross bar on the body to sliders on the counterweight arm is only representative. The action of bringing a guy into operation is seldom as convenient as the arrangement shown in Fig. 29. For new readers it is worth reiterating and illustrating the proportions for the pin and slot arms. These are shown in Fig. 31. Essentially the angle of the vane arm is required to be adjustable between 30 and 35 deg. and the counterweight arm to be as close as possible to that of the vane arm for any particular setting, without adjustments to both the slot length and the pin arm length, which is not very convenient. The proportions must be a compromise. Note that the “pin” is on the counterweight assembly and the slot on that of the vane. If they were the other way round there would be no locking action at all since wind pressures on the vane would merely cause the pin to move in the slot. To obtain adjustment of the vane angle in the 380
SEPTEMBER broken condition, side adjusting screws on the top plate, as used for the Ballantyne gear, can be used. This is good since it is both precise and enables slightly differing adjustments for the two tacks. The alternative is to make the pin adjustable in a slot in its mounting arm. Two alternative forms are illustrated. The simple commercial type is a plain clamping screw, but with this it is difficult to obtain precise adjustments. The second is more complex, in which the pin position is adjusted by a screw thread feed adjustment which can be really precise. The latter in practice is worth the additional trouble to make, since to be able to adjust the vane angles critically can make all the difference between the boat “flying” on a course and just sailing there. Sailing with the Fisher gear is so similar to that with a Lassel or a Ballantyne that only a brief resume is necessary. When sailing on a close beat (see Fig. 5) particularly if a change of tack or a guy will be required before the course is completed, sail with the gear “broken”. That is with the body in the fore and aft position and the locking lever freeing the pin and slot motion. The tack screws or pin setting should have been adjusted in tuning up, before any racing was commenced. It is good practice Cy PIN ASSEMBLY VANE ARM as much as possible the need to vary the vane angle adjustment and know its optimum setting; one of the troubles about vane steering is that the approximate setting of a vane makes the boat behave so relatively well that too many don’t bother to seek the most out of it. Before leaving this gear a few ideas on dimensions will be helpful. While the pattern follows the Balantyne gear in many details, the replacement of the gear linkage, with its relatively close spacing, by the pin and slot motion calls for a greater spacing between the side pintles on the main body. A minimum spacing of 2 in. between these side pintles is desirable and for 10 Rater and A class 2% in. would be better. For gears on all but a 36 in. class boat the centre of gravity of the vane and counterweight should be 33 in. to 4% in. from the centre pintle, according to the size of the boat. Vane feather sizes will be discussed in a subsequent section. Full use should be made of the space between the side pintles for the pin and slot motion, since the larger it is the more precisely in general it can be adjjusted. Balance is easily achieved since the vane and counterweight assemblies are so similar in size and always to sail guy arm, a guy. All other courses should be sailed the gear appropriate fixed, angle. and Avoid the any body turned temptation to to ADJUSTMENT TO PIN BLOCK CLAMPED close beats with the vane in the broken condition as this ensures that this adjustment is always available, and should there be a wind shift while on a course you are all set for a tack or, with the flick of the with 19 65 the adjust the tacking screws from their optimum setting for a close beat, to sail a course not so close. The settings for a close beat are critical and are worth preserving when once found. Nevertheless, experience may show that slight adjustments are required—for a close beat—in different wind strengths. If required, these are likely to be a slightly closer vane angle in light weather and a slightly greater angle in heavy weather. Quite apart from hull design the rake of the mast can give rise to these variations. It is worth while trying varying the rake of the mast to reduce as much as possible the need to vary th vane angle good enough to use any old feather if you expect ments and their restoration later can so easily lose to get the most out of your gear, whatever type it may be. construction and the vane and counterweight should be made the same weight, so that their centres of gravity can be equally spaced from the centre pintle. This leads one to point out that it is worth making a couple of vane feathers while you have the gear in pieces and the scales handy, since it is not really for different weather conditions since such adjust- DEAR SIR, Congratulations on another winner in Suzie Q@. My son and I have built one each, his powered by a Frog 34 diesel and mine with a Merco 5 c.c. Glow. The boats have been built exactly to plan, rudder shape, size and engine Readers Writtle DeEaR SIR, In defence of the ‘‘Fail Safe’’ used by the members of the Manchester Club (see Round the Regattas, August), as far as I can remember, was the only one affected. my boat Obviously. the purpose of the fail safe system is misunderstood, as at the time that it operated to give ‘‘tick over’’ the battery lead to my Rx had fractured, and the boat was out of control. Without the fail safe, a high speed crash would have resulted, and I was therefore thankful that the engine throttled down, and two minutes with a soldering iron put things right, instead of a ‘‘rebuild’’. G. M. TIPTON, Manchester 22. position, etc., the only slight modification being 4 in. wide spray strips instead of } in. Having only finished them last week, and suitable local water for trial runs being non-existent, we decided to try them out for the first time at the Victoria Park R/C regatta. Due to teething troubles with David’s radio and my tank and prop, we were hopelessly outclassed, which was only to be expected on a first run. However, after spending all Monday on various mods. to radios, tanks and props, we went for a run to Wickstead Park on the Tuesday and the transformation was most marked. Both boats have a very fair. turn of speed, well over 12 m.p.h., which will improve further with more tuning I am sure. The turn cannot be 381 DMN faulted in my own humble opinion, as near equal in both directions as makes no difference, and as clean as a whistle if you’ll pardon the expression, in fact the running of the boats came well above all expectations. Any former misgivings about 5 c.c. being too much soon disappeared, there being no sign of torque reaction at all, in fact, I will go further and predict that this boat will outdo Pirana in the right hands. The kick round or _ snaking usually seen with Piranas with fast actuators is absent. I am using a ‘“‘Bonner Duramite’’ on rudder, one of the fastest I believe, and the turn can only be described as half skid, half lean in, the boat literally pushing up a wall of water and running round it. I should also add that with the rather old fashioned radio equipment we are using the weight of the boats is 63 Ib. After reading your article ‘‘The Next Step’’, doesn’t this boat fill the bill? Once again congratulations. R. A. RAMAGE, Bletchley.
MODEL BOATS Experimental Fins D. M. J. Hollom discusses two successful but unusual 10-raters with the reasoning behind them == since I designed and built Green Dragon, or E.X.J. as the original concept was christened, I have been asked why I chose such a peculiar configuration for the fin and lead and to what purpose. As with most things new, criticisms were rapidly forthcoming, heads shook and fingers pointed at the weed and, once again, the heads shook negatively. This was quite understandable as this very real snag had been envisaged from the outset, but as the project was purely an experimental one, to find out whether the theoretical advantages were practical ones, I was not unduly pertubed. It is, I think, a fairly widely accepted theory amongst designers that the optimum position for the fin is with the toe at, or about, the mid-section of the boat. This is fine in theory but the designer is then faced with the problem of keeping his ballast low down where it will be most effective in providing stability. If the fin is placed in this optimum position, then the lead must be spread up the leading edge of the fin in order to achieve a centre of gravity that is sufficiently far forward to enable the boat to float on her proper waterline. This, in turn, means that the centre of gravity will be high and the boat will lose sail carrying power. The other alternative is to move the fin forward from this optimum position, in which case the lead can be moved lower down whilst still achieving the same longitudinal position of the centre of gravity, thus enabling the boat to float on her designed waterline. Clearly the designer til has a problem—he can either have the fin in its optimum position and sacrifice some stability, or have maximum stability with the fin too far forward for really good handling. As with most things in designing, a compromise is the usual answer and in most designs the fin is probably a little too far forward and the lead a little too high. The keels of F.X.J. and Green Gragon are an attempt to overcome this problem. The fin has been placed with its toe on the mid-section, and the lead has been contained in a streamlined bulb which projects forward of the fin. In this way maximum stability is obtained as the centre of gravity is as low as possible, and the fin is theoretically in its correct position. The first version of this design, E.X.J., was designed nine years ago at a time when I was young and wanted a boat that would be exciting to sail; a boat that would plane readily and fast and yet still go well to windward. At the time the average weight of a 10 rater was about 26 to 28 lb. and so I designed E.X.I. to displace approximately 20 Ib., which with her bulb keel and low rig would, I estimated, give her the stability of a 26 Ib boat. A very flat scowlike section was chosen for her which was then modelled into what might be called a cross between the classic forms of the sea-going planing hull and that of the model yacht. The chines were carried high in the bow giving a Vee section forward with plenty of flare where it is most needed to supply lift just above the waterline. The greatest body depth was placed well forward, giving a long flat run aft. I feel that this form is very effective off the wind and if it can be achieved with an acceptable degree of volumetric balance has advantages while sailing on the wind, as the dissimilarity of the bow and stern helps to damp out any pitching motion. The governing factor is of course that this be achieved together with an acceptable degree of balance. For various reasons, E.X.]. was not completed until 1963. During that season she raced in club events with some considerable success and the following notes on performance were made: (i) In the object of this experiment, that of finding out whether this keel eliminated steering vices, it was very successful. On a reach, which I consider to be the most testing point of sailing, she would plane
SEPTEMBER 1965 (;REEN Dragon without any sign of broaching right up until the moment the boom dipped into the water. (ii) With her greater than average beam, flat scow section, and chine form, I anticipated that she would be a poor light-weather performer. On the contrary, she turned out to be quite outstanding in light conditions. (iii) In moderate winds she planes sooner than most boats, but not quite as soon as I had expected. Once on the plane she keeps planing well, and, as expected, faster than the heavier boats. (iv) In strong winds she planes almost continuously and still faster than most boats. To windward she lacks the stability and power of the heavier boats and in rough water she is quite definitely at a disadvantage. I believe that this is due more to the large flat surfaces than to the light displacement. Green Dragon is the same basic boat but with a redesigned fin to try and rectify the bad points of E.X.1. The draft has been deepened to give her more stability at a possible sacrifice of light weather ability. This is the version I am sailing at the moment, and after four months’ racing the conclusions are as follows: (i) The deeper draft seems to have made her very SECRETARY WENT [Continued from page 387] named, achieved 65.98 m.p.h. His second C class boat reached 63.92 m.p.h. to take the C class prize. The Ayrshire Trophy was also competed for at this meeting. This trophy is awarded for the fastest speed over five laps obtained from a standing start, the boat being only released and not helped on its way as is normal with the modern prop-riding hydroplane. Jim Hampton from Portsmouth was the winner with a speed of 48.7 m.p.h. obtained with his A class boat fitted with a home-built engine. Second was C. Everitt of Victoria with a C class boat “Min” and a speed of 47.13 m.p.h. This is the only competition of its type at the present time and general opinion has been that modern hydros will not take off successfully from a standing start, but after the performances at Blackheath some more thought will have to be given to the matter—maybe it is a good idea to get more variety into competitions. During the lunch interval, in company with the much more sensitive to changes in trim. She has only recently achieved an acceptable degree of tune, and I believe that there is still plenty of room for improvement. Handling characteristics are equally as good as E.X.]. (ii) The deeper draft does not seem to have affected her light weather performance, which still seems to be as good as ever. (iii) In moderate to strong winds performance is improved due to the extra stability, but the flat surfaces of the hull still hamper her in rough water. In conclusion I would say that from the handling point of view the keel is a complete success, and if it were not for the weed problem I believe that it would be ideal. To date, she has not been unduly hampered by weed, but it must be admitted that she has always sailed on reasonably weed-free waters. Perhaps if we ever obtain our Utopia we will have weedless ponds, and it will then be a practical proposition on all sailing waters. This experiment has at least satisfied my curiosity, and I hope that this article has managed to convey the ideas behind it, and to provide a little food for thought. St. Albans members and with the aid of the local hotel, I was able to test the tankard that the St. Albans club have given me as a memento of the Brussels trip. A nice gesture, which I much appreciate, and I can report that the only leak is in the right place! Thanks, St. Albans. I have sent the Editor a list of results for both the Blackheath regattas and perhaps with luck, as this report is already late, he can fit them in. July was not a good month, the clerk of the weather let us down, so let us hope for better luck in August. On the 22nd of that month I will be at Southampton to see what happens in their pairs only regatta. August Ist sees the Grand at Victoria and on the 28th-30th the Hydro International will be held at St. Albans, so it looks like a busy month for yours truly. of For the R/C Speed fans, September Sth is the date the eliminators for the 1965 Championships. [Concluded on page 390] 389


