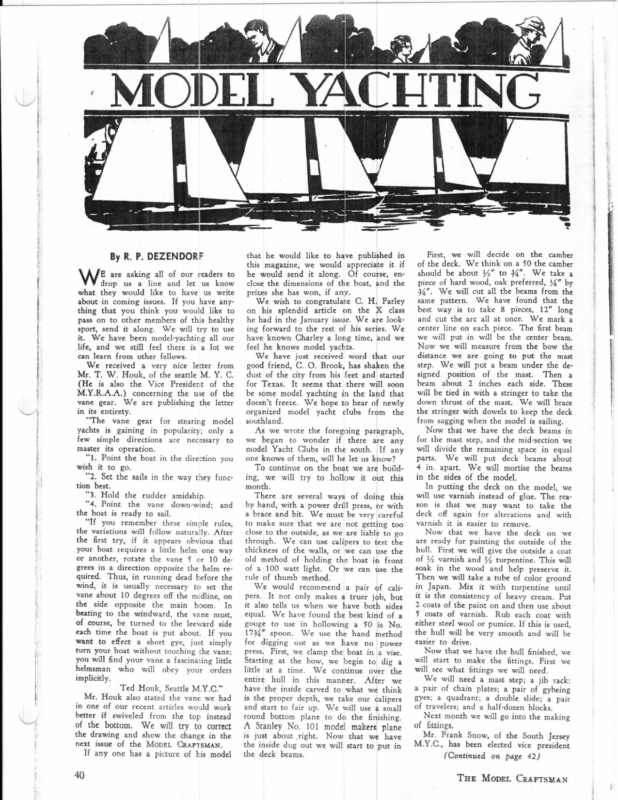
- Model Yachting. By R. P. Dezendorf.
- Here is technical guidance for model yacht builders, covering techniques for hollowing hulls, installing decks, and operating vane gear. The article also shared news from the national model yacht racing community, including club elections and regional developments

that he would like to have published in this magazine, we would appreciate it if By R. P. DEZENDORF E are asking all of our readers to drop us a line and let us know what they would like to have us write about in coming issues. If you have anything that you think you would like to pass on to other members of this healthy sport, send it along. We will try to use it. We have been model-yachting all our life, and we still feel there is a lot we can learn from other fellows. We received a very nice letter from Mr. T. W. Houk, of the seattle M. Y. C. (He is also the Vice President of the M.Y.R.A.A.) concerning the use of the vane gear. We are publishing the letter he would send it along. Of course, enclose the dimensions of the boat, and the prizes she has won, if any. We wish to congratulate C. H. Farley on his splendid article on the X class he had in the January issue. We are looking forward to the rest of his series. We have known Charley a long time, and we feel he knows model yachts. We have just received word that our good friend, C. O. Brook, has shaken the dust of the city from his feet and started for Texas. It seems that there will soon be some model yachting in the land that doesn’t freeze. We hope to hear of newly master its operation. model Yacht Clubs in the south. If any one knows of them, will he let us know? the first try, if it appears obvious that your boat requires a little helm one way or another, rotate the vane 5 or 10 de- grees in a direction opposite the helm re- quired. Thus, in running dead before the usually necessary to set the vane about 10 degrees off the midline, on the side opposite the main boom. In beating to the windward, the vane must, wind, it is of course, be turned to the leeward side each time the boat is put about. want to effect If you a short gye, just simply turn your boat without touching the vane; you will find your vane a fascinating little helmsman implicitly. who will obey your orders Ted Houk, Seattle M.Y.C.” Mr. Houk also stated the vane we had in one of our recent articles would work better if swiveled from the top instead of the bottom. We will try to correct the drawing and show the change in the next issue of the MopEL CRAFTSMAN. If any one has a picture of his model 40 beam about 2 inches each side. These will be tied in with a stringer to take the down thrust of the mast. We will brace Now that we have the deck beams in for the mast step, and the mid-section we will divide the remaining space in equal southland. the variations will follow naturally. After step. We will put a beam under the designed position of the mast. Then a As we wrote the foregoing paragraph, we began to wonder if there are any “The vane gear for stearing model yachts is gaining in popularity; only a few simple directions are necessary to “2. Set the sails in the way they func and cut the arc all at once. We mark a center line on each piece. The first beam we will put in will be the center beam. Now we will measure from the bow the distance we are going to put the mast the stringer with dowels to keep the deck from sagging when the model is sailing. organized tion best. “3. Hold the rudder amidship. “4. Point the vane down-wind; and the boat is ready to sail. “If you remember these simple rules, same pattern. We have found that the best way is to take 8 pieces, 12” long the in its entirety. “1. Point the boat in the direction you wish it to go. First, we will decide on the camber of the deck. We think on a 50 the camber should be about 4” to 34”. We take a piece of hard wood, oak preferred, 4” by 3%”. We will cut all the beams from the model yacht clubs from To continue on the boat we are building, we will try to hollow it out this month. There are several ways of doing this by hand, with a power drill press, or with a brace and bit. We must be very careful to make sure that we are not getting too close to the outside, as we are liable to go through. We can use calipers to test the thickness of the walls, or we can use the old method of holding the boat in front of a 100 watt light. Or we can use the rule of thumb method. We would recommend a pers. pair of cali- It not only makes a truer job, but it also tells us when we have both sides equal. gouge We have found the best kind of a use in hollowing a 50 is No. to 1734” spoon. for digging press. We use the hand method out as we have no power First, we clamp the boat ina vise. Starting at the bow, we begin to dig a little at a time. We continue over the entire hull in this manner. After we have the inside carved to what we think is the proper depth, we take our calipers and start to fair up. We will use a small round bottom plane to do the finishing. A Stanley No. is just 101 model about right. Now makers plane that we have the inside dug out we will start to put in the deck beams. parts. We 4 in. apart. will put deck beams about We will mortise the beams in the sides of the model. In putting the deck on the model, we will use varnish instead of glue. The reason is that we may want to take the deck off again for alterations and with varnish it is easier to remove. Now that we have the deck on we are ready for painting the outside of the hull. First we will give the outside a coat of % varnish and 4 turpentine. This will soak in the wood and help preserve it. Then we will take a tube of color ground in Japan. Mix it with turpentine until it is the consistency of heavy cream. Put 2 coats of the paint on and then use about 3 coats of varnish. Rub each coat with either steel wool or pumice. If this is used, the hull will be very smooth and will be easier to drive. Now that we have the hull finished, we will start to make the fittings. First we will see what fittings we will need. We will need a mast step; a jib rack; a pair of chain plates; a pair of gybeing gyes; a quadrant; a double slide; a pair of travelers; and a half-dozen blocks. Next month we will go into the making of fittings. Mr. Frank Snow, of the South Jersey M.Y.C., has been elected vice president (Continued on page 42) THE Mopet CRAFTSMAN
YACHTING (Continued from page 40) Instead of making a square to fit in the top, cut out an octagon as for a roof. To make this octagon, draw a circle of 11’-6” radius and mark We have just received word that Tex Foster has moved to 106-06 Jamaica Ave., Richmond Hill, L. I., N. Y. May we wish him as much success as he had in the other place. out eight successive chords of 8-10” We hear that the Clove Lakes M.Y.C. each. has elected the following for 1940: Com- you can add a narrow skirt all the way around. N. Y. (Sec’ys Please Note.). Chairman Race Committee, G. Bedford; Measurer, C. Francis. When the house is assembled, you can put in the little ornamental brack- Washington M. Y. C. elected the folfor 1940: Commodore, W. C. Schlaefer; Vice Commodore, J. J. Patrick; Secretary, T. E. Tate, 4116 Garrison St., N. W., Washington, D. C. Hartford Club The Hartford ful season since the club’s formation about four years ago. After a winter’s planning, the official racing season opened with a regatta at Deeper Hudson Model Yacht Club, Rensselaer, N. Y., on Sunday, June 19th. The yachts were sailed from skiffs-in gusty, southerly winds, and, in spite of the inexperience of the Hart- ford skippers in skiff sailing, they returned home tired and weary with a fair share of the winning points. Through the cooperation of Supt. Hol- lister of the Park Department, six hundre d feet of board walk was erected along the north shore of Batterson Park with a sailing enclosure approximately 600 feet long by 200 feet wide, bounded on three sides by ropes supported on floats. Beginning Sunday, July 2nd, races were held weather every permitting. weekly Sunday afternoon, Some Sundays only two or three boats were raced but on the final meeting, November Sth, eleven boats were racing in regular compet ition. Scores of the weekly races were tabula ted and recorded by Vice-Commodore Morris. Competition between the various boats was keen and hard fough t, with only a few points Separating the leaders from the rest of the flotilla at the end of the season. On November 11th, eight members of the Hartford Model Yacht Club journeyed to Providence for a “Fri endship” regatta with the Rhode Island Miniature Yacht Club of that city. Hartford skippers proved their superiorit y in spite of gusty northwest winds, winn ing the regatta by the margin of 135 to 63 points. The com- petition was keener and closer fought than the score indicated. This regatta officially closed the 1939 racing seaso n. The club is planning for a more active and successful and fall. So enjoy the keen sailing model year get this spring, behind the pleasure of ets, cut and sanded from summer club and building and yachts. Yours for better saili ng, B. A. Root, Sec’y wood— balsa or otherwise. As these are under the roof, they will not be plainly seen. The foundation again is stone. It is made in the same fashion as in the CRRNS tank. The tank itself is shown Model Yacht Club recently closed its most active and success- es If sen; Sec’y and Treas., A. Schnauffer, 31 Cornell St., Port Richmond, Staten Island, lowing — It should come out even. the cardboard used for this does not show enough thickness (see drawing), modore, H. A. Micha; Vice Commodore, Se painted red. square, and hence has only four sides. who has left for Texas. J. Brassington; Rear Commodore, L. Lar- (Continued from page 9) (Continued from page 21) of the Eastern Division M.Y.R.A.A. due to the resignation of Mr. C. O. Brook, 42 FERRYBOAT NEW JERSEY WATER TANKS 12 feet in diameter, but this can be varied to suit the material at hand. My method of making it is to take a section of two inch mailing tube (this comes fairly close to 12 feet in HO), and cut it to proper length. The windows will now be either painted or glued on the men’s and women’s cabins, The two pilot houses can be made from blocks of pine, 1” by 7%” by 9/16”, painted white, and the windows and name put on. When they are dry, fasten them to the deck. The tops can be made from pine, 7/32” thick, 14%” wide and 11%” long, painted grey and glued on. The stack base will be pine cut to dimensions as shown, painted white with grey top and glued into place. The engin e room skylight painted will white with a be made, grey top on: ventilators will be brass tubing sol-. dered together, painted black and set into holes in the proper places -on shaped out of wood, and painted black with the red and white insignia of the Department of Docks on each side, Drive pins into the hull at the go around awning at The iron rods which the tank are made from heavy thread and the knots, when trimmed down, turnbuckles. look something like The roof of the tank is made as shown in the pattern, from bristol board assembled with cement. The pinnacle is smaller. A plain round- headed pin can be used. The stack must be added as well as the spout assembly. The stack is a bit of dowel On account (%” in HO), but of its curved shape, spout must be made of balsa you want to carve it from the (unless harder wood). The frame for supporting the spout is of balsa or other strip wood, and the pipe out from the tank to the spout is dowel. The spout is hinged on a piece of wire run through the Supporting posts. as rope and coun- This is run around some pin heads at the top of the framework. This tank is placed close by the It must be so located that when the spout is down, in the busitrack. ness position, it comes over the cen- ter of the track, high enough to clear the tank top of your highest locomo- tive tender. He hi; 1” intervals, as shown, and push pins in to form the deck stanchions. When these are in, cut off the excess and tap them with a hammer to drive them down flush with the deck. Paint them deep red. The gates at the ends of the drive – ways can be made by driving a pin in each cardboard strip at the proper place, and soldering two numb er 26 brass wires across them at right angles. At the proper intervals, solder short pieces across these and the gates are completed. Paint the gates blac k. The best way to do the lette ring on the side of the hull is with a pen and white drawing ink. At each end of the upper deck cabin, drive a pin to represent the white, and pleted. flag pole. Paint these our ferry boat is com- PILE DRIVER A piece of thread supporting terweight. Sci Drill holes through the upper deck attached to a tiny slug of core solder Serves lik so proper intervals, 3/32” up from the should be wrapped some light weight bristol board, scribed vertically to simulate the staves in the tank. This is cemented on. W) The smoke stacks will be bottom. Cut off the heads and bend them up until they just touch the guard rail, 34” from the edge. Paint these the same color as the hull. Around this tre: also the house and glued into place. The, the deck. Th Ra uni (Continued from page 11) These pieces are important, for they keep the entire car from swaying when the machine is in operation. The center-to-center and cente r-to-in- termediate pieces can be simply cemented into place as they carry very little of the weight and assis t only in holding the shape of the car. Next comes the truss rod post sup- ports. These are 6” x 6, and are fitted between the two side sills and (Continued on page 44 ) THE Mopet CrarrsMANn wit win; mar! orth it \ desi; Pow with part No Ba (ext inc} pow: unit Plé Fin no des mor whi ter bot! time low 500¢ (exc C| Wh


