The Model Yacht is a published three times a year by the US Vintage Model Yacht Group
- 36R Class, Race 1. by Mike Stobbe
- 2018 Bill Bithell VM Cup Regatta Report. by John Snow
- Spreckles Lake: Golden Gate Park, San Francisco (a history). by Carl Brosius, Mary Rose Casa, Craig Carter, and Mike Stobbe
- Boat Repairs: Rub Rail. by John Stoudt
- TECH TOPICS: Balance. by T.J. Perrotti
- Danger Lurking! LiPo batteries. by Bill Ewing
- Planning and Building Scale Model Boats That Sail – Part 3 Building. by John Henderson

The Model Yacht Journal of the U.S. Vintage Model Yacht Group Volume 20, Number Two Summer 2019 Summer SPRING
The Model Yacht Summer 2019 U.S. VMYG Leadership President: John Y. Stoudt, jstoudt309@gmail.com ……………………………………………………….(610) 316-8695 President Emeritus: John Snow, jsnowj@comcast.net ….……………………………………………….. (978) 594-8521 Treasurer: Ernie Mortensen, usvmygt@gmail.com .…………………………………………….………… (858) 525-5217 Newsletter Art Director: Bruce Richter, richterbruce@gmail.com …………………………..………………(917) 575-2221 Newsletter Editor: Jeff Beck, beck.jeff@gmail.com …………………..…………..……..……………. (240) 252-0236 Editorial Staff: Ken Young, youngrun@sbcglobal.net……………………………………………………………..(630) 957-7490 Webmaster: Jim Flach, Jim.flach@gmail.com ……………………………………………………………(610) 299-8138 Membership: Ernie Mortensen, usvmygt@gmail.com ………………………….……………………. (858) 525-5217 Regatta Coordinator: Nick Mortgu, mortgu@comcast.net ……………….…………………………….. (609) 820-0509 Awards Coordinator: Rob Dutton, edwin653@aol.com………………………………………………………….. (703) 608-8812 Resources Coordinator: John Y. Stoudt, jstoudt309@gmail.com ……….…………………………. (610) 316-8695 Historian: Earl Boebert, boebert@swap.com ………………………………………………………………(505) 823-1046 Boat Yard: Jim Linville, linvillejim@gmail.com ………………………..………………………………..(781) 534-0203 Plans Coordinator: Ivor Walton, vintageplans@comcast.net Construction Advice: John Henderson, jgnhenderson@atlanticbb.net …………………………………….(443) 282-0277 Class Coordinators Free Sailed: John Fisher, jfisher577@gmail.com…………………………………………………………………….(719) 651-0762 Intl A Boat: Mike Denest, mjd12k@yahoo.com ….……………………..…………………………………(610) 316-3570 Schooner: Tom Alessi, alessitr@icloud.com…………………………………………………………………………..(610) 566-9504 Skipjack: John Henderson, jgnhenderson@atlanticbb.net ………………………………………………..(443) 282-0277 Unrestricted: Russ Trapani, teamlebanner@gmail.com……………………………………………………………(501)-789-3927 Vintage 36: Alan Suydam, alansuydam@comcast.net …………………………………………………….(301) 653-4899 Vintage Marblehead: Bruce Richter, richterbruce@gmail.com ……………..……………………………(917) 575-2221 Regional Coordinators International: ………………………………………………………………….…………………………………. Open Mid-Atlantic: ……………………………………………………………………….…………………………….Open North Central:.……………………………………….……………………………………………………………Open North East:………………………………………………………………………….……………………………..Open North West:………………………………………………………………………….…………………………….Open South Central:………………………………………………………………………….…………………………Open South East:………………………………………………………………………….……………………………..Open South West: Ernie Mortensen, usvmygt@gmail.com ……………………………………………………………..(858) 525-5217 UK Coordinator: Graham Reeves, graham@reevesmail.co.uk……………………………………………..+44 151 936 1140
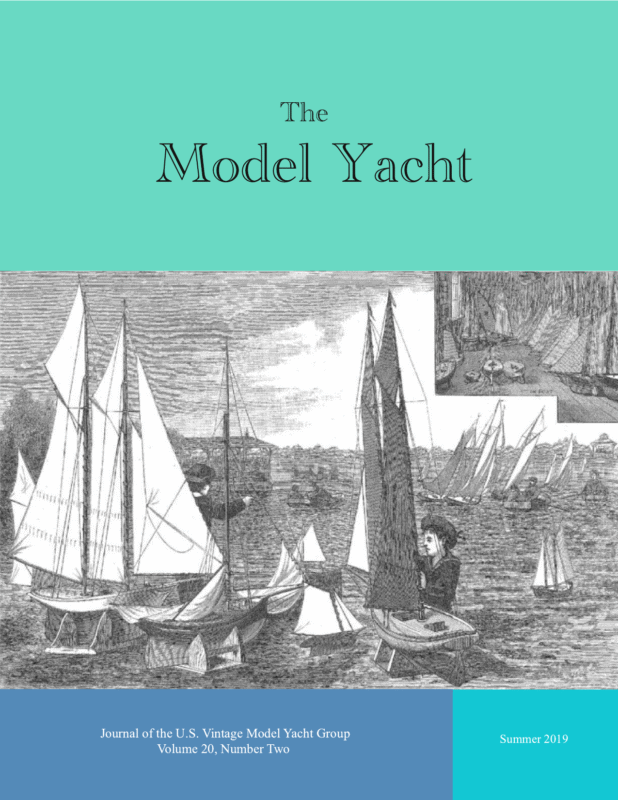
The Model Yacht The Model Yacht is published three times per year by the US Vintage Model Yacht Group. Copyright 1998 to 2019 by the USVMYG. Reproduction for noncommercial purposes permitted; all other rights reserved. Other copyrights are maintained by the original holders, and such material is used here under the fair use provisions of the relevant copyright acts for nonprofit research and educational purposes. Editorial Address: John Stoudt 309 Sundance Drive Chester Springs, PA 19425 jstoudt309@gmail.com Summer 2019 Summer 2018 The Layline President’s Message I need to share my thoughts and philosophy about the US VMYG and the boats we sail. Our membership is shrinking, mostly because we are getting older. ● We sail beautiful older boats, not the fast, contemporary ones that most AMYA members sail. ● While we have been trying for over a year to increase our membership, our outreach has been generally unsuccessful. ● Our efforts must be to grow our membership and to encourage others to get involved with vintage model yachts. We need to encourage individuals to build a boat, acquire a boat, or to get that boat their grandfather built out of the attic restored and on the water. Definition: A layline is a straight line (or bearing) extending from the next mark to indicate the course a boat should be able to sail on the one tack in order to pass to the windward side ofthe mark. (vsk. wikia. com/wiki/Layline) On the Cover: A British engraving from the mid 19th century accurately depicting both the full-size boats and model yachts of the day. Membership Renewals: The annual membership fee will be due and should be renewed with the publication of the first newsletter of the calendar year. Please reference “Membership” on page 34 for the dues amounts. Please use the form that accompanies this issue of The Model Yacht to complete your membership renewal. Marketing – I would like someone to head up a marketing effort for the US VMYG. We must creatively identify ways to increase our visibility and share what we do with the ultimate goals of improving our membership and meeting our mission and goals. If you are interested please contact me. Rules Revisions – John Henderson, one of our members, has been asking a number of very good questions about our rules. His questions are rooted in his desire to sail his boats in our regattas and to point out inconsistencies and ambiguities. He feels an organization such as ours should present rules in a consistent manner. During a recent conversation, I discovered that John’s expertise lays in document preparation in a regulatory environment. So I asked him if he would be willing to tackle a “regulatory” review of our rules. 1
The Model Yacht Summer 2019 Summer 2018 Inside Most of the work will involve developing consistency and removing ambiguity. After these rules are revised and vetted, the members will be asked for input and approval. Leadership Team……………….. i The Layline………………………1 Barnacles…..3, 4, 9, 19, 22, 24 Treasury Vacancy………………4 Clarification……………………..4 36R Class, Race 1 …………….5 2018 Bithell VM Cup………..7 Spreckels Lake………………..10 Boat Repairs……………………17 Balance………….. ……………. 20 DangerLurking………………. 23 Planning & Building Pt.3….25 Resources……………………….32 2019 National Championship Schedule……33 Membership Form………….. 34 . The Boats We Sail – Do not forget that we have included the Classic Marblehead and the older International A boats in the boats we support. So dust them off, fix them up, and sail them in a regatta. We will score them separately. US VMYG Clothing – If you would like to purchase a piece of US VMYG clothing you can go to this website and select what interests you. Corporate Casuals will get your order ready and ship it directly to you. There are ball caps, various shirts, fleeces, rain slickers and sweaters available. Show our colors and pick out a couple of pieces of clothing. Here is the link to our apparel page: https://shop.corporatecasuals.com/us_vintage_model_yacht_group/shop/home Additional Plans Available – We have added a few boat and miscellaneous plans to our website. These include: Boats Plan Additions J Selmer Larsen – V Bottom M Class Popular Mechanics – Zip M plans and article Miscellaneous Items (new category) AA Mattson – Pronghorn self tacking vane AL Link – self tacking vane gear AR Lassel – sliding rig AR Lassel – vane gear CHF – X Class adjustable rig JB Spowart – locking vane JYS – rig plan Register Your Boat – It is important that you register your vintage boat/s. This helps us know what boats are out there and will become part of a data set on vintage model yachts. Our hope is that someday this will be a good reference source. Go to this location to download the registration form: https://usvmyg.org/registration/ Boat Yard – US VMYG is making vintage boat sales possible on our Boat Yard page. A number of vintage boats have been posted and sold to date. 2
The Model Yacht Summer 2019 Summer 2018 The US VMYG thanks the authors for providing the rights to distribute these documents. If you have a boat or other vintage item you would like to sell please contact Jim Linville (linvillejim@gmail.com) to make the necessary arrangements. Please supply Jim with as much of the following information as possible: 1. What you want to sell and what is its condition. 2. List of optional equipment that will be included, rigs, electronics, stands, etc. 3. The price. 4. Its location and transportation options or “for local pick-up only”. 5. A high-resolution electronic photograph of the main object (more than one is better). 6. Your contact info, email, phone number. Articles – We need material to keep our Journal full of good material about vintage model yachts and related information. Please write for us. Submit your article to me (jstoudt309@gmail.com) and Jeff Beck (beck.jeff@gmail.com). National Championship Regatta Subsidy Program – The US VMYG will provide the following support to a local club that hosts a national regatta and complies with these guidelines. ● $15 per participant, up to a maximum of $300 (first event) ● $10 per participant, up to a maximum of $50 (each additional event) The following requirements are necessary for the reimbursement to be made: ● Submit the Regatta Dates for Approval ● Seek approval for the regatta from the US VMYG President at least 6 months prior to the event date. ● Confirm Participant Eligibility ● All participants of the NCR must be members of the US VMYG ● Send the list of participants to the membership secretary/treasurer ● Submit a Regatta Report ● Request Stipend from the Treasurer Publications for Sale – The US VMYG has six different publications for sale on the website and will be no longer accepting mail-in order forms. The proceeds of each purchase go directly to the US VMYG. These are: ● Yankee III by Earl Boebert ● Building Planked Models by Charles Farley ● Plank on Frame Workshop by Al Hubbard (75 minute video) ● Building Madcap, A Vintage Marblehead Model Yacht by Ivor Walton ● Restoring Tritonia: A Vintage Marblehead Pond Yacht from 1934 by John Stoudt ● How to Build a Model Yacht: A Detroit 24”/36” School Built Model Sailboat If you have any questions or comments please feel free to contact me or any of the other members of the leadership team. The link to these items is: https://usvmyg.org/store/publications/ Barnacles Herreshoff Exhibit— Lighter, Stronger, Faster: The Herreshoff Legacy an exhibit that celebrates Captain Nat— one of MIT’s first students—and the Herreshoff Manufacturing Company. This exhibit opened at the MIT Museum in mid-October, and will remain open through 2019. 3
The Model Yacht Summer 2019 Summer 2018 US Vintage Model Yacht Group Treasurer / Membership Vacancy Unfortunately, Ernie Mortensen needs to relinquish his position as Treasurer / Membership coordinator of the organization for the coming year (2020). He will be available to assist the new individual in assuming this role. The only requisites for undertaking this role is a love of vintage model yachts and a rudimentary knowledge of Microsoft Excel. Please contact John Stoudt. Clarification Author Ken Young In the article “In Search of the ‘Classic’ Marblehead” in the Spring 2019 issue of The Model Yacht, I stated that in the late 1970s taller rigs with main luffs of 80–82 inches were being used. I should have stated that luffs of that length were in common use by that time. John Snow pointed out that in the early 1960s the Central Park Model Yacht Club had begun to “tinker” with taller masts. John said that in 1960 he had a Marblehead with a 106-in luff, which proved impractical because of all the spreaders and stays that were needed to stiffen a mast that tall. With the advent of carbon fiber rigs in the 1970s, the longer luffs became more practical and easier to manage. Barnacle The Second Radio Controlled Model Yacht?—In last summer’s issue, Volume 18 Number 2, a Barnacle pointed out that in 1885 Nikola Tesla developed the very first boat controlled by a wireless radio control system. It wasn’t until the 10th of September 1934 that a second R/C boat surfaced. That’s when the Boston Traveler printed a picture with the headline “Radio Controlled Boat Operated by Pressing Button in Box Ashore”. The story began: “It was no less than sheer wizardry.” For the entire story go to: https://usvmyg.org/history/the-first-radio-controlled-model-yacht/ 4
The Model Yacht Summer 2019 Summer 2018 36R Class, Race 1 Sunday, March 31, 2019 The 36R Class season opener was held on Sunday, March 31st (unless you count the RagTop-StinkPot regatta, which also included 36R boats this year). Eleven skippers turned out on an absolutely gorgeous day. As an unexpected bonus, associate member Bruce Richter stopped in to see what was happening, while he and his wife were traveling from New York. Bruce is the commodore of the Central Park Model Yacht Club at Conservatory Pond in Central Park, New York. While not a freesailor, our Bruce Ettinger gave him a crash course and set him up with the club’s 36R-13. Author & photographer Mike Stobbe, Fleet Reporter Above: Ed Schoenstein turns out into the fleet. It was a beautiful day on the lake. Left: Commodore Richter (right) learns from JeffStobbe that freesailing is a casual walk in the park 5
The Model Yacht Summer 2019 Summer 2018 Starting by threes, racing got underway in very light unpredictable winds that ranged from south to west, except in Heartbreak Harbor where it was anybody’s guess which way the wind was blowing. The water level was very low, at the bottom of the bumper boards. This would be serious for M or X boats, but not a problem for shallow-draft 36Rs. There were a few very close finishes, usually on the running board, but for the most part, the flukey and shifty winds quickly scattered the racers. The Street Breeze was Dave Sands making hasty repairs to Black Magic still won this beat. particularly unreliable in the Deception Pass area, whereas further out, in mideach only one point apart. Unfortunately, Bruce lake, the winds were generally better. It was such Richter had to leave after racing only two rounds, but a beautiful day, however, that even losing was a he really enjoyed his first try at freesailing. Picking pleasant experience. Bruce Ettinger did poorly on deeper into the results, I compared the results of his his runs, but won every beat, which was good four boards with how each of the other competitors enough for first place. Jeff Stobbe was second, two had done against their first four opponents: when he points back, and Colleen Stobbe was third. Dave had to leave, Bruce Richter was actually in first Sands came in fourth. Third through sixth were place! Had he been able to stay for the entire regatta, Bruce might have carried gold back to New York, who knows? The complete results are: 1st Bruce Ettinger, 36R-55, Warp Speed 2nd Jeff Stobbe, 36R-32, Ace 3rd Colleen Stobbe, 36R-31, Grace 4th Dave Sands, 36R-34, Black Magic 5th Stephen Ma, 36R-15, Skylark 6th Mike Stobbe, 36R-48, Judy 7th Mary Rose Cassa, 36R-28, Manzanita 8th Bernard Price, 36R-61, Batteries Not Included 9th Ed Schoenstein, 36R-53, Beamy Up 10th Jason Spiller, 36R-24, Ruthless Robin DNF Bruce Richter, 36R-13 Jason Spiller looks wistfully across to his boat in Motor Boat Bay, Ed Schoenstein behind, then Dave Sands repairing his boat at lake edge. 6
The Model Yacht Summer 2019 Summer 2018 2018 Bithell VM Cup Regatta Report Author: John Snow Twelve VM skippers competed in 13 heats on Saturday, October 20, in the 11th annual (2007–2018) Marblehead Model Yacht Club (MMYC) Bill Bithell Vintage Marblehead (VM) Memorial Cup Regatta at historic Redd’s Pond in Marblehead, MA. It was one of four events in the MMYC’s Mini-Race Week activities encompassing US VMYG V36 and VM National Championships along with MMYC’s Chowder Race/Messenger Cup Regatta. Bithell Cup skippers enjoyed steady southwest breeze with some isolated gusts plus temperatures in upper 40s to 50s. 7
The Model Yacht Summer 2019 Summer 2018 Would you guys finish up already! This allowed for exciting once-around, windward–leeward course with south-end offset mark and north-end gate marks. Rick Gates, Jerry Leach, and Sue Martin ably supported me as Regatta Director for scoring. Cheryl Emmons and Biff Martin provided lunches to our skippers, guests, and volunteers. Eight Traditional (TR) 1930–1945 VM boat designs with four High Flyer (HF) 1946–1970 VM boat designs were raced while scored separately for award purposes. Hmmmm. . . . Was this attempt at a smile before or after Herb Dreher edged Thom McLaughlin (left) out for 1st place among HFer’s by less than 1 point? 8
The Model Yacht Summer 2019 Summer 2018 Results John Storrow with 1930s Madcap design won out over John Stout and his 1930s Tritonia by two points as Traditional VM winner. Eddie Wolf was third with Madcap for top three Traditional VM finishers. Herb Dreher was most consistent skipper overall with his 1950s Sunwind winning six heats at the top of High Flyer VM fleet. He also won the perpetual Bithell Cup rotated annually between the Traditional and High Flyer fleets. Furthermore, Herb edged out Thom McLaughlin with 1950s Halycon HF model by less than a single point. Cliff Martin came in third with 1960s Magic Dragon I. Marblehead Nautical Chart plaques were crafted by Tod Johnstone of Mystic, CT and awarded to six VM skippers: “top three” places in TR and HF VM fleets. Skippers traveling the greatest distances to race were Ken Young from Illinois, Colin Parker from Maryland, and Rob Dutton from Virginia. Barnacle Book Recommendation—An Addition to Your Library: Martin, David E. Ship Models, Math Models and Yacht Design, Sail Tech Press, P.O. Box 3391, Farmington Hills, MI. This is a very interesting book about ship models and their design. The book is intended as a preliminary design source on yacht design and math models. It includes XLS and XLSM versions of these four programs: PCLINES, PCHULL, PCMOLD, and PCSAILHULL. 9
The Model Yacht Summer 2019 Summer 2018 Spreckels Lake: Golden Gate Park, San Francisco Authors: Carl Brosius, Mary Rose Cassa, Craig Carter, and Mike Stobbe Aerial photo view ofGolden Gate Park, looking south. Spreckels Lake is seen just below the oval-shaped polo field. The Pacific Ocean is at right edge. Photo: Wikipedia. In the 1860s, San Franciscans began to feel the need for a spacious public park similar to Central Park, which was then taking shape in New York City. Beginning in 1871, Golden Gate Park was carved out of unpromising sand dunes that were known as the Outside Lands, an unincorporated area west of San Francisco’s then-current borders. Conceived ostensibly for recreation, the underlying purpose of the park was development of housing and the westward expansion of the city to the Pacific Ocean. The park drew its name from nearby Golden Gate Strait, the location of the eponymous bridge that was completed in 1937. Model yachting, in an organized sense, seems to have reached the San Francisco Bay Area sometime during or the1880s. Early traditions tell of openwater model sailing competitions on San Francisco Bay held between the boardwalk of Meigg’s Pier, located on the northern San Francisco shoreline (now the North Beach neighborhood) and Goat Island (now known as Yerba Buena Island). This would have been skiff sailing, whereby the model yachts would be chased down by their skippers rowing in skiffs. By 1893, park development had included the creation of Stow Lake, an oddly sited hilltop lake circling a large island. (It was located on the hill to enable gravity flow to other lakes in the park.) Model yacht sailors quickly discovered that the lake’s elevated position guaranteed good winds and an enthusiastic informal group soon formed up. From this group the San Francisco Model Yacht Club (SFMYC) was founded in 1898 at the home of J.E. Gunnung in San Francisco. Measuring about ½ mile by 3 miles, Golden Gate Park has stood as a symbol of natural beauty, easily earning the title as one of the most visited city parks in all ofAmerica. Today, Golden Gate Park possesses an array of unique and one-of a-kind features that sets it apart from other urban settings. One of these is Spreckels Lake, the home of the San Francisco Model Yacht Club. 10 1
The Model Yacht Summer 2019 Summer 2018 Others who were of assistance in this formative stage included James Brannan, one of the club’s first members and owner of the San Francisco Call Bulletin, a newspaper in which the SFMYC appeared frequently because of his interest and influence. Club activities involved meeting at the Commodore’s home and sailing on the waters of Stow Lake. Model yachting on Stow Lake left a lot to be desired, however, having an island in the middle, trees, bridges, and all manner of obstructions. Even worse, much of the lake edge was inaccessible, and they had to run the gauntlet of public canoes and rowboats also enjoying the park. It seems likely that club members would also have utilized skiff sailing on Stow Lake. Designed exclusively for model boating and measuring approximately 950 feet (east–west) by 420 feet at its widest, the irregularly shaped Spreckels Lake was clay-lined and bordered with pile-driven redwood side walls buried under a sloping rock rip-rap edge. It lies on the north side of the Golden Gate Park, at 36th Avenue. The lake was built between 1902 and 1904 and was first filled in February 1904 from groundwater pumped to it by the “Dutch Windmill” located almost a half-mile west. The new lake was considered much better than Stow Lake, being larger, more regular in contour and oriented lengthwise to very good winds. At this time, the territory surrounding the lake was practically virgin, consisting largely of sand dunes, with few trees and a sparse scattering of houses. A few years later, in 1902, the SFMYC, citing crowded conditions and consequent friction at Stow Lake, petitioned the Parks Commission to create a “model yachting lake” within Golden Gate Park. They pointed to the model yacht ponds commonly found in European and East Coast parks where model racing competitions drew large crowds. Their petition was backed by Adolph B. Spreckels, the wealthy Spreckels Sugar baron, who was also the San Francisco Parks Commission President at that time, and the project was ultimately approved. Adolph Spreckels took Adolph B. Spreckels, a personal interest in President ofthe Park moving the project Commission and booster of along. In recognition the model yacht pond of his efforts, the Parks project. Origin ofthe Commission named the moniker “sugar daddy”. lake after him. Spreckels Lake around 1904 looking north to Fort Miley and the Richmond District in the background Photographer Unknown The model yacht club moved from Stow Lake to its new waters even before the lake officially opened, immediately setting up an 1800-foot, two-board run and beat race course still in use today. The club held its first racing event there on Sunday, February 28, 1904 as soon as the only partially-filled lake contained the minimum four feet of water required to successfully float and race their boats. 11
The Model Yacht Summer 2019 Summer 2018 The first boat to win on the new lake was then club Vice-Commodore Henry London’s Imp; the Sautee, owned by L. S. Adams, finished second. Spreckels Lake would officially open nearly a month later on Sunday, March 20, 1904, when the club also held its first opening day regatta on the lake. Opening Day in March is still a tradition with the club. Soon, cup races became front-page news and crowds of fans on race days were so large that police and roped-off areas were necessary to restrain their enthusiasm. Betting on the races was rampant. The Park Commission donated a fine clubhouse in 1909, built of materials salvaged from the temporary ballroom and pavilion of the Saint Francis Hotel and columns from the Palace Hotel, which had been built as an emergency measure after the great fire and earthquake of 1906. Before trees grew to surround the lake, wind conditions were wonderful and, with these favorable circumstances, the popularity of model yacht racing in San Francisco rose to a high point, which has never since been equaled. SFMYC Clubhouse in Golden Gate Park, 1907–1938. Photographer Unknown 12 The original clubhouse was replaced by the SFMYC’s second and current clubhouse, which serves as meeting hall, storage facility, workshop, and library. Built in 1937–39, it stands on the western side of 36th Avenue at the intersection with John F. Kennedy Drive. The structure was built by the Works Progress Administration (WPA) for the use by the club in perpetuity, using a combination of donations raised by the club membership through private subscriptions, with some help from San Francisco city government. It was WPA policy that local sponsors provide 25% of the project cost.
The Model Yacht The structure’s red-tiled roof and concrete walls, with wooden, highceilinged interior reflects a WPA-era architectural fusion of Mission Revival and Craftsman Style that matches other buildings in the area including the Police Stables across JFK Drive to the south. The SFMYC clubhouse is considered one of the finest examples of the naturalistically styled, man-made model boating facilities in the world and one of the most beautiful. Summer 2019 Summer 2018 Entrance to the SFMYC clubhouse. Photo by Craig Carter Sometime in the late 1930s many of the irregular curves on Spreckels Lake were straightened and the rockfill shoreline was replaced with a vertical concrete edgewall surrounding the entire lake. The concrete wall, which featured a thick redwood “bumper board”, rested directly on the rockfill, burying it under a raised backfill which supported a new asphalt walkway flush with the top of the wall. At the same time, the water level was raised to within 2-4 inches of the lip. The vertical edge and bumper board meant that model yachts could safely approach all the way to the lake edge, while the high water level made it easy to launch and remove boats. The redwood bumper board has more recently been replaced with a plastic one. The lake is 2–3 feet deep at the edge, and 6 or more feet deep in the middle. While freshwater, it is murky with green floating algae. This, in fact, is an asset, because it blocks sunlight from reaching the bottom, so Spreckels Lake virtually never has a weed problem. The lake as it appears today, with the vertical edge and flush asphalt walkway. Photo by Mike Stobbe 13
The Model Yacht Summer 2019 Summer 2018 During the 115 years since its construction, the trees have grown up around Spreckels Lake, drastically altering the prevailing wind patterns. The lake is infamous for notoriously shifty and unpredictable winds, which make sailing on it very challenging. In general, the winds are light to calm in the morning and start building at midday, becoming strongest in the mid-afternoon, then softening again in the evening. With this in mind, the lake is generally used by powerboats in the mornings and sailboats in the afternoon. Seasonally, the winds are strongest in the summer, and nonexistent (or stormy) in the winter. It follows that the SFMYC formal season for sailboat races and powerboat events begins in early March and ends in mid–late October, with informal sailing and running of powerboats all year long. While all model yacht clubs serve R/C sailors, the SFMYC is unique in that it supports a power squadron, a freesail squadron, and a R/C squadron. The power squadron is primarily scale, mostly electric, but with an active steam group as well as some gas-fueled boats. The power squadron hosts local and regional events and every other year sponsors a well attended international event called “Model Boats on Parade”. View ofSpreckels Lake and large Monterey fishing boats, Model Boats on Parade, 2018. Photo by Joshua Dockery 14
The Model Yacht Summer 2019 Summer 2018 36R Class Free-sail boats on a beat. Photo by Bruce Ettinger Brisk winds on Spreckels Lake with 36R Class Free-sail boats in contention. Photo by Bruce Ettinger. The free-sail squadron sails developmental X-class, M-class, and 36R-class yachts. The club has adopted specific rules for sailing on Spreckels Lake: limiting draft and displacement for the X and M free-sail boats to keep older boats competitive. This has been very successful. The club has free-sail boats as old as 80 years that can and do sail with the newest boats. It should also be noted that the SFMYC is the only club left in the United States that still has an active free-sail squadron with a full regatta season. Most ofthe X-Class and M-Class free-sail boats are stored in the clubhouse and create a stunning display as shown here. Mike Stobbe (foreground) prepares for a 36R race. Radio-sail boats are also stored in the clubhouse. Photo by Carl Brosiu 15
The Model Yacht Summer 2019 Summer 2018 equation: SFMYC founded 1898 + Spreckels Lake completed 1904 + permanent clubhouse completed 1939 + enthusiastic SFMYC members with a wide range of opportunities for model boating + SFMYC’s shared stewardship of the lake and clubhouse with the San Francisco Recreation and Parks Department, primary caretaker and regulator = a thriving model boating community on Spreckels Lake! The radio-sail squadron actively supports eight classes: Infinity 54, ODOM, RX, Santa Barbara, Star 45, 10-Rater, Victoria, and Wheeler. Whether an R/C sailor in the SFMYC is just beginning and trying out the small Victoria, or is more experienced and wants to explore the challenges offered by one of the other larger classes with varying characteristics, there is ample opportunity to find the R/C class that matches their interest and skills. In addition to a full season of R/C sailing on Spreckels, the radio-sail squadron also typically hosts 2 to 3 AMYA national or regional championships each year. Spreckels Lake is open to any member of the public for model boating, without fees or permits. So when you come to San Francisco, visit the clubhouse, chat with members, and enjoy your time at Spreckels Lake, the home waters of the SFMYC and surely one of the most beautiful places on the planet. The SFMYC has about 165 members, and it flourishes because of the convergence of many special components which create a very fine Radio-sail Victorias racing on Spreckels Lake with family looking on Photo by John Blackburn 1 Much of this article is an adaptation by Mike Stobbe of “Golden Gate Park, Spreckels Lake, and the SFMYC”, published in the Spring 2014 issue of Model Yachting, the newsletter of the American Model Yachting Association (AMYA), printed herein with the permission of the AMYA. 16
The Model Yacht Summer 2019 Boat Repairs: Rub Rail Author and photographer John Stoudt with another boat off of your starboard rail and a gust of wind causes your opponent to take a hard left turn right into your boat. Sailing at Redd’s Pond in Marblehead, MA is a real thrill, and having the opportunity to take your 1934 Marblehead back to its home pond is amazing. I take the opportunity at least once a year to bring my M class boat, originally built and sailed on Redd’s Pond, back to sail on her home waters. With this comes a risk. Redd’s Pond has hidden hazards; the entire edge is ringed with either concrete or rocks and underwater obstructions. And of course, there are other boats in the water that can and do become their own hazards—like when you are on a beat The wind on Redd’s Pond can be fickle, steady over 15 knots, swirling along the graveyard, and generally unpredictable. Coupled with the physical conditions, this can be hard on your boat. Upon returning home from the 2018 Vintage Nationals I inspected the boat. Oh boy, did she take a beating, a few large dings in the hull and many in the rub rail. 17
The Model Yacht Summer 2019 3. Mix up a small batch of 60-minute epoxy. There should be enough epoxy mixed to repair all of the dings. 4. Use the mahogany sawdust to thicken the epoxy you just mixed. Mix enough “thickener” into the epoxy until it is the consistency of peanut butter. You should have a filler the same color as the damaged rail. 5. Carefully fill the damaged areas leaving a slightly larger amount of epoxy than necessary to have the repair remain flush. This will allow you to sand the area down flush with the rub rail. Allow the epoxy to cure completely before proceeding. The rub rail poses a slightly different issue as it is a very visible feature of the boat. It is a small half round piece of mahogany that is a good contrast and accent between the deck and the hull. How do you make a nice repair that is nearly invisible when complete? How does one go about this? The process is fairly straightforward using the following steps: 1. Carefully rough up (sand) each chip or dent to remove old finish, knock off splinters and rough up the area to be repaired. First clean the damaged area with sandpaper 2. Take a small piece of mahogany (the same as the original rub rail if you have it) and make a nice pile of sawdust. Collect this saw dust on a piece of paper. Thickened epoxy in place. Note that the filler is left proud so that the patch can be sanded flush with the finished rail Sawdust to be used as filler 18
The Model Yacht Summer 2019 6. Sand until the filled areas are flush with the surrounding rub rail. Use 220-grit open coat sandpaper on a small sanding block. Do not rush and regularly check the fix. 7. If an area is low repeat the application of thickened epoxy to the low spot. Roughen, apply, let cure, and flush sand. If you apply enough epoxy filler the first time you will not have to repeat this step. 8. Using your favorite waterproof finish (mine is Waterlox) apply multiple coats with a lint-free rag—allow each coat to dry. Make sure you wipe the surrounding areas with a clean cloth to remove excess finish. Make at least four applications. Repair ready to be sanded to final shape The finished repair This same process can be used to repair holes in the deck, hull and other areas. Good luck with your repair! If you have a repair technique you use on your boat/s please write it up and send it in to either myself or Jeff Beck our copy editor. Barnacle Minor Hull Repairs—Invariably your hull will get dinged up in a regatta and will need repairs. If the area damaged is painted, another good product to make the repairs is automotive body filler. Do not forget to seal it before you repaint. 19
The Model Yacht Summer 2019 Summer 2018 e c n a l a B Written and Illustrated by TJ Perrotti Most sailors know that a boat must “balance right” to sail correctly and efficiently, but what, exactly, does that mean? Let’s start the discussion by going back to the playground that we all remember as a kid and hop back on a see-saw or teeter-totter. This simple playground toy serves as the perfect analogy for the physics that Mother Nature imposes on a sailboat. The mechanics of a simple see-saw respond to and look for a balance of applied forces and moments in the very same manner as does a sailboat moving through the water. In the case of the playground toy, a little kid balances out a big kid by moving further away from the pivot point. Everyone’s happy. Further, there’s a net force that’s transmitted down into the see-saw base that’s equal to the sum of the weight of both kids. The sum of all related forces equals zero, and the sum of all related moments equals zero. Simple. 20
The Model Yacht Summer 2019 Summer 2018 In the case of a sailboat, you have underwater hydrodynamic forces on one side of the black box (hull, keel, rudder), and above water aerodynamic forces on the other side (sails, mast, rigging), but things must still balance out. When sailing in “steady state” conditions (i.e., smooth seas, constant wind speed and angle, constant boat speed, etc.) a sailboat is none other than a slightly more complicated see-saw, but with a pivot point that allows movement in multiple directions. Ultimately, the forces and moments must balance out if the boat is going to sail straight and steady. In this birds-eye view of the boat, we see that apparent wind acts on the sails (and rig) to produce a net aerodynamic lift force and a net aerodynamic drag force. By definition, the aero drag force is in the direction of the oncoming apparent wind, and the aero lift force is perpendicular to this. We can add these two force components together (as vectors) to find the net total aero force. And, we can break this total aero force down into two new components: aero drive force is in the direction that the boat is moving through the water, and aero side force is perpendicular to this. 21
The Model Yacht Summer 2019 Summer 2018 Those two force components must be equal and opposite to the hydro forces acting on the wet side of the boat, namely: the net hydro drag force, and the net hydro side force. If we add those two hydro forces together (as vectors), the resulting total hydro force is exactly equal in size to and exactly aligned with the aforementioned total aero force. In this stern-on view of the boat, we again see the aero side force and hydro side force that together are trying to heel or tip the boat over. This heeling force (or roll moment, really) is resisted by the “righting moment” (or RM) of the boat, which results when the center of immersed buoyancy of the heeled boat shifts away (laterally) from the boat’s center of gravity. Crew weight on the weather rail supplements this, too. Back to our see-saw analogy, equilibrium balance is achieved when: ● ● ● ● ● The weight of the boat equals the upwards buoyancy force. The aero drive force equals the hydro drag force. The aero side force equals the hydro side force. The heeling or roll moment (aero plus hydro) equals the righting moment. The yaw (or turning) moments balance out. Barnacle A Good Way to Carry Your Transmitters—Harbor Freight sells these aluminum cases that come complete with liner materials and a carrying strap. These cases come in two sizes. The small one will accommodate a single transmitter and the large one two. 22
The Model Yacht Summer 2019 Summer 2018 Danger Lurking! Author Bill Ewing Exploded battery shown with a similar battery for comparison transmitter “on” until the battery died (showing no response from a voltmeter) I placed it in my damaged battery plastic bin, checking every week or two to see if any voltage reappeared as itsometimes does. After a couple of months I noticed some current had built up enough to try to recharge it. After observing the re-charging process a couple of times over the next few hours, I retired to go upstairs. Yesterday I opened my basement door to find overwhelming smoke and burnt smell. Fortunately the house didn’t burn down … but I can see how this could occur easily. I had been charging a 9.6-V Lithium iron phosphate (LiFe) battery with my Thunder 680 charger. Several months ago, after accidentally leaving the 23
The Model Yacht Summer 2019 Summer 2018 and the ash from the explosion is abundant and dirty. Although usually cautious, and knowing that lithium polymer (LiPo) batteries can and do explode while charging, I thought that this was not the case with LiFe batteries. WRONG. They too explode. Shelfdamage caused by the explosion About an hour later the battery exploded, burning and scarring quite a large area. A nearby radio battery cover was severely burnt, the dry wall seared and scarred, and some edges of loose paper from a book 2 feet away clearly caught on fire. The teak shelving within 2 feet has been scarred and damaged, I was very fortunate that more serious damage was avoided, and have already ordered several battery safety bags to prevent reoccurrence while recharging. I also think about the many times I have recharged while being nowhere near the process. I hope this will be a warning to others that were not aware of the danger with LiFe batteries. PLEASE BE CAREFUL! Barnacle So You Need a Bow Bumper—Your boat does not have a bow bumper and you have been looking for a simple solution. Try Sugru—this advanced silicone technology bonds permanently to almost anything and then sets strong by turning into a durable, tactile durable, tactile silicone rubber overnight. It has a unique combination of technical properties: waterproof, heat- and cold-resistant, durable, flexible, shock-resistant, and electrically insulating (up to 24 V). You can easily mold it into the shape you want on the bow of your boat. It comes in many colors and has similar characteristics to that of cork. 24
The Model Yacht Summer 2019 Summer 2018 Planning and Building Scale Models that Sail Part 3 : Building Author and Photographer John Henderson In Parts 1 and 2 of this series, we discussed how to make preliminary calculations and analyses to predict appropriate sizes, weights, and sail areas suitable for a sailing scale model. We also discussed more detailed calculations covering displacement, helm balance, ballast, and weight distribution. We examined the elements of lines drawings for the original yacht and interpreted them for our modeling application. In all of this, we used a 1:23 scale model of the J-Class yacht Rainbow as a specific example. In Part 3 of this series, we will apply these results to build the model. There are many successful techniques that make a good sailing model. I will present ones that have worked for me, without claiming that they are the only good methods. I will try to indicate compromises and alternatives where useful. I will assert, however, that the approaches presented in the article will work together to make a successful model, and I suggest that significant changes be considered only after careful thought. I believe that these methods are suitable for any reasonably large R/C sailboat. Fig. 1. Framed Hull just offthe Building Board 25
The Model Yacht Summer 2019 Summer 2018 Frames and Building Jig Frames are generally spaced at equal intervals. A spacing of 4–5 in is usually fine for sailing models built as described herein. For convenience, the frames generally correspond to the sections on the drawings. It is sometimes helpful, however, to insert extra frames in areas where the hull shape changes rapidly, such as near the trailing edge of the keel on boats shaped like Rainbow. This can be seen in Fig. 1. Models are generally built upside down and constructed of wood planking over plywood frames. The frames are typically about ¼ in thick (this may vary depending on your source of plywood, but I think that more than this is overkill). The center of each frame is removed to form a “ring frame”, where the ring is about ¾ in wide. See Fig. 3 in Part 1 of this series. Unless you are desperate to minimize weight, the ring frames can be left in place permanently. Recall from previous articles that the frames must be “undersized” relative to the sections drawings by the thickness of the planking. When you lay out your frames for cutting, it is best to mark the centerline and the waterline on each frame. Before you declare success in frame set-up, check very carefully from the bow and stern to be certain that all of the centerlines and all of the waterlines are exactly in line. Also check again that each frame is perpendicular to the building board. Errors and inaccuracies here are very difficult to rectify later. Note that frames have “legs” to set the proper vertical height relative to each other (see discussion in Part 1 of this series). These “legs” can be drawn on the sections part of the lines drawing, where the relative height of each frame is shown clearly. The length of each leg is chosen to make the waterline (LWL on the plans) of all the sections be the same height above the building board. Obviously, these legs must be removed after planking and before laying the deck, but do not remove all of the legs until the waterline has been marked on the planking. The legs support the boat and provide a level reference for marking the waterline. I think that it is helpful to add sheer clamps and an inner keel to the mounted frames before planking begins. These can be seen in Fig. 1. These longitudinals help to hold the position and angle of the frames during planking. Since you have already worked out where the mast will be, this is a good time to reinforce the frames near the mast—perhaps with a compression post near the mast’s position, or by leaving a central part of that frame’s ring. It is also good to decide at this point where the chainplates will be fastened and put some hardwood or plywood between the relevant frames to hold the chainplate screws or bolts (best not to rely on the deck planks alone). I think it is easiest to taper the edges of the frames before they are installed. The amount of taper of each frame can be determined from the waterlines drawing. Sketch a frame of the correct thickness on this drawing and note the different dimensions of the forward and aft surfaces – this is the amount of taper needed. Note also that the amount of taper changes somewhat as you go around the frame’s perimeter. Also note that the sections drawings give the location of the largest surface of each frame, so frames that are forward of the maximum beam have their aft faces at the section location, and frames aft of maximum beam have their forward faces at the section location. Transoms are often tricky, especially if they are curved and raked. Be sure you understand the drawings. I generally add a block of wood to the last (transom) frame and shape that block to form the curved and raked transom. Cheating, maybe, but a lot easier than trying to plank such a transom. 26
The Model Yacht Summer 2019 Summer 2018 Ballast can check this on dry land by suspending the boat at the calculated center of buoyancy and making sure that it hangs level. The dominant single weight item is the lead ballast, which should be located at the center of buoyancy. Desirably, the radio gear should also be located at the center of buoyancy, but heavy items, such as the battery, can be moved to “trim” the weight distribution. To protect yourself against inaccurate estimates or other surprises, it is prudent to save a little ballast for last minute addition—perhaps less than a pound for a model of this size. The biggest unknown is probably the hull weight, which can be determined before the exact ballast casting needs to be made and installed. You need to work out the weight and location of the lead ballast. If you are working from plans for a fullsize boat, the indicated ballast volume may or may not apply to your model. In general, since models will not be carrying freight or have interior furniture, the ballast/displacement ratio is higher than full-size boats. Said differently, you may need more than a scale-sized volume of lead in order to get the boat to sink down to its lines. So, how much lead ballast do we need? In Part 2 of this series, we calculated the total volume (and hence weight) of the boat. This weight is the sum of the weights of the bare hull, the deck, the rig and sail, the radio gear, the rudder, and the ballast. You can weigh your radio gear exactly, but the other components will have to be estimated at this point. If you make a lead casting, the goal should be to get reasonably close but not go over the required weight. This allows for correction and fore-aft trim adjustment when you are nearing completion. If you plan to make a lead casting for the ballast, you must work out its shape (unless it is a bulb on the bottom of a fin). It may need to match the keel shape and its volume distribution must match the required center of gravity. The full-size boat plans are a guide for the distribution, but they may not be exact for modeling purposes. Estimate or calculate (use Simpson’s Rule, per Part 2) the volume of lead, and note that solid lead weighs 0.41 lb/in3 . You will make a wooden “plug” that is the exact shape of the lead and use it to form the mold for casting These weight estimates are, or course, heavily dependent on the size of the model, but here are some actual component weights for the Rainbow example model of this series (the model was about 68 in LOA, 11-in beam, and weighed about 23 lb when finished): ● bare hull, without epoxy coating or deck = 3.3 lb ● hull with epoxy coating (not fiberglass) and rudder = 4.2 lb ● radio gear (2 sail servos, small rudder servo, batteries, receiver) ~ 1 lb ● mast, sails, rigging ~ 2 lb ● ballast ~ 16 lb If you have trouble calculating the volume, you can work with an approximation: Before you cut and shape the wooden “plug”, measure and calculate the volume (length x width x height) of the (desirably) rectilinear wood block from which you will make the keel shape. Weigh that rectilinear block and then calculate its density in ounces per cubic inch. Then make a wooden shape for the lead casting from this block of wood. Weigh this keel-shaped wood. Dividing the weight of your shape by the density of the original block gives the volume of your shape in cubic inches, which you can multiply by 0.41 to get the weight of lead of that shape. The weight should be arranged so that the center of gravity is at the same fore-aft location as the center of buoyancy, calculated in Part 2 of this series. You 27
The Model Yacht Summer 2019 Summer 2018 For a simple sand casting, make sure the shape is appropriate for getting the plug out of the sand. Add support for fastening the ballast with bolts. An alternative is lead shot, which can be dumped into a hollow hull (make sure it is strong enough) and epoxy added to stabilize everything. Note that lead shot is 2/3 of the density of solid lead (I think this is independent of shot size as long as the shot balls are small compared with the space they fill), so the center of gravity will be higher, with some decrease in righting moment. It is probably a good idea to fiberglass the outside of the hull where it will contain the lead shot, just for strength. “correct” wooden boatbuilding technique of spiling each plank so that every plank runs the full length of the boat. Instead, I use the generally accepted strip planking practice of running full-width planks parallel to each other until the edge-set (sidewise bend) becomes troublesome, and then I start a new section of planking where the planks can lie easily on the curve of the hull. The two sections will meet in a kind of football-shaped gap, which is gradually filled in. See Fig. 2. You will probably find that the overhanging stern area requires considerable twist in the planks. I try to maintain full-length planks, for appearance sake, because I varnish the hulls. Painted hulls do not need to be so fastidious. I get a little more casual about “stealer” planks once I get below the waterline, where it will be painted. Planking the aft end of the keel, near the rudder, is often the most problematic, but it yields to patience and care. Planking I prefer cedar (usually western red cedar) for planking, and I generally cut it into ⅛ by ⅜-in strips. Straight-grained lumber is available, and it can be cut, planed, sanded, and bent easily. For a model like this (i.e. one that is relatively long and narrow) these strips take the required bends without soaking or steaming. That said, my own practices do not always follow the traditional and For boats like this one (long and narrow), the planking above the waterline will not be much different regardless of whether you spile or strip-plank. Fig 2. Strip Planking in progress, showing “football” 28
The Model Yacht The “football”, which might be undesirable if visible, is entirely below the waterline, where it is covered with bottom paint. I note further that the original Rainbow was built of steel, so faithful reproduction of the building material and technique is not practical in a sailing model. Summer 2019 Summer 2018 Fig 3. Deck planking and layout Successful strip planking, especially if you intend a hull finished bright, does require some careful beveling of the plank edges, and some careful tapering of the planks where they meet in the “football”. Take the trouble to make the edges fit and the planks to lie as uniformly as possible. I generally do not cover the hull with fiberglass cloth, except in areas of stress such as the ballast keel. Instead I simply coat the planks with a couple of applications of epoxy resin. With good fairing before applying the epoxy and with careful sanding of the epoxy itself, the wood is sealed, and a smooth surface is created for the application of varnish and paint. If you plank carefully, you don’t need a complete covering of fiberglass cloth for strength or for water tightness. The interior of the boat should be waterproofed. An easy way is to apply one or two coats of epoxy resin (without fiberglass cloth) to the interior of the hull before the deck goes on. Waterproofing the underside of the deck is not so straightforward. A plywood deck can simply be epoxy-coated on the underside before it is attached. Epoxy could also be applied to each plank of a planked deck before application, but this is likely to be very wasteful of expensive epoxy. I have had good luck with simply coating the underside of each plank with water-resistant wood glue (e.g., the waterresistant versions ofTitebond), which is less expensive, less wasteful because you don’t have to pre-mix a fixed quantity, and dries to a sufficiently “waterproof” coating for the underside of the deck. The deck itself could be sheet plywood or strip planks. Plywood may be less desirable, because decks generally involve compound curves (i.e., the deck curves both fore-and-aft and athwartships), which are difficult to do well in sheet material. Strips could either run parallel to the centerline or parallel to the edge of the deck. For long and narrow boats, following the curve of the deck edge is not difficult and generally does not require steaming. For models in the length range of 5 ft, deck planks of ⅛ by ¼ in are reasonable. Strip planking, with minimal spiling, almost always works better on long, narrow hulls, such as pre-WW2 racing boats. Most Marblehead Class hull shapes can probably be built without too much spiling. Shorter or fatter boats (a catboat would be an extreme example) probably would require spiling and maybe steaming. 29
The Model Yacht Summer 2019 Summer 2018 Rudder Post and Tube The rudder post fits into a properly sized tube (I generally use a 3/32-in post and a ⅛-in OD tube). The tube is mounted with epoxy at the bottom of the boat and extends upwards either through the deck or as high as possible below deck level. Sometimes, if the top of the tube is below deck level a small amount of water works up the tube. I think this quantity is more annoying than dangerous, but if it bothers you then extend the tube above deck level – of course, this requires that the rudder-servo connection be above the deck also. Fig. 5. Main hatch framing, with sail servos If the rudder is on the trailing edge of the keel or is mounted to a skeg, then it is good practice to install a hinge at the bottom. There are many good solutions. My own favorite is to attach a small flat plate to the bottom of the keel, solder a 2-56 nut to this plate, mount a ⅛-in OD tube at the bottom of the leading edge of the rudder, and run a 2-56 screw through the nut and into the short tube on the rudder. See Fig. 4. Note the reinforcing wrappings around the rudder post at the top of the rudder and the short tube at the bottom of the rudder. Hatches Hatches are a necessary evil. Seaworthiness is never improved by the addition of hatches. They should be as small and narrow as is consistent with maintaining and replacing the radio gear. Their location should be planned before you start construction. Desirably, they are over the center of gravity, since radio gear is non-negligible weight. They must be far enough away from the mast that they do not interfere with a boom vang or the sheets. It should not be too difficult to remove the hatch cover, especially if the ON/OFF switch is inside. And, above all, a hatch must be watertight. I think that it is often convenient to use the hatch opening as a carrying handle, since it is at the center of gravity. This adds the additional design parameter of strength. Make hatch frames that are robust enough, and glue them securely to the hull frames. Fig 4. Rudder mounting 30
The Model Yacht Summer 2019 Summer 2018 Water tightness can be achieved in several ways. Arguably, the best is to screw down the hatch cover onto some kind of rubber gasket. This is also the least convenient at the launching site, especially if the switch is inside. An alternative that may work well enough (and is what I normally use) is to raise the hatch frame ~½ in above the deck, keeping the hatch (especially the hatch width) as small as possible, and making a carefully fitted hatch cover. This is what is shown in Fig. 3. If you have any doubts, put your boat into the water, grab the top of the mast, and pull it downward, observing how far you can heel the boat before the hatch edge is submerged. You may or may not be pleased with the results, and you may become convinced that a screwed-on, gasketed hatch is in your best interest. them after the deck is in place. Plan servo and battery locations with both hatch access and weight distribution in mind. Fig. 5 shows the mounting of the sail control servos, with all mounting screws and servo arms accessible through the hatch. Fig. 6 shows the installation of the rudder servo adjacent to the rudder post. (The rudder post is the angled brass tube emerging from the kingplank, and the servo is offset to port.) The rudder servo’s arm and the “tiller” arm on the rudder post should move in a parallelogram. The photo shows that the servo is mounted at an angle so that the axis of rotation of the servo arm matches the axis of rotation of the rudder post. Radio Installation This topic has been covered thoroughly in many articles for many classes of R/C boats. There is nothing unusually challenging about installations in one-off scale models. Work out how the sail and rudder servos will be arranged before the deck goes on. Install any needed supports for the servos. It would be prudent to do a temporary installation of the servos to be sure everything works, BUT, leave them in place only if you are certain that you can get access to every screw and adjustment after the deck is on. Otherwise, remove them and re-install Fig. 7. Ah yes, the obligitory “boat under sail” picture As stated at the outset, this article describes techniques that have worked for the author. Other approaches are possible. I encourage written contributions that describe other successful methods (or lessons learned from unsuccessful methods). Fig.6. Rudder servo installation 31
Summer 2019 The Model Yacht Resources Plans: • A.J. Fisher (http://www.ajfisher.com/) • Pinterest (http://www.pinterest.com/pin/506866133039763052/) • Solomons Island Model Boat Club (https://sites.google.com/site/simbclub/home) • Sublime Boatworks (http://www.sublimeboatworks.com) • The Vintage Model Yacht Group, UK (http://www.vmyg.org.uk) • US Vintage Model Yacht Group (http://www.usvmyg.org) Hulls: • Biff Martin, Marblehead, MA – Biff Martin (978-828-9765) • Blue Crab Model Yacht, Cambridge, MD – Scott Todd (410-310-2453) • The Vintage Model Yacht Group, UK (http://www.vmyg.org.uk) Construction Manual and frames for Wampum • Steve Deligan, stevedeligan@gmail.com (www.rcmodelyachts.com) Parts and Tools: • Horizon Hobbies: https://www.horizonhobby.com/ • Long Beach RC, Hickory Corners, MI (http://www.longbeachrc.com) Micro-Fasteners: http://www.microfasteners.com/ • Micro-Mark: https://www.micromark.com/ • MidWest Model Yachts, Plainfield, IN (http://www.midwestmodelyachting.com/) • Model Yacht Fittings, The Villages, FL (http://www.modelyachtfittings.com) • SAILSetc (http://www.sailsetc2.com/store/index.php/products-by-category/fittings/vintage-style.html: • ServoCity: https://www.servocity.com/ • Small Parts: https://www.smallpartsinc.com/ • Tower Hobbies: https://www.towerhobbies.com/ • West Systems: https://www.towerhobbies.com/ • Worth Marine, Marblehead, MA http://www.worthmarine.com/store2/) 32
Summer 2019 The Model Yacht 2019 National Championship Regatta Schedule September 26 – 29, 2019 Eligibility: Skippers of Remote Control (R/C) Vintage Marbleheads, Vintage 36/600s, Schooners, Skipjacks, Unrestricted Models, International A Boats, and other vintage model yachts. Membership in the US Vintage Model Yacht Group is required and the American Model Yachting Association is encouraged. The sailing location is Tel Hai Camp and Retreat Center, 1101 Beaver Dam Road, Honey Brook, PA 19344. This location can be accessed from either the Downingtown (Exit 312) or Morgantown (298) interchanges of the Pennsylvania Turnpike. Exit 312 is about 25 minutes to the lake, and exit 298 is about 15 minutes to the lake. Schedule: THURSDAY, September 26, 2019 12:00 noon – Check-in 12:30 – Welcome; Skipjack/Unrestricted Models, other boat skippers’ meeting 1:00 – 4:00: Skipjack and Unrestricted Model yacht racing (scored separately) 4:15 – Awards presentation NOTE: Other boats, for example, could be a cat boat or lobster smack. FRIDAY, September 27, 2019 9:00 am – noon: Schooner/International A Boat skippers’ meeting with racing immediately after All fleets (bulb/fin keel) will be raced together but scored separately Noon – 12:15: lunch (provided at site) 12:45 Schooner/A Boat awards presentation Vintage 36 skippers meeting 1:00 – 4:00 pm: Vintage 36/600 racing 6:30 pm – Picnic sponsored by CSMYC NOTE: 9:00 am to 4:00 pm – Guest event: Trip to Winterthur Museum and Gardens SATURDAY, September 28, 2019 9:00 am – noon: Vintage 36/600 racing Noon -12:30 pm: lunch (provided at site) 12:45 – Vintage 36 Awards Vintage Marblehead skippers’ meeting 1:00 – 4:00: Vintage Marblehead racing 6:30 pm: Regatta dinner at local restaurant NOTE: 9:00 am to 4:00 pm – Guest event: Trip to Longwood Gardens SUNDAY, September 29, 2019 9:00 am – noon: Vintage Marblehead racing 12:15 pm: Vintage Marblehead, Craftsmanship and Sportsmanship awards presentation Register online at: https://form.jotform.com/90377600151955 33
The Model Yacht Summer 2019 Summer 2018 Membership Form (2019) NAME ___________________________________________________ AMYA # ______________* First Initial Last STREET _____________________________________ PHONE # ___________________________ CITY ____________________________ STATE ___________ CTRY __________ZIP _________ Email Address ____________________________________________________________________ (required) *The US VMYG recommends membership in the AMYA. DUES – emailed newsletter (new members) $30.00 for U.S., Canada, and Overseas DUES – mailed newsletter (we ask current members to help reduce costs – select emailed newsletter) $40.00 for U.S. and Canada $50.00 for Overseas Life Member Contribution in the amount of $ _______________ COMPLIMENTARY MEMBERSHIP – The US VMYG makes complimentary memberships available to museum personnel, school directors, et cetera by email only. If you would like to have a complimentary membership for your organization please provide an email address for the individual who will be receiving the newsletter and other communication. Organization: _____________________________________________________________________ PREFERRED METHOD OF PAYMENT: You may now join/renew electronically at: https://form.jotform.com/90405575663966/ Mail in membership: You may also send a check along with this form for the correct amount to: US Vintage Model Yacht Group P.O. BOX 9721 San Diego, California 92169 NOTE: The US VMYG will not share your personal information with outside parties. 34


