The Model Yacht is a published three times a year by the US Vintage Model Yacht Group
- Onward, Big and Little (10-Raters). by Earl Boebert
- The US VMYG Vane. by Earl Boebert
- Yankee III Update. by Earl Boebert
- Multiconic Design of Hull Surfaces. by S.S. Rabl (1958)
- Model Sailboats: The Technical Side of a Fascinating Hobby. by Samuel S. Sanford (1930)

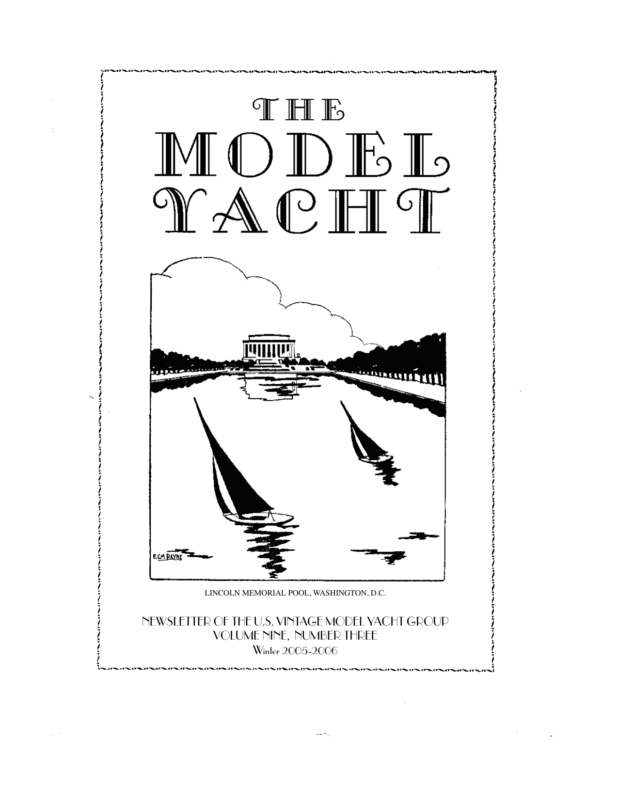
LINCOLN MEMORIAL POOL, WASHINGTON, D.C. NEWSLETTER OF THE U.S. VINTAGE MODEL YACHT GROUP VOLUME NINE, NUMBER THREE Winter 2005-2006
NEWSLETTER OF THE U.S. VINTAGE MODEL YACHT GROUP VOLUME NINE, NUMBER THREE Winter 2005-2006 Editor’s Welcome W ith this issue we close out our ninth year of publication. As always, we hope you enjoy reading our efforts as much as we enjoy hunting up the material and presenting it. Like all editors, we are constantly on the look out for material, and if you have something to offer, be it construction, history, workshop tip, or some interesting experience with a vintage boat, please send it to the Editorial address at the masthead. Since we are in the middle of the building season, this issue features plans for interesting boats. We have here a project for any size from one to (if you are so inclined) twentyfive feet LOA. In addition, we reprint a 1930 article describing how to build a Boucher Curlew, one of the most popular sailing models ever. At 31 inches, she is large enough for radio gear and perfect for small-scale “messing about in boats.” One thing we are especially happy about is the development of the USVMYG Vane Gear, described in this issue. We hope this will help increase interest in free sailing, and support the US team in the UK/US Challenge Cup series for 36 Inch Restricted Boats, which so far has been a sweep for the UK. The next round is in 2007, at San Francisco and San Diego, and new skippers are welcome. Finally, we offer an article on developing plate shapes for the much-maligned “sharpie” designs. The geometry may seem complex at first, but studying it will be worthwhile. Ebbs and Flows The President’s Message T Vintage Membership he VMYG annual membership is $20 for three issues of our newsletter – “The Model Yacht”. It is $25 for members outside the US and Canada. The VMYG lifetime membership is $100. Members also have access to technical assistance and vintage model plans. To subscribe to or renew our newsletter and services, send $20 or $25 check (payable to US VMYG) or cash ($100 life membership) to: John Snow, c/o US VMYG, 78 East Orchard Street, Marblehead, MA 01945. For detailed information, you can call me directly in Marblehead @781-631-4203 or visit the VMYG Web Page at: www.swcp.com/usvmyg 2006 VMYG National Events Dates and locations for our 2006 National events have been finalized. The R/C Vintage M regatta will again be at Spring Lake, NJ August 19 & 20 and will include R/C V36 racing. Our Traditional Sailing Craft/Scale regatta for R/C boats will be at the Mariner’s Museum in Newport News, VA on September 23 & 24. Contact John Henson for VM event details at 732-458-1370 or senlivjh@aol.com Check with John Atwood to confirm the activities planned for the Traditional event at 757-596-9701 or Earl Boebert Page 1 john.atwood@tea.army.mil
Vintage Etcetera V36 Models The VMYG continues to monitor interest in 36-inch R/C V36 designs. Check with Alan Suydam, acting coordinator, for further insights on potential 2006 V36 activities at: 301-737-1927 or asuydam@peoplepc.com Potential 36R Free-Sail Regatta San Diego Argonauts MYC members are building V36 Class design models this winter with the plan to free-sail them with vane gears at their home sailing site. Ernie Mortensen, San Diego MYC Secretary, is leading this project using lessons-learned from his racing in the 2005 International Challenge Cup free-sail regatta in England. For more details on this club project and a possible June free-sail regatta in San Diego, contact Ernie at 858-729-0084 or erniejm@mindspring.com AMYA Model Yachting Magazine VMYG Feature 2005 AMYA MY issue features the US VMYG, with 20-pages covering our model designs and activities, supplemented with historical articles. Copies are available to current VMYG members. Contact John Snow at 781631-4203 or Earl Boebert at 505-823-1046 if you would like a copy at $7.50 including mailing cost. VMYG Material The US VMYG “how to” book and video package on plank-on-frame model construction, and the Yankee III J Boat model building book are available via the VMYG website. Also, some copies of the 20+ page catalog of the 2004 The World of Model Yachts exhibit at the Museum of Yachting remain available. John Snow Onward, Big and Little T he 10-Rater class is the oldest active class in model yachting, being started in 1877. In 1904, W.J. Daniels devised a method of calculating the balance of a sailing yacht hull and demonstrated it to the world in the 10 rater XPDNC. In 1913 he designed the 10-Rater Onward, and used it as the basis for a full-sized sailing craft. This he built in his upstairs offices in the Financial District of London, hauling it out one Sunday morning, the Edwardian equivalent of building a boat in your basement. Earl Boebert Page 2
Page 3 16 Lbs 8 Oz Displacement 12 Inches Beam 1580 Sq Inches 38 Inches LWL Sail Area 62 Inches LOA Onward
Page 4 H arrison Butler was an opthamalic surgeon who designed cruising yachts as a hobby in the years just before and after WWII. He was a disciple of Rear-Admiral Alfred Turner (R.N., Ret.) who developed a theory of balanced hull form called the “metacentric shelf” theory. Although not used (or even widely described) today, both model and full-size boats designed to it exhibit exemplary handling characteristics. Butler also wrote an informative book on small boat design, Cruising Yachts Design and Prima 22 Feet 18 Feet 7 Feet 3 Inches 4 Feet 180 Sq. Feet LOA LWL Beam Draft Sail Area Performance, from which these plans are taken. Prima was designed by Butler’s daughter, Ormonde Joan Butler, and would make a nifty small scale sailing model of the “footy” (12 inch LOA) or similar size.
Transom Plate and Damper Clamp Space for Counterweight Guying Adjustment Lock Forward Body Beating Angle Adjustment Mounting Arm Damper Rudder Shaft Tiller Arm The USVMYG Vane T he free sailing flame has been kept alive in the United States by the San Francisco MYC, and more interest has been generated by the UK/US Challenge event that was initiated by San Francisco and the UK Vintage Group. Now activity is spreading to San Diego, and we hope elsewhere as well. There are two main inhibitors to the spread of free sailing: appropriate ponds and the lack of economical vane gear. We can’t do too much about the former, but we are trying to do something about the vane problem. Attached are the photographs of the “Mark 0” vane which we hope will encourage people to take up free sailing. The dimensions are tailored to the 36 in Restricted Class used in the UK/US Challenge; as an indication of scale, the mounting arm is 4 inches long. Despite this size, the vane is adequately strong to work on a M Class boat. are easily done. The main body of the vane swings on a 3/32 inch stainless pintle on the mounting arm. This pintle could be could be deck mounted if desired. Also, the long damping arm on the body can have a pin mounted on the end and be used for a traditional pin-in-slot linkage to the rudder shaft. As shown, the vane can be used to convert any old 36/600, US One Meter, or other similar boat to free sailing by just bolting it on the stern. Features • Beating Angle Stops: Accommodate a “break back” angle from 25 to 35 degrees. • Lock: The nylon thumbscrew drives into a countersunk (conical bottomed) hole. This locks the feather arm on center and is not dependent upon the gears for proper alignment. • Rudder Linkage: The “pull-pull” cable linkage has negligible weight and friction and can handle a wide range of vane-torudder distances if the builder chooses not to use the “unitary” idea. The linkage is arranged so that 45 degrees of vane angle gives 20 degrees of rudder. • Guying: This is the mechanism that causes the boat to execute a single tack in the middle of the pond. It is essential for sailing on Spreckles Lake in San Francisco, and very useful in other venues to save time by not sailing all the way across the pond. The side at which the guy is applied is chosen by unscrewing the thumbscrew and moving it to the proper side. The guying tension is set by the General Characteristics The basic design is a Ballantyne geared linkage using Delrin gears. All the parts are laser cut from 1/4” ABS sheet. The use of laser cutting required some parts to be “beefier” than absolutely necessary, resulting in a weight of 3 ounces without feather or counterweight. At least a third of this could be removed by a little judicious filing and drilling. The vane, including the rudder and the damping mechanism, is designed as a single unit to be bolted to a (generally recessed) transom, although other fixing arrangements Feather Arm, Showing How Feather is Clamped Page 5
slider as shown. The permanent nylon post on the counterweight arm is there to keep the guying rubber from going over center and locking. • Friction Adjustment: The relative resistance that the vane body has to turning on the pivot (to set feather angle when “break back” is locked, as on a reach or run) is adjusted by a screw that pinches a 1/16 long fragment of O-ring material against the shaft. This gives friction from fully jammed to fully free. • Counterweight: The counterweight is bolted to the counterweight arm at the location shown. Counterweights can be washers, old coins, whatever. The unitary design permits balancing to include the rudder, and if one is really picky it can be done with the rudder submerged to account for buoyancy effects. My opinion is that there is so little mass in the vane that balance is not going to be much of an issue. • Damper: The damping rubber attaches to a line which is “trapped” by the damper clamp on the top of the transom plate. This allows a much more delicate adjustment of damper tension and angle than the traditional ball chain, and can’t be knocked loose by accident. Final Remarks A “Mark 0” vane is currently under test by Ernie Mortensen in San Diego. After we get his feedback we’ll do the first run of vanes, which should be ready in time for the sailing season. We anticipate a price of $50.00 postpaid for an assembled vane, ready to bolt on your boat. The rudder, feather, and counterweight are not included, because they are so specific to individual tastes and designs. If you are interested in getting one, please let us know at the Editorial Address in the masthead (email is preferred). This is not a commitment to buy, just a way for us to get an idea of how many to make on the first run. The low cost is made possible by the advent of economical, computer-controlled laser cutting services. A few services are listed below: Yankee III Update As always, tweaks and modifications arise as experience is gained with a boat: Weight: Like all boats to the Universal rule, Yankee likes to be on the heavy side, just a fraction under six pounds. Double Forestay: Since she is a light air boat, you’ll spend a fair amount of time sailing under shortened sail. It turns out it’s better to drop the jib and keep the staysail. This will be simpler if you add a separate, fixed forestay running alongside the jibstay. Interestingly, most of the big J’s did the same thing. Vang Tension: She is happier with the vang set on the loose side to put a fair amount of twist in the main. The picture shows her running much too tight. www.pololu.com www.gundersonaerodesign.com www.climatemodels.com/laser/ laser.htm Earl Boebert Page 6 Earl Boebert
Page 7 N athael Herreshoff’s 1903 Reliance has been widely described and documented owing to the fact that she carried more sail than any other America’s Cup defender, but many observers think that Herreshoff’s 1899 Columbia was much the prettier boat. The 1899 series was the first by all-out racing machines and Herreshoff exploited a LWLonly rating rule with long overhangs and a severely cut away profile. Captained by the phenomenal Charlie Barr, she beat Shamrock I in 1899 by a wide margin. She then surprised everyone by beating Herreshoff’s brand new Constitution in the Defender Trials of 1901, and then went on to beat Shamrock II the same year in what was for Columbia Earl Boebert many years the closest series in the history of the Cup. Her lines bear careful study, especially in the easy way the sections transition into one another and the easy run of the buttock lines. The great British model yacht designer W.J. Daniel thought Columbia was one of the best designs Herreshoff ever produced. Columbia was plated with manganese bronze below the water line and steel above. She carried 90 tons of lead in her keel. Her dimensions were: 131 feet LOA, 89 feet 8 inches LWL, 24 feet beam, 19 feet three inches draft and 13,135 square feet of sail. A sailing model which did not require substantial reduction in rig, or an auxiliary keel, would have to be on the order of six to eight feet long, and would be an impressive sight indeed.
many years for the Glenn L. Martin Company and produced many of the drawings for the famous China Clippers. He was a model powerboat builder and co-edited Model Yachting Monthly magazine with Ted Houk in the 1950’s. This article appeared in The Planimeter, journal of the Society of Small Craft Designers, in March 1958. Multiconic Development of Hull Surfaces Multiconic Design of Hull Surfaces H Editor’s Note ard chine boats, or “sharpies,” are thought by many to be limited to simple shapes. That this is not so is obvious by looking at the designs of people like William F. Crosby, who did, among other things, the famous Snipe class of boats. This short article by S.S. Rabl shows how one can obtain the true shape of a complex surface bent from a single sheet. It is an exercise in descriptive geometry, and Rabl’s discussion, and especially his diagrams, will reward careful study. The problem solved by that of multiconic development arises because when we look at a line in threedimensional space that is inclined toward us, the line is foreshortened by the effect of perspective. The solution is to use triangles, as shown, to obtain the true lengths of the lines as they would be if flattened out. In the diagrams, significant points are given letters and line segments are given numbers. Samuel S. Rabl was a draftsman, teacher and author. He worked for Any hull surface intended to be covered with sheet material—either metal, plywood, or plastic, must be “developable.” To be developable it must be either flat or curved to the surface of a cylinder or cone. Most developable hull surfaces are conic. The popular conception of conic development is that the designer must choose one edge of his hull surface, select an apex point and design the other edge of the surface so it will intersect radians to this apex. Thus, with a hull bottom as an example, either the keel or chine lines are drawn and the shape of the opposite line determined by the intersections with the radians of the selected apex. This limits the designer to the choice of one line only. The geometric theory that any curved line is composed of a multitude of short straight lines can be elaborated for hull surface development by the concept that the hull surface is Page 8
composed of segments of a multiplicity of cones having adjoining radians in common and whose apices lie somewhere out in space. For development purposes the location of these apices has no bearing on the final result. Figure 1. To use the multiconic method, the designer lays down his lines in the time honored mode of drawing his profile and plan views. The next step is to draw the radians. As a general rule, the midship station is selected as the starting point and the first bottom radian A-A’ is drawn to the first or second frame forward of this. Figure 2. From the endings of this first radian in the profile the chine and keel-stem lines are divided into a number of equal spaces A to G and A’ to G. These points are then connected with additional radians B-B’, C-C’, D-D’, E-E’, and FF’. This equal spacing is for convenience only. In reality the radians may be spaced at random, the only requisite being that they follow a pattern similar to the ribs of a fan. From the profile these lines are projected to the plan as shown. Convenient buttock lines are now drawn in the plan and their intersections with the radians projected back to the profile. From these intersections the trace of the buttocks may now be drawn. From the buttock heights in the profile, the shape of the bottom frames Page 9
may be determined. (Example —X and Y on Frame 2.) For topside development, water lines are used in lieu of the buttocks. Figure 3 and Figure 4. It is often necessary to predetermine the shape of the hull covering sheets. This process is called “development.” It is from this process that the expression “developable hull surfaces” originated. One of the more simple methods of development is “triangulation.” To develop a hull surface by triangulation the surface is first divided into a series of adjoining triangles. Figure 5. The original radians, being straight, form very good sides for these development triangles. By drawing diagonal lines from chine to keel between the radian inter sections, the surface is “triangulated” for development. Figure 6. To lay out or “develop” the hull surface the true lengths of all sides of all triangles must be determined. This is accomplished by the use of right triangles. The length of one side of these triangles, as they appear in the plan, is used for the base and their differences in elevation, as they appear in the profile, is used for the altitude. By laying out these two lines at right angles to each other the length of the hypotenuse, which is the true length, is determined. The true lengths are now used as radii of arcs which are intersected to form the final flat expansion. The diagonals, which are curved, are determined from the buttock intersections much in the same manner as the frames. Their true lengths are determined by girthing the curve. By building up the triangles in a continuous line, the final shape of the sheet is determined. Figure 7. While this method has been in use in the shipbuilding and aircraft industry for many years, it seems to be very little known by the small craft designers who need it most. Page 10 S.S. Rabl (1958)
V36 Plans Available Cook Oak, not Rice Costco (and other outlets as well, probably) is selling a $30.00 automatic rice cooker which is just the thing for steaming hull frames up to about 9” long. Just add water, push “cook” and it’ll steam away and shut itself off when dry. Waterproof Equipment Box Otterbox sells this nifty box to DOT standards so you can check a filled Zippo lighter on an airplane. Looks like just the thing for batteries and receivers in larger boats. 4.837″x 3.682″x 1.652″ outside, 4.003″x 2.488″x 1.293″ inside, 5 oz. and waterproof to 300 feet. Best of all, it’s only $13.00 www.otterbox.com Industrial Grade Turnbuckles We have redrawn the popular plans for the Thomas Darling 20-Rater, as the originals were showing the results of age and the “copy of a copy of a copy” problem. We also have drawn up full-size plans of the DN36 boat featured in the last issue. Either of these will make a handsome and competitive V36. Copies are $25.00 postpaid to the Editorial Address. Document That Boat! You may have noticed a little card that fell out of this issue. This is a project promoted by Good Wife Judy, prompted by some boat ID cards that were printed up by Russell Potts of the UK group at the 2003 UK/US Challenge races. We get a lot of poignant requests of the form “my father/grandfather/relative made this boat and it was very important to him. What is it?” So give a hand to future generations, fill out the card, and drop it inside that vintage masterpiece you just built. Let us know if you need extra cards, we’ve got plenty. The Model Yacht is published three times a year by the U.S. Vintage Model Yacht Group. Copyright 1998 to 2006 U.S.V.M.Y.G. Reproduction for noncommercial purposes permitted; all other rights reserved. Other copyrights are maintained by the original holders and such material is used here for nonprofit research and educational purposes. Editorial Address: 9219 Flushing Meadows NE Albuquerque NM 87111 Email: boebert@swcp.com Phone: 505 823 1046 These hefty little brass turnbuckles are from an industrial supplier that requires a $100.00 minimum order, so we have laid in a supply and offer them to members for $12.00 a pair plus $4.50 postage per order, to the Editorial Address. The picture shows the size relative to a large A.J. Fisher turnbuckle (lower item). They’ll look fine on a traditional M, a 50 inch schooner, or an AMYA J Class boat. 300 lbs pull strength, range of length 1 5/8 to 2 1/8 inches. Our thanks to member Fred Abbe for discovering these. Officers of the U.S. Vintage Model Yacht Group: President: John Snow Eastern Vice-President: Ben Martin Western Vice-President: Dominic Meo, III Midwest Vice-President: Tom Pratt Southeastern Vice-President: Thom Mclaughlin Vintage M Class Coordinator: John Henson Vintage 36 Inch Coordinator: Al Suydam A Class Coordinator: Rod Carr U.K. Coordinator: Graham Reeves Canadian Representative: Doug McMain Historian: Earl Boebert Archivist: Jim Dolan Page 11
Model yachts in Central park, New York City, probably some time in the 1920’s Model Sail-Boats The Technical Side of a Fascinating Hobby T Editor’s Note his article appeared in St. Nicholas magazine in July of 1930. The magazine was published from 1873 to 1939, and is justly revered as the finest youth magazine ever to appear in the United States. Topnotch writers contributed to the journal—for example, Rudyard Kipling’s Jungle Book first saw publication as a series of stories in St. Nicholas. This particular article is, in effect, a long advertisement for Boucher Incorporated, who had a full-color advertisement on the back cover. The article tells how to build the very popular Boucher Curlew, a nice, simple 31-inch model that, like all Boucher boats, is sure to sail well. Boucher sold Curlew kits and built-up models, including one with a Bakelite hull. Boucher designs of this period can be recognized by the patented sliding rig which was exclusive with them. The article omits some patterns and the hull templates, but the hull shape is simple enough to carve by eye. This is a good “grandparents’ boat” to be built for a young person and can easily carry small radio gear. P Model Sail-Boats ractically everybody has a hobby. A story is told of a man who came home every evening and worried about his business to such an extent that he was bordering on nervous prostration. A long vacation, a complete rest, and many other things that are very expensive were prescribed for him by his physician, but for one reason or another he did none of them instead he found a hobby—which was his salvation. Many of his evenings are spent working at this hobby, his threatened breakdown is quite forgotten, and he is himself once again. In 1870, John Ruskin observed some athletes training, and made the suggestion that they be put to work on something productive, and that all the energy they were using to better the condition of their bodies be put to some practical use. The idea was put into operation, and was a dismal failure; the fascination was gone when they were made to undertake regular work. So it is with a hobby; there must be something in it which is a pleasure, something we want to do, and do it because we like doing it. Manual training, taught in almost every school in this country,1 enables the boy who Earl Boebert Page 12 1. Alas, no longer. —Ed.
Page 13
HULL CONSTRUCTION Nothing short of Perfection should be your aim when starting this most important step in model boat making. I Don’t Hurry—Be Careful Turn model upside down and screw in vise as shown above. First: Smooth off flat portion of bottom of block so that parallel lines may be drawn each side of the center line, five-sixteenth inches from center, making a total width of five-eighths of an inch. This space is to be left flat, so that angle pieces, which will be attached to fin keel, may be secured on the flat space. As an additional aid in locating the templates for shaping outside of the hull, the stations marked on deck are to be transferred in their proper position to bottom and side of block, and numbered as illustrated. III Be Careful—Don’t Hurry Place block model in vise as shown above, and number the stations marked on block, commencing forward, from 1 through 9, to correspond with the numbers on plan templates. With a small plane, smooth the sides of block to line drawn on upper part of block, which is the exact size and shape of the finished model at the deck. The cutting edge of your plane should be adjusted to give a thin shaving. As the hull begins to take form, reduce this cutting edge until the shaving has the thickness of paper. For convenience in handling block for shaping exterior of hull, screw a cleat, or block of wood about one inch square by six inches long, on bottom of inside of block. II Take Your Time—Don’t Hurry Block is now ready for shaping outside of hull. Secure block in vise by means of cleat, as illustrated in Figure 1. A flat one-inch chisel can now be used to shape the exterior of the hull by gradually rounding off the sharp corners of the lifts to fit to the templates. For instance: station 5 on hull, as illustrated below, is to be cut down very carefully, so that template 5 will fit fairly close; then sections 4 and 3, and so on down the line, until the hull is shaped up to fit all of the templates within a reasonable distance, say less than onesixteenth of an inch. This process is repeated for both sides of the hull and should proceed very slowly and carefully, so that in roughly shaping or molding the side to the templates you will not cut off too much. Remember that it is a very easy thing to cut too deep with your chisel, and that it is rather an unsatisfactory operation to have to fill in cuts that have gone too far. Page 14
IV Don’t Hurry—Plenty of Time After the hull has been shaped to molds, or to the templates on both sides, use a very small plane set fine, for taking off thin shavings and gradually, a little at a time bring the form of the exterior hull down to fit exactly to molds. The exterior of the hull is now ready to be sandpapered. First use a coarse sandpaper (about Number 1), and then finish off with Number 0. Always sandpaper with the grain; otherwise it will scratch the wood and line your hull with ugly-looking scars. A good rule to follow when sandpapering the interior of the hull is to make a wad of cloth about three inches in diameter, and wrap the sandpaper around it. This method tends to make the sandpaper fit into the contours of the hull, and a much veneer job will result. V Don’t Hurry—Be Careful Now that the exterior of the hull has been shaped up to form, the work of gouging out the interior may proceed. Remove the cleat, which is now of no further use, and place model in vise, right side up. Be sure not to tighten vise too much or you will dent the sides of your hull. Now draw a line threeeighths of an inch from the outer side of the hull, running, parallel, completely around the deck, as illustrated. This line is to be a guide to guard against digging below or outside. Scooping out a hull should be done very carefully, because if you attempt to take out too much at one time, you are likely to cut clean through with the gouge. The entire hull should be scooped out to an even thickness of about one-quarter inch. Remember that the thinner the sides of your hull are, the less weight you will have to carry, and the better your model will sail. After the hull is scooped out to approximately three eighths of an inch thickness, it is wise to use a very heavy sandpaper (Number 2) to remove the remaining eighth. It is important that your hull be of even thickness throughout. If the port side is a quarter of an inch thick, and the starboard side varies from a quarter to an eighth of an inch, your hull will have a list that will hamper its sailing qualities. As suggested at the top of this page, you should aim at nothing short of perfection in the making of the hull for your model. Whatever time and care you spend in following the instructions exactly will be anything but wasted, for upon this operation depends the success of your entire showing when you come to put your model boat to the test. If your boat is going to outsail the next fellow’s, the hull is most important. Page 15
Page 16
wants to make something in line with his particular hobby to gratify his wish. Usually the boy wants to build something that will go, and the more it resembles the prototype, the more his interest is aroused and the more enthusiastic he becomes. Model-making is divided into many different classes. Some models are copied after objects in real life, reduced in exact proportions and to scale, and are used for educational and demonstration purposes. Models are also built for experimental purposes, or to illustrate or prove some definite principle, before the full-size structure or article is undertaken. Some models simply represent the object on the surface, the interior being solid and unfinished. The most interesting of all, and the types that appeal to boys or girls, are working-models. Models of this type usually give the greatest amount of enjoyment and satisfaction to the average person. For a good many years, this country has enjoyed, undisputed, the sailing speed supremacy of the world. The Constitution, better known as Old Ironsides, owed many of her brilliant victories to speed and flexible maneuvering qualities. In the early sixties, before steam had superseded windjammers, our clipper-ships, such as the Flying Cloud and the Staghound, established record trips around the Horn. Since 1851 we have successfully defended America’s cup against foreign challengers and competitors. The last four Cup challengers, owned by Sir Thomas Lipton, were defeated by American built and designed yachts. For years the United States has held all motor-boat speed records, established in competition against foreign challengers for the Gold Cup. All the foregoing was accomplished solely on superior design of hull, and engineering, commonly known as naval architecture. Model-making had its origin many, many, years ago. Before the time of our present-day naval architect, master shipwrights were responsible for the grace and power of the Page 17
monarchs of the sea. For every vessel that was built, a scale model, perfect in every detail, was made, and from these models the ships were built. At that time models took the place of the plans which naval architects today develop. After the vessel was completed, these were stored away for future reference, just as we do with a blue-print. Later on, when the art of drafting reached a more advanced stage, and naval architects came into being, plans in many cases took the place of models; but to this day one of the first steps in the construction of a scientifically built ship is to prepare a model, fifteen or twenty feet in length, of the hull of the large ship. This hull model is weighted until it is down to the proper draft of the vessel it represents, and is then towed through the water by an especially designed device that registers the pull to the smallest fraction of an ounce. Tests are made at various speeds. This work is done in an experimental-model basin, to ascertain the exact amount of power needed to propel the hull at these varying speeds. From these experiments, data is obtained which tells the amount of horse-power needed in the actual boat to make it move at a designated speed. The waves that are thrown off by the model are studied and measured, and from information thus gained suggested changes or modifications of the underwater form of the hull are obtained. At an early stage in the design of steel vessels, half models are made of the lines and contours of the outer hull. Steelplating diagrams are laid out on these models so that the exact size and shape of the plates may be determined. This method, of course, reduces waste to a large degree. The design of a successful racing yacht, sail or power, involves two highly technical sciences: naval architecture and marine engineering. Calculations are made before the boats are built which determine most accurately every characteristic. It is ascertained, in advance, just how they will behave under different loading, or wind conditions; how much power will be required to drive them at a given speed; just how far over a racing sail-model will lean with a wind of a certain velocity, and much data. You have often seen a toy boat capsize when a sudden gust of wind fills the sails. Such a calamity is scarcely ever heard of in the case of a properly designed sail-boat, because the designer has predetermined the proper ratio between the sail area, boat or hull displacement, and keel weight. Because of the law of relativity in mechanics, however, one cannot take the design of any large racing yacht, make a scale reduction of it, and expect to produce a successful miniature racing yacht. This, translated into plain language, means: Sails have two dimensions, length and breadth, and we speak of them in terms of square feet or square inches. Hulls and lead keels have three dimensions, length, breadth, and depth, and are spoken of in terms of Page 18
cubical contents. Consequently, if we should try to reduce both sails and hulls in an exact scale reduction, we should in reality be reducing the sails by the square, which is correct, and the hull and the keel by the cube, which is one power too much. Therefore. a complete new calculation is needed to determine the correct ratio between the-sails, the hull, and the keel. For the boy who is contemplating building a boat, the following plans and suggestions are submitted for his assistance. Which boat shall he build? The natural inclination is toward the largest and fastest, but that is not always possible for most of us. Experience and cost are most important factors, which the model boat builder must take into consideration. If you have had absolutely no boat-building experience, there are plenty of inexpensive construction-kits on the market, with all material. cut to the proper length, and with a working plan that explains each step in the construction of the boat. These construction-kits may be had for all type boats, and range in design from the simplest sailing yacht to the most elaborate. The following drawings and instructions are for a thirty inch, Marconi rigged racing sloop. This model was chosen for these pages because, after many races between model boats of the same size, it proved itself to be the fastest and best adapted for all-round sailing and racing. It is also one of the best from the standpoint of construction. Figure 12 gives the proper dimensions of the hull, and will come in handy for those who wish to build this for themselves from unfinished material. The boat is constructed in two lifts of the thickness shown. Secure two boards, patternmakers’ best kiln-dried pine, 31 inches long, 7 1/2 inches wide, and 1 3/4 inches thick, dressed. Mark a fore and aft center-line on the top, bottom, and ends of each board; also the transverse frame stations, as indicated, at three inch centers. Mark the cut out for the top lift and cut it out with a compass saw. If the material is nicely dressed, next glue the top block to the bottom one with waterproof glue. Line up the center lines and frame lines accurately on each block. Mark the profile of the boat from the figures given, on both faces of the blocks, and saw neatly to the lines. Mark the new frame lines on the top, as the old ones were cut away when the sheer line was cut. Lay out the half-breadths on the proper stations, or frames, from the figures given, and cut both sides accurately and evenly to the line. After the hull has been completely finished, inside and out, it is advisable to give it a good coat of shellac to protect it against checking. The next step will be to construct the deck. This operation is explained in Figure 6 and Figure 7. Cut the deck to about the shape required, and secure it in place with wire brads and waterproof glue. Then trim off the edges flush with the side of the hull and sandpaper it smooth. It is well to give the underside of the deck a thin coat of paint before fastening it in place. The fin is secured to the hull by angle strips, as shown in Figure 8. Fasten angle pieces to the fin with brass rivets. Make these rivets from brass wire. Secure the fin to the hull with countersunk, three eighths inch brass screws: The fin is made from 22-gage galvanized iron to the dimension shown in Figure 12. A lead bulb, as indicated, is secured at the lower edge1. The rudder assembly is shown in Figure 9. Drill the hole for the rudder stock tube four and three eighths inches from the stern, and vertical to the deck. Cut the rudder-stock tube to its proper length, and gently tamp it into place. Make it a tight fit by the use of a little thick paint. The rudder is made and installed as shown in Figure 9. Figure 10 shows the proper dimensions for the masts, boom, and jib-boom. The construction of these items is comparatively simple, but the same care that has been exercised throughout should be carried out here. The two and one half-inch sleeve that is illustrated in Figure 10 should be made of aluminum tubing. Figure 11 shows the completed boat, with sails and rigging. The sail dimensions are indicated. Painting And Finishing This is the place where the unadvised amateur is most likely to spoil the job. Many homemade boats look as if the paint had been put on with a twelve inch wall-brush or a shovel, and after the trouble that you have taken so far, you do not want to spoil it all with a sloppy looking paint job. Page 19 1. A slightly larger piece of copper or brass can also be used. —Ed.
After the hull of the boat is completed, and all brad-heads have been slightly countersunk, the first smoothing should be done with a fairly smooth sandpaper and the final smoothing with Number 00 sandpaper, until all signs of tool marks or roughness have disappeared. Use the best ready-mixed paints. You will probably find that they are too thick for miniature-boat work, and this being the case, should be diluted to the consistency of cream by adding turpentine. After the paint is thinned to the right consistency, add five or six drops of Japan drier for each half pint of paint. Three or four thin coats, well brushed out, will be the best. Several thin coats of paint are much better than one heavy coat. The best paint for water protection is pure white lead1 mixed with linseed-oil, diluted, as specified above, to the proper consistency. If the boat is to be finished bright topsides, with colored boot-topping and another color underbody, use the paint known as ground in Japan, diluted as described. It is suggested that Valspar varnish be used on the hull, spars, masts, and booms. When painting and varnishing your boat, be sure to keep it out of the dust, as this will ruin your efforts. After each coat has thoroughly dried, rub it ever so lightly with a Number 00 sandpaper to erase brush marks. one sheet, and eliminates the added weight of a boom and gaff ring. Figure 11 shows in detail the method used in rigging this particular sloop. The best cloth to use for making model sails is balloon cloth2. The edges of the sails should all be finished with a very narrow hem. Interest in model yachting is not local. A National Model Yacht Racing Association has been organized, and club and interclub racing is rapidly growing in popularity. The game has passed beyond the stage of the former toy boat which floated but rarely sailed, and the thrill of the keen competition in model-yacht regattas is an added incentive to the builder to put forth his best efforts. Most reputable manufacturers of model boats to-day put on the market models which are guaranteed to sail, and if the models which you make yourself can stand up to them, you may be assured you have been successful in all the details of your work from the construction of the hull on up. In addition to the pleasure derived from building your model yacht, there is still something beyond the fun of it. It will help to revive, develop, and promote that interest in an American merchant marine which is so essential to our national progress. Samuel S. Sanford (1930) Sail-Making A properly designed set of sails, after the dimensions have been determined, should have a very slight slack, or bag, in the middle. Frequently “toy boats “have their sails made for show and not for sailing. They look better to the untrained eye if they hang nice and flat, without any bag. However, the properly made sail, if laid out on the sail-loft floor with the outer edges stretched tight, will show the slightest looseness in the center. Sails may be made in one piece, although some model-makers are so fussy that they piece them together, just as the larger sails are made. This procedure is unnecessary, and only makes a lot of tedious work. The sails considered best for model boats are the Marconi fore and aft rig. The mainsail, in this rig, combines the topsail and mainsail on 1. This material is deservedly extinct. Use “Kilz” aerosol primer instead. Krylon brand aerosol paints are very good for model boat use. —Ed. Editor in Search of Material — Please Contribute Anything of Any Length to the Masthead Address. 2. Page 20 This material is no longer available. —Ed.


