- Sea Urchin. By Vic Smeed.
- Vane Without Pain, Part I. By H.E. Andrews.
- Tucker’s Topical Talks, Not All Plane Sailing. By H.B. Tucker.

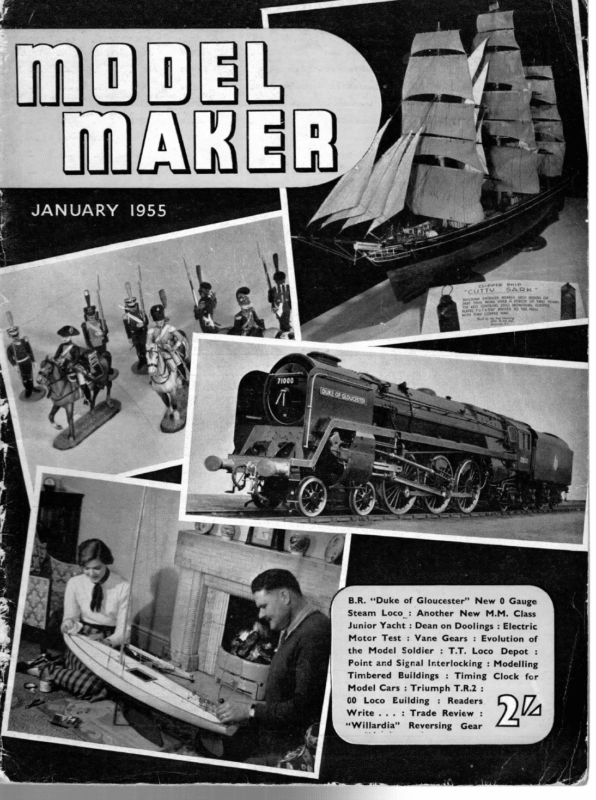
JANUARY cuPprte “cust t Ee Sei e DES RLS MEBDLY cD 2 a & PNTED. 386 Ot 2K) Pee cit Ca TO THE ME ey COPPER TANS. B.R. ‘‘Duke of Gloucester” New 0 Gauge Steam Loco : ‘Another New M.M. Class Junior Yacht : Dean on Doolings : Electric Motor Test : Vane Gears : Evolution of the Model Soldier : T.T. Loco Depot : Point and Signal Interlocking : Modelling Timbered Buildings : Timing Clock fer Model Cars : Triumph T.R.2 : 00 Loco Euilding : Readers Write… : Trade Review : “Willardia” Reversing Gear [Z (A
SEA URCHIN. MM. CLASS VIC ey SMEED COPYRIGHT MODEL MAKER 38, CLARENDON Mit YACHT DESIGNED CUT KEEL(AS SKETCH)FROM BALSA, oF AOD PLY SKEG, PR 8 SKES ras ROAD, TFORD REM FORCEMENTS. Fit Ye BALSA SERVICE Atow For ‘4’x 4 HaRowooD IMWALES CHINES & INWALES. SCREW MAST A CHINES, ste To %’x %” stock # secuneLy ae GRAIN FIN CORE SLIDES ATHWARTSHIP BEAMS, FIN ETC PAINT IN NORMAL WAY. HARD “6 BALSA, UNDERSIDES FIRST, i i FIT DECK AS BALSA MODEL, SKIN wiTH 1 iy PLY, GLUE legs COVER HULL WITH SKEG A FU cur KEEL FROM YW eiv(as skercn ABOVE) CUT BULKHEADS FROM ‘ePLY & FRET OUT To PECKED Lines, BuxHeaos 4 ‘6’x%4’ HARO BALSA HERTS. 1B RACK woe CONSTRUCTION. PLY CLEAN OFF CHINES & PLANK SIDES, GRAIN VERTICAL, BETWEEN REINFORCEMENT, SURFACE WITH SILK,NYLON OR GLASS CLOTH, USING DOPE, RESIN GLUE,OR Wome ALLL ETT/ MZ POLYESTER ZL IM CORE EXTENDS TO LOWER EOGE A 4 Vi!u pw, FIN 205WG PINTLE PLATE a s688 RTC SOLOEREO PIN; IS CONSTANT FOR GREATER PART OF DEPTH, BLOCK . SHEETS CROSS SECTION AT iy BROUGHT. PATTERN PIN TO PREVENT 7 ‘x A wave x & Bs 3 z r 4 Fs = TOMS a a Yaga! é SIDE PLAY OF LEAD. ] Ve Ae PLANKING. CHALK WITH ONLY SLIGHT Loss or FIN CULKHEAD Se ‘ REINFORCEMENT ~ 2 OFF-‘ PLY. 4. BALSA PLAMKING. eed rin TO THICKNESS WITH !a FITTING. WITH FIN TO PROVIDE x Se cuine. ~ Dore BEFORE EXCEEDEO By UP TO sors HORIZONTAL, MARK CHALK OW BLOCK SAWCUT, CAST IN PLASTER OF PARIS. VARNISH LEAO FACES HULL TO BRING WATER LINE Me” pr. FOR LEAD, FACE UP PATTERN TO COMPENSATE FOR & CROSS-GRAIN RUB DOWN WITH WET 400 PAPER, LINE WITH RULING PEN & IOUGHLY. PATTERN with Ye” pLuG, aLLow Y’ovenLar ALL ROUND VARNISH PLY DECK, INSIDE OF MULL eae CROSS SECTION VARNISH CUT FINISHEO HATCH ty HARD BALSA FOR ADHESIVE. RUB i! SKEG REINFORCEMENTS OF KEEL. St Add Pee BA STUDOING. CAST IN LEAD = RESIN DOWN & PAINT IN USUAL WAY, BALSA EACH SIDE, FIN Y CORE. yt & BALSA EACH SIDE. |MAROWOO D. CHINE WEAK LINE. RUBBER FROM EVE TO TILLER GYING DESIRED —— FILLING ee — 4 ax! nq HALVED JOINT, SPINNAKER BOOM EYE heoRass wine sovoeni ‘3 WTO SCAEW-EVES yy (eo 4″4 Yo rune so.venen +? md om ___—— | it eS | Set | nS at SWG. BRASSa “SOLDERED WASHERS. one = ue senses. paase ten ——pr sO nce was UNOER DECK hia To = MAST BAND AND GOOSENECK DRILL FOR SCREW EYES m PLACE MAST BAND & JUMPER BEN ‘ Va SET TAPE POCKETS & SOLOER : \;7% #0 BA. BoLr, lt SS. Carte: SLOTTED ON MAST BACK AS SHOWN HEM LEACH AS JIB. DOUSLE: MATERIAL: AT CORNERS. t \ Ls TO TAPE POCKETS FITTED. STAUT v4 \\ 4 \ \ is (From caiben oars * eves) RIGGED CITHER side, 72° BOOM ‘ EYELETTED IN PLAC! SPINNAKER MAY BE SPINNAKER INTO pe 21 ia STEERING MAY BE ORILL IM PLACE, PUSH STRUT. THRO MAST, SOLDER, BEND ON MAST PUSH SCREW Eves ieee = BRASS, CURTAIN BRAINE Ke’prass wine. 30 SWG BRASS % /0 BRASS TUBE ee, BRASS TUBE a ae 1 FOR ACE FOOT OF 3 2°%-029″ CELLULOID SAIL TO Boom | on “42° PLY BATTENS. 4 800m FRO \ ‘a’x’4″ spruce Fon of *ceuuor BATTENS. : ra re NEM H AS ‘ LEACH SMALL AS OF SAIL WHEN POSSIBLE YOUR NUMBER WILL FEATHER FITS 208w VANE 2 BETWEEN QUADRANT | SAS eos NURSES’ VEILING OF 7 Bacs Ge fo WU ALD og Une. =—_\ 1: BRIC, \ sw asa wisn To RETAM PIVOT ® DRAWN 2 YACHTS. AILS For O87. Scone 5 COPIES OF THIS PLAN ARE MAY BE LACEO wast. SAN6 hasan AVAILABLE, BE 15 COMPLETED, A PRICE 4/6d. TO WILL ENABLE FORE STAY —— POST OF FORESTAY PAESEO bierHAUL ISneyENO al es FREE FROM MODEL MARK £1 PLANS SERVICE, 38 CLARENDON i z TO bsilege | * ‘NVELOPE “MM CLASS YACHTS.’“1 V / 4 mast, Pa %4 7/9 x 242M WALL THICKNESS OURAL cer MAKER YOU IN REGATTAS HELO FOR MM.CLasS MAST OR CLIPPED TO A JACK STAY. ep SAIL ALLOTTED To You OW RECEIPT THIS : SAIL ’ FULL-SIZE MODEL PLEASE NOT ExcEED ey FOR DIMENSIONS SAE PARTICIPATE POLYSTRENE ( FOOD WEADBCARD IVORINE OR Ye” rensrex *TuBESon MAIN =a SEErE SKE sKercH wer OFA MAST BAND & GOOSENECK: ROAD, WATFORD, ry [um 3 HERTS
MODELLING IN BALSA PT. IV Introducing SEA URCHIN By Vic Smeed Sea Urchin, second of the MM class boats, Poses with Water baby, MMI, comparison purposes for THE difficulty with a balsa surface subjected . to hard wear is the low local impact resistance mentioned earlier in this series. This resistance varies, of course, with the density of the wood used, but if very hard balsa is employed there is no advantage in using it— one may as well go in for mahogany or obeche. The difficulty is not in providing a hard and durable paint surface as in backing up that surface in such a way that a knock won’t crush the balsa itself, leaving a permanent indentation or scar. The answer is to “spread the load” in the same way that a man can traverse thin ice or mud with the help of a plank. This spreading of the load entails surfacing the balsa with a medium which is in itself stiff and which will bind to the fibres and bond them together. We have already discussed tissue covering, which, when doped or painted. fulfils these requirements to a certain extent. A better and considerably stronger result can be achieved by using silk or nylon in place of tissue: either of these materials when anplied wet will cover duo-curves without wrinkles, and the pores can be rubbed full of balsa cement. resin glue, or thoroughly brushed with several coats of goldsize to produce a really hard and tough surface. The fabric can be applied in small pieces dry, or larger pieces damped with water. usine clear done or varnish as an adhesive. The adhesive. filler, and paint should match all the way through, by the wav. i.e. don’t mix cellulose or turns based treatments. There is little doubt that the ultimate in this direction is glass fibre, applied with polvester resin. The resin bonds comnletely to the balsa fibres, and the ultimate result is unbelievably strong. An added attraction is that the resin mav be coloured with litho ink to the desired finished colour, and then mav be sanded and polished to a flawless finish. If renairs are ever necessary. the resin will bond to itself and invisible joints are simple. This month’s model, Sea Urchin, is designed to be built using any of the above techniques. This is the second of the new MM-cl ass yachts discussed last month, and is of simple, hard chine construction. The hull is built chiefly of balsa, with ply reinforcements at points of high stress, the deck is of 1/16 in. ply, and the sail plan and rigging are identical with Water Baby, described in the December issue. All parts are shown on the plan, including a simnlified vane gear. Construction commences by cutting out the keel member, which is virtually a profile of the boat. and forms a built-in jig. To the keel are glued the two, 4in. ply fin reinforcements, one each side, and the skeg reinforcements. The bulkheads can be cut while the keel assemblv is drving. These are “egg-hoxed” in place and cemented securely before adding the chines and inwales. The mast sten can be added before covering the hull if desired. Select hard 1/16 in. sheet balsa for planking, and cover the bottom of the boat first. The grain runs athwartship, i.e. from the keel to the chine, and the sheets are butted over the keel. When dry, trim off surplus at the chine and sand to a smooth contour. sheeting vertical. Fit Now add the side in the same wav. with the orain Trim off and sand to correct shane. the deck beams and other in. sa. reinforcements and insert the rudder trunk, after dribbling paint thoroughly through its y|
a MODERN MAKER) seating. Shape the lead (available from Arthur MACDONALD ON MM CLASS Mullett if you prefer) and build up the fin with Dear Sir, + in. balsa each side of the }in. ply core. The I was interested in the introduction of the “MM ” top of the fin core will need to be in three class (December MopEL MAKER). I think the idea fills a real want, and the scaling down of th2 pieces to allow the studding to pass. Apply successful ““M” class rule appears to be as good plenty of glue and slide the fin in place, bolting a way as any of ensuring the production of craft up tight. Build up the fin reinforcements with of reasonable proportions. 4 in. balsa, and add soft balsa fillets for the . My first reaction to the published design was to agree with Arthur Levison that more displacement garboard radii — this “outrages design was called for, especially as the anticipated ratio technique” with a sharpie, but is called for in of 35/55 for lead-to-total weight would be very hard the rules. Shape up the completed fin and also to realise. However, I have gone into the matter the skeg, and the hull is ready for applying carefully and used several methods of determining the optimum displacement for this class. these all the first stage of the finish. tend towards the same answer, which can be derived Whether using silk, nylon, or glass cloth, the procedure is identical. Prepare from the following (the simplest) approach. If all dimensions are scaled down by a factor of 2, the said area is reduced by 4 and the height sufficient adhesive for the whole job, and brush it roughly over the area to be covered. of the C.E. by 2, giving a heeling moment reduced by a factor of 8. However, the we’ght of the lead will be reduced by 8, and. the denth of the CG. Lay the fabric Perit cas. in place and brush more adhesive over the top, smoothing out any air bubbles or wrinkles. A good stiff brush should be used, to knock the adhesive well into and through the cloth. Cover the whole of the exterior. including the lead, but ensure that the rudder trunk is left clean. Allow to dry, glasspaper down, and apply a further coat or coats of adhesive until a good surface is presented. (all things being proportional) by 2, giving a righting moment reduced by a factor of 16. The righting moment is thus reduced twice as much as th? heeling moment, so the relative stability of the half-size craft is low. To restore matters one could make the lead weigth + that that of fu’l size and this would mean, assuming an average lead weight of 14lbs. for the ‘““M’” class, a lead weitht of 3.5 lbs. for the “MM”. But it is not possible to secure such a good lead-to-total weight ratio in th> smaller boat. Typical figures are “A” class .7, “M” class .66, 36in. class .6. If you plot these against length (LWL) and interpolate the graph, you get .55 for the 25in. boat, which would b:2 When dry and tidied up, lay the hull on a sheet of 1/16 in. ply and trace the deck outline. Cut out and fit accurately to hull. Glasspaper thoroughly and apply a coat of marine varnish to the topside. The inside of the hull should also be thoroughly varnished. When the deck is dry, rub down with wet No. 400 paper, wipe off, and line with Indian ink and a ruling pen. Varnish over this, rub down, and varnish again. The deck is glued in place after fitting horses, Just about realisable with normal building ric Sah If this is so, the total displacement will be ——- = 6.36 Ibs. So 64 lbs. would be a suitable displacement. If the fin were made a little deeper in proportion than an “M” class this might be reduced slightly (say to 6lbs.). To meet this reauicement we could take an ““M” class design of about 22 lbs. disnlacement and scale the body plan down by x .75. If the section spacing is scaled down to half. to get 25 in. l.o.a., the displacement would be (.75)2 x .5 x 22 = 6.2 |bs. approx. It therefore appears probable that a boat of ab-ut etc., and varnishing its underside, and can be screwed to the hardwood reinforcements, pinning elsewhere while the glue dries. At this stage the hull painting may be completed. An alternative method of construction is suggested on the plan, in which the bulkheads are cut from +in. ply and fretted out. A more 6—7 lbs. displacement, with beam and body depth about 75% of “M” class size and rather mor? than half the draft of an “M” class would suit the rule. As sailing condit‘ons which would be avite normal for a large model would be rather r-ugh for a small boat, it would be advissble to pav attention to sea-worth‘ress in the design, and, of course, hull balance will be of great importince to ensure that a novice can gt it to perform well. I propose to design a boat on these lines and will let you see the results. Yours sincerely, D. A. MACDONALD. London. conventional keel and 1 in. inwales and chines are needed on this version, the ply skinning being glued and pinned in place. Imm. ply is specified if available: failing this 1/32 in. (.8mm. approx.) may be used. A sound paint job, inside and out, is all that would be needed if this construction is followed. Full details on rigging and fittings will be given next month; these, of course, apply equally to Water Baby. Unfortunately pressure of space means that we must hold over the description of the exnerimental steering gear for this month, but this will give us further time to compare it in action with the vane. Whi’e there is much in Mr. Macdonald’s letter with which we agree we should pont out that the anticipated wei-hts given with Water Baby were in fact the cctual weights of the origival beoat, which was not made espeially itht. The reivced stcbi’ty with a smaller boat was auticivated and the fin was increased in depth (re ative to a normal Ma bleh ad‘ to lower the lead as far as possible without producing a profile comparing unfavourably with conventional! larger yachts. 18
JANUARY, 1955 VANE WITHOUT PAIN VANE GEARS THEIR USE. BY H. E. AND PART lI. ANDREWS Introductory and historical 6 Mes use of vane type steering gears, which has largely revolutionised model yacht racing in the post-war years, is regarded as a – recent development. In fact, however, there were designs for vane gears in existence for many years prior to 1946. In 1922 there was published in the Boys’ Own Paper a design for a then popular class of yacht, the 18 footer (the precursor of the “A” Class Rule) and to steer this boat a vane gear was shown. The feather, without any balance weight, was designed to stick out from the mast-head. It was attached to an actuating rod which ran down.the mast, and from the lower end of this rod an arrangement of bell cranks and levers ran to the rudder head. This gear contained all the essentials of the modern gear except the balance weight and self-tacking arrangement, but it looked ugly, was regarded as “un-yachty” and suffered the fate of all inventions which arrive before the time is ripe for them. In the succeeding years the “Braine” gear continued to reign supreme, but in 1937 it received its first severe knock when Sam Berge won the Yachting Monthly Cup using a vane gear against a powerful fleet of competitors using the Braine gear. Owing to the intervention of more urgent affairs model yachting ceased in Great Britain after 1939, but in the U.S.A. it continued, and much thought was expended on the development of steering gears, with the result that, by 1946, the Braine gear in that country was obsolescent if not dead. When the sport restarted here after the war the new gears were slow to catch on but the changeover accelerated and by 1951 all the yachts, except one, in the “A” Class National that year were vane steered. Since then the vane gear has been universal in all classes except the 36in. Restricted, where considerations of deck space militate against its use. Function of Helm The main function of a yacht’s rudder is not, as may be supposed, to alter the yacht’s Its purpose is to keep the sails course. effectively full of wind while laying the desired course. Wind, even on the open sea, is not constant either in speed or direction and, particularly when sailing to windward, these variations can, by judicious use of the helm, be made to give many additional miles of course made good. The vane gear, properly used, enables this procedure to be copied exactly in a model yacht. It is, in fact, more sensitive and effective than the most skilful helmsman. Types of gear At the present time vane gears appear in a multiplicity of shapes and sizes, and each new yacht launched sports some new variant. Basically, however, all these gears conform io one of two principal types, the “Lassel” type where the self-tacking mechanism is of the “pin and slot” pattern, or the “Ballantyne” type where this mechanism is actuated by The names given are toothed quadrants. those of the two Americans who developed the Typical gears of each respective types. pattern are illustrated at Figs. 1 and 2. Similarly there are two basic mechanisms for the connection between the gear and the
LASSEL TYPE VANE can exert on the rudder is determined (1) by the distance between the centre of effort of the feather and the main pintle, and (2) the GEAR. ratio between the lengths of the levers inter- connected between the vane gear and the rudder head. By adjustment of the lengths of these levers you can have the choice between ample force but small change of rudder angle, and little force to attempt to secure a large change of rudder angle. From what has been said earlier concerning the function of the yacht’s rudder, it will be apparent that a large change in angle of helm rudder head, the “pin and slot” and the ““pushpull” rod. The former is the more popular is seldom necessary, and so the obvious choice of lever lengths is such as to obtain ample power to (of which more anon). A third mechanism occasionally seen in the- 36 in. Restricted Class is one where the vane movement is transmitted to the rudder head via toothed quadrants. angle. The usual adjustment of these lengths because it is more flexible in its adjustment Once the ratios of these quadrant gears has been chosen, no adjustment is possible except by changing the quadrants. For this reason it is very little used. Basic Theory of Vane Gears to Before coming to practical details of how tune up and sail a new yacht fitted with vane gear, it is necessary to assimilate a little bit of basic theory. A yacht moves by reason of the action of the wind on its sails. This is a truism, but it may not be so clear what wind causes the yacht to move. The force which does this is a wind composed of the “true” wind, which may blow from any point of the compass in relation to the boat’s course, and the wind of the boat’s motion which is always equal direction of bined wind is is the one to gears must to in speed and opposite to the the yacht’s course. This comcalled the “apparent” wind, and which the yacht’s sails and vane be trimmed. Figs. 3a and 3b illustrate how, with the yacht’s course and the direction of the true wind remaining constant, the apparent wind can alter appreciably in direction. Figs. 4 and 5 show how, as the true wind comes more in line with the boat’s course the apparent wind shows less discrepancy therewith in direction. We shall refer to these diagrams again later. The second bit of theory relates to the vane gear itself. It is assumed that the area of the rudder must bear a definite relationship to the area of the vane feather and experience has proved that for every square inch of rudder area about four to five square inches of feather area is necessary. The amount of force the wind pressure on this feather area secure a small in rudder is such that the vane lever is half the length of the rudder lever (or tiller bar). Circum- stances can arise, however, when it is neces- sary to alter these proportions and as stated earlier it is easier to do this with the pin and slot mechanism. Figs 6(a) and (b) illustrate these points. The position of the vane gear on the yacht’s deck is of importance. It should be so sited that the feather is as clear as possible of the adverse effect of the back-draft from the mainsail. Structural considerations, of course, have a bearing on this problem and its consideration is part of the designer’s job. Skippers should, however, be aware of these matters. Tuning-up a vane steered boat We now turn from general considerations to the practical. Assuming you have taken delivery of a new yacht equipped. with vane gear, the first thing to () do is to balance the vane. ¥No oF It is necessary to do Neon this balance test with the boat afloat in order to take account of the loss of rudder weight due to its buoyancy, and it is most conveniently done using the club measuring tank. Put the boat into the tank and heel it to one side, unlock the _ self – tacking mechanism and allow it to swing to its “stop” position, having first lined ,, up the main body of the vane 45 on the centre line of the boat. If the balance weight is cor36 change BEATING CONDITIO NS.
Zo) () Fi‘g REACHING CONDITIONS. WIND OF BOATS MOTION 2MPH. APPARENT WIND ° 4-45MPH. 3 oo <é. REAL WIND 5 M.PH. rectly adjusted, the main body ) of the vane should remain on the centre line of the boat. If NEAR RUNNING it proves CONDITIONS.) eavy” WIND OF BOATS or to move the accordingly 2 MPH, be “feather- “weight-heavy ” balance until the weight desired degree of balance is obtained. Having balanced the vane with the boat heeled one way, heel her the other way and see if the condition is satisfactory. It should be, of course. If for which the not, the probable explanation is that the main pintle is not vertical to the deck line, and this should be adjusted before the test is repeated. Now for the first sailing test. To do this it is desirable that a lake with an accurate wind should be used if at all possible, and in _ this connection it may be stated that Pandora and Red Sabre, the two “A” class yachts writer is responsible, were taken from. Newcastle to Surbiton for tuning up! Assuming that on arrival at the lakeside a good wind is blowing, giving beat and run conditions. Remove the vane gear from the boat and harden up the centring line so that device) and unlock the self-tacking mechanism. Set the side adjusting screws so that, when the mechanism is in its action position, i.e., fully angled, the feather lines up with the apparent wind. Refer to Fig. 3(a) or 5 (b). At first, both the side adjusting screws should be adjusted so that the same angle of feather is achieved on either tack. You will probably find that the included angle between the feather arm and the counter-balance arm is about 120 degrees, i.e., giving an effective feather angle to the boat’s centre line of about 30 degrees. Having thus adjusted the vane and trimmed the sheets to the marks previously discovered, again set the boat away on her first leg. She should now sail an unfaltering course, luffing slightly if the wind hardens and_ shaking slightly and falling off if the wind heads. | If she behaves like this, adjust the side screws so that the feather makes a slightly smaller angle with the centre line and set the boat away again. The writer tunes a boat so that the foresail is trimmed a shade freer than the mainsail on a windward trim. Most model yachtsmen, however, trim with the main a shade more free than the foresail. (To be continued) the rudder stays amidships. Trim the sheets to the estimated beating trim and set the boat away on her first leg. The aim is so to adjust the trim of the sheets and, if necessary, the mast position, that, while maintaining adequate drive in the sails, the boat very slowly works up into the wind, in other words, giving the appearance as if she were trimmed a bit too tight. When this has been achieved, the vane should be remounted on the boat and the centring line slacked off until the tension is only just sufficient to centre the helm. Lock the vane body amidships (or set it on the centre line of the boat if it has no locking VANE LEVER & TILLER BAR PROPORTIONS 37 Mi
MOEN MAKER) ~\ UCKER’S TOPICAL TALKS NOT * ALL Now PLANE SAILING 2 y, SINCE this page was inst’tuted, I have endeavoured, month by month, to introduce topics provocative of argument and discussion. It is beside the point that this gives me a chance to air my personal views. What matters is that it draws a selection of opin‘ons, from which the reader can form his own judgment. My success is proved by letters in the Christmas number from Mr. J. C. Hogg and Lt.-Col. C. E. Bowden. Though these are mainly anent Radio Control for Model Yachts, Colonel Bowden raises another subject, when he writes:— _Sometime last year, Mr. Tucker was also very discouraging towards a fellow model yachtsman trying to introduce a planing tyre of model on the lines of the genuine planing full-size keel boats of Uffa Fox, the world-famous full-size designer who gave us real planing, of keel boats in practical form.” The role of iconoclast is not one I covet, but in - fairness to readers this cannot pass without comment. Although undoubtedly the most publicised yacht designer in the world, Uffa Fox did not originate the planing sailboat, nor is he by any means the only exponent of such craft. Further, to the best of my knowledge and belief, neither Mr. Fox, nor any of his confreres has ever designed a true displacement type keel yacht that genuinely planes. A few years ago, a 6-Metres yacht was built at an East Coast yard from designs by Uffa Fox. Published photographs of her on the launching cradle revealed a keel profile similar to the Flying Fifteen’s Seal-Flipper fin, and other unusual features, From the press notices, she was expected to plane, and in every way be as revolutionary as was Jullanar in her day. For months I searched the yachting press for news of her. Yet I never saw a stamp him as one of the greatest British salesman of our generation. Let us salute him accordingly. single report. Perhaps the Colonel can now give us her racing record to support his argument? 1 wonder whether anyone shares the Colonel’s belief that the Flying Fifteen is a full-keel yacht? Nobody ever claimed that the bulb-fin of the old Sibbick Rater made her a full-keel boat, and the Fifteen’s Seal-Flipper is only a bulb-fin in fancy dress under a new alias! Of course, all of these old centreboard and bulb-fin Raters were planing types, but even these were by no means the first rractical planing boats. In the East and in the South Seas, for hundreds of years there have been various proas and catamarans of extraordinary speed, but they certainly never received the skilful advertisement accorded to the Flying Fifteens, etc. As people with some knowledge of our subject, let us try to retain our sense of proportion. The Flying Fifteen is a very cleverly designed sailing boat of the planing type, but there is nothing magic about her lines. Quite a few modern designers and bui'ders could produce an equivalent, possibly even a better, boat for the same price if they had the market for it. The really superb thing about the Flying Fifteen and her sisters is the commercial genius displayed by Uffa Fox in popularis‘ng his creations. His showmanship and flair for publicity are truly magnificent, and for * * a crack at this * * R.C. business, and by way of a start a short extract from our two correspondents:— Lieut.-Col. C. E. Bowden: “‘You sail her like the real thing, albeit a trifle late in your reactions’. Mr. F. C. Hogg: ‘‘Vane steering will undoubtedly keep a yacht moving fast on @ course as well or better than any system yet devised”’. But, gentlemen, isn’t this what I have been telling you from the start I have asserted that the shore based skipper must of necessity be late in his reactions, and that the vane gear, which has not this time lag, must, therefore, handle the boat better. You both admit this is correct but say you precer it your way as more fun. I have already agreed that you no doubt can enjoy yourselves with R.C., but expressed the op.nion (which I still hold) that for serious racing the vane is essential as handling the boat best. It will make argument easier and clearer if we adopt the distinction I have drawn on previous occasions between ordinary “handling” or “sailing” the boat on a course, and “manoeuvre” or ccurse alteration. So to summarise arguments to date, Messrs. Hogg, Bowden and I, all agree that for best sailing, vane gear is essential. We likewise agree that R.C. is essential for satisfactory manoeuvre, but we are not at one as to the extent that manoeuvre is essen- tial in racing, or whether it is worth sacrifice of sailing ability to gain manoeuvreability. I suggest that the divergence in viewpoint between our two R.C. protagonists and myself is that I am in favour of rac.ng being a real testing ground for yacht design so as to effect a continuous improvement in the breed, while they think it would be more fun to introduce the tactics of manoeuvre. Obviously, there is something to be said on either side. Hence, my suggestion, that it should be possible to combine R.C. for manoeuvre, with vane gear for sailing the boat, was a common sense endeavour to find a solution that should combine the best features of the two systems. It is worth consideration in the interests of all concerned. It seems, however, that my suggestion of compromise does not meet with approval, so let us try another tack. The Colonel writes:— “Please, encourage us to develop models that will plane, and models that we can control from the shore.’ From his account of his own activities—yachting throughout the Season in the Flying Fif‘eens, model yachting, model aeroplane building and flying, and now Radio Controlled Models, Colonel Bowden has opportunities and time that few of us possess. Whereas we, perforce, concentrate on a single hobby, he can spread himself over many subjects. Here, indeed, is a wonderful chance for him to show his versatility in a combination of these various fields. Let the Colonel, therefore, build a scale model of his Flying Fifteen. Let him equip this with a scale crew weight (as we use in the 6-M Model), but movable so as to trim the boat in a fore-and-aft direction as the prototype is trimmed by her crew. With his R.C. he will then be able to steer his craft, trim her, and sail her. The whole project is perfectly feasible, and he should be able to get some spectacular results. Surely this is a far better idea than the production of hideous, bastard craft, in an endeavour to turn displacement type yachts into planing boats?


