- Racing Model Yacht Construction Part Eight- Method Two of casting a keel lead, this time in two halves, with moulding sand By C. R. Griffin
- SQUARE ONE Fred Shepherd s ultra-simple 36 in. Restricted yacht, performance belies the somewhat stark simplicity
- ‘Lateral Control’ J. D’Oyly Wright discusses experiments and observations with scale sailing model keels. Part 2

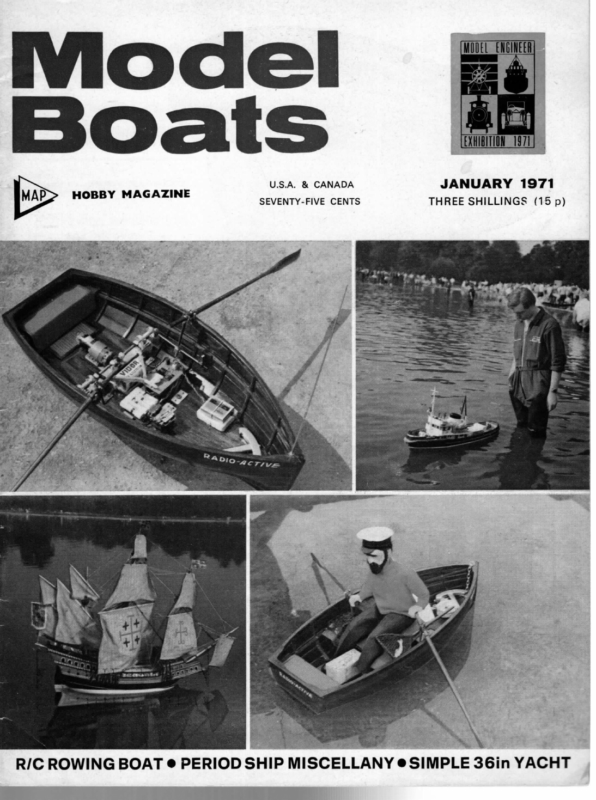
JANUARY 1971 SEVENTY-FIVE CENTS THREE SHILLINGS (15 p) eortmnenes, .% U.S.A. & CANADA 4 R/C ROWING BOAT @ PERIOD SHIP MISCELLANY @ SIMPLE 36in YACHT
i MODEL BOATS Mert Racing Model Yacht Construction Lt TI Part Eight- Method Two of casting a keel lead, this time in two halves, with moulding sand Sy By C. R. Griffin Ley FIG 54 CROSS SECTION THROUGH “A” ROUGH PATTERN AND “B” FINAL SHAPE PPHE one piece pattern does not readily lend itself to use in the process of moulding in sand, the main difficulty being the satisfactory reproduction of the slot for the base of the fin. To overcome this problem the pattern is made in two identical parts as shown in fig. 52. The moulding of the bulb keel in two halves has advantages over the single piece bulb in that firstly, any corrections for weight and position of centre of gravity can be done by drilling into the flat joining faces. This way the external profile can be done by drilling into the flat joining faces. This way the external profile of the bulb FIG 52 the surface. gravity Test the position of the centre of by suspending and correct any large discrepancy. Give all surfaces of each half pattern three or four rubbed down coats of paint or varnish. Cut a piece of aluminium (of thickness equal to half fin thickness) to fit into each recess in the half pattern and to allow a reasonable space between the half patterns, fig. 55. If the spacing is too small there is every possibility that the mould will collapse at this point. Screw the plate into place and the pat- tern is ready for the moulding process. At this juncture it would be beneficial to look at the sand process, make some comparisons with the plaster process already described and give explana- tions of the differences. The plaster process may be described as the layman’s approach whilst the sand moulding process is the professional’s. The principle involved is extremely simple and in no way differs in either method. It is only in the actual practice that the differences and difficulties arise. HALF PATTERN FOR KEEL is not disturbed. Secondly, the fitting of the keel to the base of the fin is simplified and allows for easier adjustment of the trim of the yacht. Divide the plan of the bulb keel into 1 in. spacings and drop a perpendicular through the designed centre of gravity, see previous article, fig. 46. Trace these lines together with the outline of the bulb on to In sand moulding the pattern normally has to have special allowances and tapers to facilitate easy with- two pieces of hardwood, preferably mahogany, the thickness of the wood being equal to one _ half the thickness of the fin. Cut to shape, leaving sufficient wood at either end to enable the pat- tern to be turned between centres. Cut two further pieces to the full outline of the bulb, preferably from a thicker wood, and glue to each of the cutout laminations, see fig. 53. Glue an equal number of laminations to each half pattern, ensuring that the total thickness is in excess of the greatest half diameter of the bulb. Bolt the two sections together, using 1 or 2 BA. bolts, see fig. 54. Drilled brass plates screwed to the extensions assist in turning. Machine the rough pattern between centres to the designed shape, checking the diameter at the various marked stations. A profile template is useful in checking the final shape. Smooth the pattern, remove the excess wood and separate the two halves. Fill the bolt holes with wooden dowels and smooth FIG 55 HALF PATTERNS JOINED BY SPACING PLATE NOTE: DISTANCE AT X NOT TO BE TOO SMALL OTHERWISE MOULD MAY COLLAPS E ger AT THIS POINT drawal, but fortunately this problem does not arise when moulding a conventional bulb keel. The moulding process used is known as a green sand mould; this has reference to the fact that the sand is moistened and differentiates it from another method where the sand is used dry. In green sand moulding the moisture content is kept as low as possible, usually between 3 and 5 per cent. Too high a moisture content will result in steam being generated in the mould, thereby increasing the danger of ‘blows’. It can also cause hot cracks and poor surface finish due to the sand sticking to the pattern. Moulding sand must possess special qualities which may be numerated as (1) resistance to the effect of the molten metal — refractoriness, (2) ability to allow FIG 53 cur our & secon LAMINATION OF ROUGH PATTERN 16
Miia, JANUARY 1971 FIG 56 LOWER MOULDING HALF BOX ON BASE BOARD, PATTERN IN POSITION AND SAND RAMMED DOWN AROUND MOULD, TOP SURFACE LEVELLED OFF AND SQUEEZED. gases to pass between its grains— permeability, and r There — bond. (3) the property of holding togethe are many kinds of sand containing a variety of ingredients, of which silica decides the refractoriness, clay the bond and the size and shape of the grains the permeability. Some sands, such as Erith sand, Lancashire Red, Belfast sand and Mansfield sand are fit to use in their natural state. However, it is the practice in modern foundries to use either combinations of natural sands or to manufacture synthetically a moulding sand to suit their own specific requirements. Parting sand, which is sprinkled on those faces where a mould is to be separated, is prepared by being burnt so as to eliminate the bond. Blacking, usually in the form of plumbago or fine coal dust, is added to sand to increase its refractoriness and is also used to give additional surface pro- tern and the remainder of the box filled with old sand. The sand is rammed down, using a wooden dollie, struck off level with the upper face of the box and squeezed down with the second board, see fig. 57. The box is then turned over, the upper board removed and the exposed sand sprinkled with parting sand (talc powder will suffice in the absence of parting sand). The upper half of the moulding box is located and fastened to the lower half. Tapered wooden runner and riser cores are now put into place and sand packed around them to fill the upper half box. The sand is again rammed down and squeezed by a base board. To improve the permeability of the sand, i.e., its ability to allow gases to pass through it, a vent wire (bicycle spoke) is pushed through the sand in a number of places from the outside almost to the bottom face, see fig. 58. As an alternative to the use of wooden cores the top half of the box may be completely filled with sand and the runner and riser holes cut by using 1} in. and } in. diameter copper tubes. Note that although a plate joins the half patterns, they are, in fact, being used to form two separate moulds within the same box, the spacing plate being SPACING PLATE RUNNER RISER tection against molten metal. T q ‘ 1 I | ! ] 1 \ ‘ \ 1 LOWER HALF BOX REVERSED ONTO SECOND BASE BOARD, TOP HALF BOX FITTED, RUNNER AND RISER CORES POSITIONED AND SAND RAMMED DOWN. VENT HOLES CUT. The moulding box, in which the sand is packed when making a mould, is in two parts, each part consisting of a four-sided rectangular box having neither top nor bottom. The top half has locating pieces which accurately locate it to the bottom half and a means is provided whereby the two halves may be fastened together. Two boards, slightly larger than the base area of the moulding box, are needed. One board supports the moulding box during moulding, the other is used to squeeze the sand and to support the mould when it is turned over, see fig. 56. Both the half boxes and the boards should be of substantial thickness and preferably varnished to protect the wood from the moisture in the sand. The pattern is placed flat face downwards on one board and the lower half of the moulding box placed around it with the locating edge at the bottom. New moulding sand is placed around the patRUNNER RISER T T T | ! | ! ] ‘ 1 1 1 ‘ 1 | RISER ! | ! i “ FIG 59 PLAN OF MOULDING BOX left in the mould. It is, therefore, necessary to dupli- cate the runner and riser holes, see fig. 59. The two halves of the moulding box are separated, the pattern and cores (if used) carefully removed and the impressions in the lower half of the mould- ing box scooped out to assist the flow of molten metal. The impressions are then smoothed and dusted with fine plumbago. The spacing plate is detached from the pattern and placed in position in the mould, then the two halves of the moulding box are fastened together. Molten lead is poured into the mould through one of the runner holes until it appears in the corresponding riser holes. Pour steadily but quickly, so that the molten metal runs through the mould before it starts to solidify. Repeat the procedure for the other half, then put the mould aside to cool. When completely cold the mould is. separated and the castings tapped out. The runner and riser lead is removed together with any flashes of metal and each casting checked for weight and accuracy of = t — – – ——— —— = – = = – ~ – FIG 58 WU position of centre of gravity. c BOXES SEPARATED, PATTERN AND CORES REMOVED, ENDS OF MOULD SCOOPED OUT AND SPACING PLATE IN POSITION. TOP HALF FASTENED IN PLACE. = READY FOR POURING OF LEAD As stated in the previous article, the method of fitting the lead keel to the hull will be described later in the series when, in fact, all of the yacht fittings have been made. It will then be possible to ascertain accurately the exact all-up weight of the yacht. ey
JANUARY 1971 SOl | ARE ONE [TpuRnNe the past year or two a number of sug- gestions have been made through the letters column of Model Boats that the M.Y.A. should intro- The Eastern District M.Y.A. went duce another class. P , the 1968 Annual further, with a firm proposaltheatthought le -simp ultra s herd Fred Shep behind this General Meeting. (I feel sure : ‘ more people to 36 in. Restricted yacht : s the performance belie Al H i somewhat stark simplicity proposal was sound—to introduce model yachting) but their formula for the soaks class was far too scrappy and consequently was at the A.G.M. At the 1969 A.G.M. : the rejected Southern and Metropolitan District, a proposal was by the Brighton and Hove club that the put forward Council should consider a one-design class M.Y.A. and that a number of designers should be asked to design and build what they feel would fit the bill. Then a series of one-of-a-kind races would be held to select the ‘One’ design. The main reason behind this idea was cost. In the Southern and Metropolitan area, Marblehead and 10-rater competition is very hot indeed and unless one is willing to spend a fair amount of money and a great deal of time, then the prize winning list is just out of reach. Hence a One Design, all boats competitive irrespective of age. One would probably still see the same names at the top, but at least the boats would all be the same and they would still cost the same as Ms, etc. This would be all very well for those already in clubs and without doubt would give very close racing. But would it help the dwindling numbers that we have read of recently? After having visited last year’s Model Engineer Exhibition and listened to people at the G.R.P. Marine stand firing questions at Ray Blick, I came to the conclusion that a great number of them were reluctant to start building due to lack of detailed information. This thought was later backed up by Model Boats Editor Vic Smeed. So, then, it seems that although a new class may be welcomed by some, to increase the population of the M.Y.A. clubs something simple and cheap, yet exciting to sail, is needed as an introduction. The obvious choice here is the 36 in. Restricted. This length can be built practically anywhere from workshop to kitchen table, could be handled and sailed with ease by a ten-year-old, and be completed with ready-made vane and sails very cheaply. This could mean a revival of a class which has for some time now been struggling for its existence. With the Championship for the 36R at Poole this year, the first time in the South since heaven knows when, I decided to have a go. A Marblehead was built in the North in the summer of 1969 to a design by Roger Stollery, using just four pieces of ply to form the hull. This method seemed ideal. In fact, could one get anything simpler? The four-piece hull seemed to fit perfectly; the floor would obviously be very flat, but with the pre- vailing wind at Poole giving a reach both ways this was not a problem but perhaps an asset, producing a shape not unlike Zaza and Hector, which have proved to be in a class of their own when reaching, but still able to keep on terms when hard on the wind. Because of the shape of the sides, almost vertical when heeled to a reasonable sailing angle and helping with the leeway problem, the fin can be reduced to Thirteen-year-old Master Austin of Guildford club shows how easy it is. 1. Sewing side skins; 2. Transom and bow-block in place; 3. Inserting shadows; 4. Deck beams, fin, and skeg fitted: 5. Deck held with tape while drying. This actual model will be on view at the M.E. Exhibition. ) ) S|
vill MODEL BOATS just sufficient to support the seven pounds of lead, thus reducing the wetted surface to reasonable limits. But as any amount of sail can be used, the question of wetted area is of only limited importance. 1 The displacement is kept well within that allowed by the rule, and by virtue of this one should gain considerable advantage when at all off the wind. The stability factor should be quite high due to the form of the sections and also the shape of the lead keel which takes full advantage of limited draught allowed by the rule. Unlike most flat, round bilge hulls, Square One will lift very little out on the weather side when angle a certain part of the hull is pushed into the water (the in wedge) and obviously on the opposite side a part is lifted out (the out wedge). Now if the in wedge is considerably larger than the out wedge the whole yacht lifts bodily out of the water, which makes handling rather difficult as (1) the windage on the hull itself is greatly increased (2) waves under the heeled because of the small wedge difference, the area of section No. 5 out wedge amounting to 30 per cent of No. 5 in wedge, a very high percentage indeed. To explain the in and out wedge, first take sketch 1. This is a fair example of a flat floored, modern yacht. When the boat is heeled to a reasonable sailing ( _ ) SQUARE ONE tdesigned by ee BS ae MM Mn F SHEPHERD 1104 The,Model,Makeror Plans Service A eee 4 aS se I Cie BODY SECTIONS x 2 3 4 5 ee \ KEEL FIN UA Yuin Or ME ‘PIy a Fay see See pee, | eee see ip 5, [SS tees =, ee ns Eerie |n\set For Monde! Ex | gee Y | _— i i bint , ~._ | prick along right side of bottom panel. Repeat from es the corresponding point on side panel, then repeat | BOTTOM much for materials for the hull. / \ fibre for Amateurs’ or if you have a firm locally who shop foreman; he may be able to help? With the | Nos Ma manufacturers listed in the M.A.P. publication ‘Glass- _18 | laminate this material why not go along and see the ee \ So Tufnol can be bought from Thomas Foulkes Ltd., Arch 280, Lansdowne Road, London, E.11 (send s.a.e. for list first) or from Ray Blick, G.R.P. Marine, 41A Industrial Estate, Sandwich, Kent. The glassfibre tape and resin can be obtained from any of the | PANEL SKEG SLOT (Bottom Pone! Oniy), al whole operation for left hand side. At this stage the bow block and transom can be cut. Sew panels together with heavy button thread or thin terylene line. Glue in, with Cascamite, transom and bow block. After allowing sufficient time for drying (usually overnight) put in place temporary sections 2—5 and 8, which will hold the hull roughly in shape while the glassfibre tape is put into place. If using glass cloth, cut strips approximately 12 in. (Continued on page 29)
il MODEL BOATS — ‘Lateral Control’ Sketch 3 J. D’Oyly Wright discusses experiments and observations with scale sailing model keels. Part 2 Variable Lateral Control It should be mentioned at this stage that the sector of 12 square inches represents the minimum need for absolute control; the area could be reduced to about a tenth of the hull’s area, but this would result in partial control, and in that case control would have to be achieved by moving the sector as well as trim- ik was assumed that if the 1/3rd. sector was placed between the positions shown in Fig. 3 an intermediate course would result. To prove this, the rudder was removed, the sector made to slide along the aperture of the strutted keel, and the length of the top calibrated in inches so that the leading edge of the sector could be moved forward ‘X’ number of inches as shown in Sketch 3. This assumption proved correct, and with the sails trimmed as before, it was found possible to sail the model on any desired course between running downwind and beating (approximately six points to wind, i.e., 66 degrees). 33 33 Dia 4 +F a Af » 7-9 iLO sa) .. R 0 Resultant Course Running downwind. Running downwind. Beginning to run with wind 9 -F —— running with wind on quarter ee | beating aed 0 | luffing : Y Vi | reaching on quarter. 2-6 2 9 TABLE FOUR Leading edge of sector Zero Advance to | ming the yards and altering the sail plan. The disadvantage of this method is that a sudden change in wind direction could lead to the model starting to luff instead of following the wind round, as would be the case with absolute control. The one disadvantage of this type of control (Variable Lateral Control) is that the sector must be of a certain area, which may lead to a keel that is too deep for practical control; this may limit system of control to small scale models, to which it appears admirably suited. It must be admitted that to date it has only been applied (very successfully) to the author’s 1/96th scale models of a full rigged ship and barque. Running with wind in varying degrees on quarter. Reaching. Going to windward. Beating (maximum). 11 onwards Luffing. This form of control could either be described as a variable control or Dynamic Control, for the model creates its own control from the very forces that cause it to sail, and the results are consistent, regardless of the wind’s velocity. Since this system relies on the power of the sector to alter the position of the CLR, further trials were carried out to determine the minimum size of the sector needed to achieve control and a sector set at the rear was only judged successful when, with the sails braced over, spanker set, and the model sent off at an angle which would normally induce luffing, it caused the model to turn and run downwind. Trials proved that a sector of 12 square inches was the minimum size (this represents approximately 4 of the area of the hull). Ideally, the sector’s length should be as long as possible (in general this appears to be somewhere about } to + of the model’s keel), otherwise leeway may be objectional. If it appears that such a sector will not let the model run downwind, this snag can be overcome by following the author’s ideas on construction of the keel (a description will be given later) and this will allow the trailing edge of the sector to project behind and act as a stabilizer, which will have a very powerful effect in preventing luffing. Diagram Four is the LEC of a 1/3rd sector drawn to scale. The axis represents the length of the model’s keel, and above it is shown the shift of the CLR with below, the shift of the sector’s centre; along the LEC the position of the sector’s centre is shown where a significant change of course occurs. As the position of the CLR is critical it will be discussed in detail in the following section together with some ideas concerning luffing, and the apparent possibility of ee the effect of a sector or an asymmetrical The Apparent Mechanics of Lateral Control Although the author cannot claim to have done extensive research, it would appear from books on marine architecture that very little has been done on the phenomenon of luffing. All the books studied have only mentioned it in general terms, and apparently contradictory statements have been made. In general it is agreed that while it is possible to show the theoretical CE through which the force of all the sails is said to act in the same plane on a profile plan, and the theoretical centre of resistance (CLR), the point at which the water pressure is said to act on the hull, in actual practice these centres can be anywhere. Opinions vary as to how much movement does take place. One author suggested the centres could in certain circumstances be in the bow. There was agreement that if the CLR was behind the CE, then left to her own devices the boat would tend to run downwind, and if the position was reversed, then the boat would fly into wind; while if the posi- tions were in equilibrium (a state normally only achieved if the vessel is lying head into wind), then it would only sail at right angles to the wind (reaching). Only one author attempted any explanation of the phenomenon, which was that it was a double coupled force (wind and water) acting against another double coupled force. rudder and leeway. It is obvious that it has a very complex mechanism with many other factors to consider, and of these the lines and the ratio of beam to length are important. There was only one very rough guide as to how much distance should separate the centres, and it was implied that the designer must rely on his own judg- eel. 28
JANUARY 1971 ment, experience and knowledge based on other ctr vessels, to determine the distance. Therefore it is not surprising that the author cannot LD/CLR add any further knowledge on the subject, but from trials with models it has become apparent that a keel — \angle ad CE PO Bx. : PO 7 + ———-f VD/CLR can be used in two ways, either to accentuate or to suppress the luffing action. It seems that the keel pel i sel: VD/CLR Dia 5 generates a ‘force’ which counters that of the luffing action, and control may be obtained by modulating this counter-force by varying shape, area, and position of the keel. In trying to find out how this force ing to the ratio of the area of the hull (underwater portion only) to the sector, and to the distance between the vertical plane of the model’s C.L.R. and that of the sector’s centre, so that in the case of an asymmetrical keel it is both vertically and laterally dis- works several factors have emerged, most of them complex, and most of them obscure; perhaps the most perplexing one is why the L.E.C. of a keel that is 2/3rd the length of the model’s keel should persistently cross the axis at a point that is in the same vertical plane as the C.L.R. irrespective of any other factor. Fortunately, this provides a constant from which it is possible to make direct comparison between keels and possible to calculate the effect of a proposed one. Since the effect of a sector (see sketch 3) is similar to that of a keel of similar dimensions and in the same position, in future discussions, unless a particular type of keel is specified, the term ‘sector’ will be used to cover all types of keels. From the results of trials of sectors in 1968, a series of L.E.C. diagrams similar to diagram 4 were compiled; it was at once apparent that there was a common factor, but a rational explanation was delayed for some time by the written implication that the C.L.R. moved laterally and no clue was found until the author considered the grams as showing a displacement of sector is considered as an integral part then the position of the model’s C.L.R. A placed. With a moving sector the theoretical path is that of a ‘V’, the proportions of which are determined by the relationship between the shape of the sectors and the hull’s shape, the ratio of the areas, and the distance moved; the proportions of the L.E.C. are determined by the angle ad, VD/CLR (see diagram 5) and the length of the sector. Thus if the C.L.R. of the model is first found, and next the centre of the hull and sector combined (with the sector’s centre in the same vertical plane as the C.L.R.) then this new centre will be vertically displaced from the C.L.R. In future discussions concerning the displacement of the C.L.R., the model’s C.L.R. will be referred to as the Point of Origin (P.O.) and the new centre, which is the Vertical Displacement of the C.L.R. VD/CLR, diagram Sa. If the centre is moved to the extreme rear, or front, the centre now moves laterally and vertically, and is now referred to as LD/CLR (lateral displacement of the C.L.R.) and the angle of the path between VD/CLR and LD/CLR to the horizontal is referred to as the angle of displacement (angle ad), diagram Sa. previous diaforce. If the of the model varies accord- SQUARE ONE (continued from page 23) x 12 in. Paint resin on inside of hull and lay cloth over, paint with resin until completely covered. This place against the keel and skeg. Glass tape both these The inwales can now be glued into place, three 14 mm. thicknesses each side. Use clothes pegs as clamps, one every three inches; let these ply strips project above the side panel a little and clean off before fitting deck beams. The deck beams can be cut and fitted now, making sure that the beam length plus the inwales equals the width of the deck at that point. Glue these into place, reinforce later with glass cloth and resin. Clean up inwales and deck beams, mark and cut out deck. Keel and skeg slots can be cut now. This can be done with a Stanley type knife, following which the keel and skeg can be shaped and fitted. If Tufnol is used for the fin a small electric drill and sanding disc will be useful for shaping, finishing with various grades of glasspaper. When fitting both fin and skeg take particular care in lining up the two, that is in the fore and aft direction. Also make sure they hang at 90° to the waterline, which is fairly easy due to the shape of the floor. One simply cuts a small right angle from, say, + in. thick ply and tapes this into items into place, using two layers of tape 2 in. wide. The order of construction thus far may be summarised in the following steps: Mark out and cut ply panels. Mark out ply ,inwale strips, Transom, Bow Block, and temporary sections. Mark out Skeg, Rudder and Fin. Glue 4 sq. balsa strips to floors. Drill holes for stitching. Sew together (beginning at bow), using strong carpet thread or terylene cord. Glue in place transom and bow block. Fit into place temporary sections. Glue inwales into place with Cascamite (clothes pegs as clamps). Glass tape over chine strips for full length of boat, also bow block. Fit keel and skeg, line up, and glass tape into position. Also strips between keel and skeg 2 in. wide. 11A. Take out temporary stations. 12. Clean off top edges of inwales. 13. Fit deck beams (glue first and then glass tape into place). (To be continued) BEGINNERS (continued from page 38) Double the tiller length requires only half the force to move the rudder; the servo arm is thus applying half the force but at double the moment, so the answer is the same. The gain is in more room in the linkage, making accuracy of assembly easier, and the same amount of slop is proportionately far less in relation to the bigger linkage. Note that the ‘perpendicular rule’ still applies for equal rudder throw. Although it is really self-evident, some beginners may need to have pointed out that lengthening the servo arm while retaining the same tiller will increase rudder travel; lengthening the tiller and retaining the same servo arm will reduce rudder throw, and, of course, in both cases, vice versa. — —_- © SO0. NAP bo taping should be carried right round the chine. 29 |) ae |


