by Thomas Darling
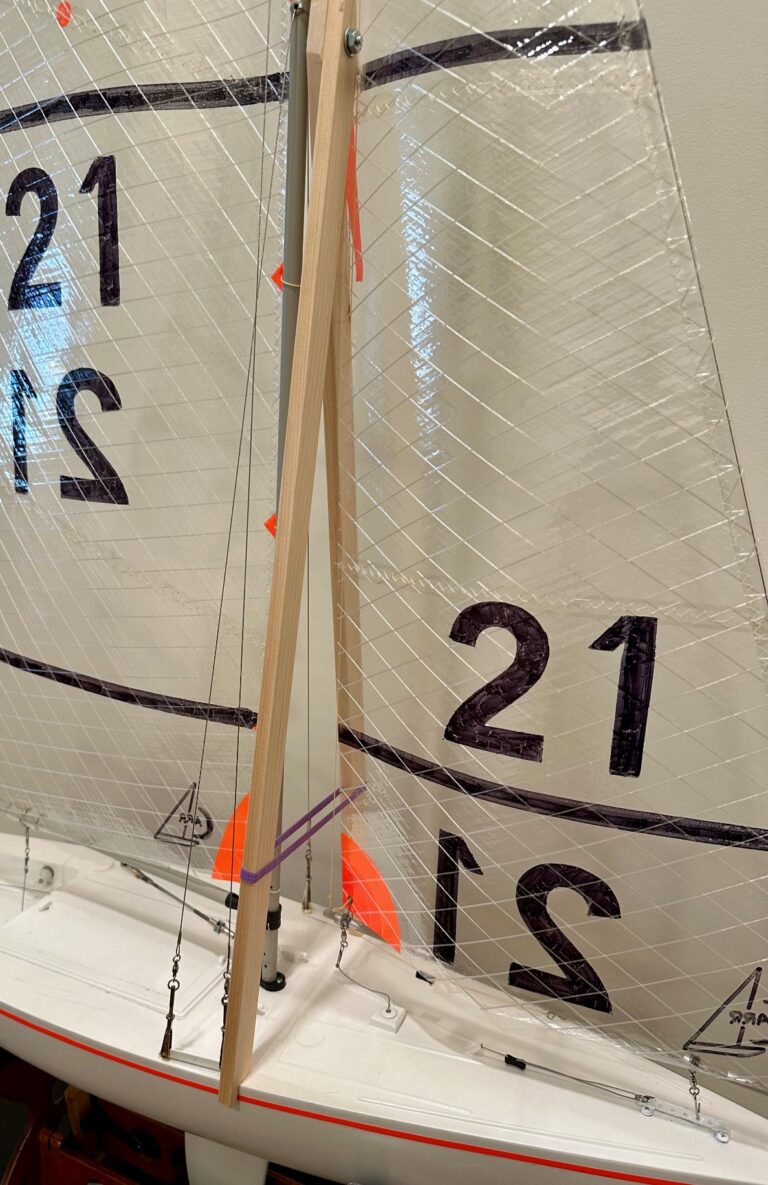
The making of sails is an art whether they are to be used on large vessels or on a miniature. A great many novices have an idea that any piece of cloth cut to fit spars is a sail. We shall see, as we proceed, that this is not true, as several very important factors must be taken into consideration before an efficient, good looking product can be had.
One of the most important things to consider is the material out of which we are to make the sails. There are several kinds of cloth which will serve, such as Union silk. Balloon cloth, Lonsdale cambric, and the linen obtained by washing out tracing cloth. The first named material is a mixture of silk and cotton and is used by the English model makers extensively. Balloon cloth is a good material provided 1t can be obtained as it comes from the loom, as it will then be nearly impervious to moisture. This condition is said to be due to the peculiar qualities of the raw material which it is woven and to the sizing used in its manufacture. It can be obtained at model supply stores. Lonsdale cambric can be bought at any department store; only the best grades should be used. When washing out the tracing cloth use warm water. This will leave just enough sizing to allow creases for tablings or hems to be rubbed easily. It can be washed again when hemmed if too stiff, or when tinting for color.
Let us refer to Fig. 1 and get acquainted with the names of the edges and corners of the sails in a Marconi or jibheaded rig. The for- ward edge of the mainsail that fits the mast is the luff. The opposite or after edge is the leech. The edge which runs along the boom is the foot. The corners marked A, B and C are the clew, head and tack respectively. The parts of the jib or staysail are named in the same manner, the luff running along the headstay. Referring to Fig. 2, we note that the edge of the mainsail which runs between the peak, B, and the throat, C, is called the head; the other edges being named as in the jib-headed rig. The topsail has a leech, a to b, a luff, b to c, and a foot, c to a.
The edges of sails must be so shaped that when set the canvas will not hang as a plane surface, but will be concave when filled by the wind. In other words, the cloth takes the shape of a parabolic curve from luff to leech. This is the shape of a bird’s wing. The shaded portions of the sails in Figs. 1 and 2 show where the greatest bag or draft should come in sails of this type. Broken lines in Fig. 1 show proper curve when looking from top of sail toward foot, the draft being near the luff and fading out into a flat leech.
I advise making a template for each sail for a model yacht. This enables the maker to check himself when laying out another suit. If the first does not fit as desired, the template can be changed accordingly. Templates can be made of heavy wrapping paper or bristol board. As the jib-headed rig is the most popular, let us consider its layout first, taking our measurements from Fig. 1. These dimensions are for a 40 in (overall length) craft.
Draw the chord of the leech arc 49 in long. The ends of this line will give the location of the head and clew. As some allowance must be made for stretching, allow 3/8 in on foot, and 1/2 in on luff. Draw chords or straight lines between the head, tack and clew. The curve that is to be laid out on each edge is called a roach, and these roaches are what give the sail the desired shape. It is assumed that the spars are straight. If the mast, boom, or club has a buckle, you must allow an extra curve for it.
Measure up one-third way along luff, and lay off 3/32 in from straight line. Measure out one-third way along foot and lay off 1/16 in from chord. Divide leech chord into halves and measure out 2 in for roach. Sweep a fair curve from clew to head, giving slightly more curve at top half of leech. Now sweep luff curve in, and repeat the operation for the foot roach. Use a spline or batten for this purpose. Lay out batten pockets. These should be 1/4 in wide, and three times the distance of the roach from the leech chord.
When laying out the template for the jib make the luff straight, allow the slightest roach along foot, and shape the leech as shown in Fig. 1, 3/16 in being allowed for stretch on foot.
Spread the sail cloth on an even floor or table top so that the weave lies naturally without creases or wrinkles, securing so that it cannot shift. Place and secure template for mainsail, with leech chord parallel to the selvage, but far enough away to allow 3/8 in for hem or tabling. Ordinary straight steel pins are best for this job as they make a very small hole in the sail cloth. Outline the template, using a very sharp-pointed soft lead pencil. Mark the place for the batten pockets, at leech and the inboard end. Now measure out beyond template for the hem allowances, 1/2 in on luff and foot, and 3/8 in on the leech. Remove the template and cut to these marks, using a sharp pair of scissors. When turning the “tablings,” as the sailmaker terms the hems, it will be best to do it the way he would go about it. Turn the leech tabling over roughly, for its full length. Place the point of the scissors at the head mark using the right hand, and with the left bring the crease on the leech mark. Now hold this much of the tabling by spreading the thumb and index finger along sail as shown and rub tabling with scissors, creasing to the leech pencil line. The scissors are held in the right hand and the fingers spread as in Fig. 3. After you get started in this manner drive a pin in where the index finger would be and take a slight strain with the left hand, rubbing the crease with the scissors held in the right hand. This method will insure against distorting the natural shape of the edges, or stretching. Rub the tabling, singly, completely around the sail, and then place the raw edge in the crease which will give a double tabling when rubbed down. The tablings will now be 1/4 in wide on the luff, and foot, and 3/16″ on the leech. Tack the batten pockets in place. Do likewise with any reinforcing or corner pieces that may be thought necessary for more realistic appearance.
The stitching down of the tablings is very important. Watch the tension of the thread, both top and bottom, so that drawing or puckering of the edges will not take place. Try it out first on a waste piece of sail cloth folded as is the tabling on the sail. Run a row of stitching around the edge of tabling, as shown at “a,” Fig. 4. Fold the corners at clew, tack and head so that no raw edges will show when sewing is finished. Starting 3″ above clew on edge of leech run another row of stitching around the sail as at “b” and “c,” Fig. 4; ending 2 in below head on leech. One row on leech is enough, as it must be free and smooth for a proper set. More stitching would tend to draw or harden it. Sew batten pockets and corner pieces carefully, leaving a proper amount of slack in pockets so that they will not pucker the leech. Proceed the same way when cutting
Proceed the same way when cutting out the jib. Have the leech chord parallel to the selvage, allowing 1/4 in for tabling on the leech. Cut 1/2 in outside of template for tablings on the luff and foot. Rub them up as on the mainsail. The stitching should be laid out as in the mainsail, two rows on luff and foot and one on leech. Let the edge row run around head and clew for 2 in as on leech of main. Battens are not needed on this sail.
If the instructions are followed carefully, a well setting sail with good draft and strong edges can be made. There are other methods of reinforcing edges. One is to bind the edges of the sail with a tape which has been creased double. This is done on larger sails. One must be careful when laying the sail edge in the tape that a proper relation between the tension of the sail itself and the tape is maintained. The tape should be shorter in length than the foot of the sail. In other words, slack sail is allowed. When the sail is stretched out along the spars this slackness will work out and the sail will be smooth. Another way, and one that makes for strength and snappy appearance, is to place a fishing line inside the tablings. Work the line out to the edge crease and run a row of stitching as close as possible to the line.
Bleached or white materials can be tinted by dipping them into coffee or tea. They will then resemble Sea Island cotton. Should you tint your sails and they become partly wet when sailing, wet them all over before drying. This will insure against unsightly stains and uneven fading, and the sails will hold their shape longer.
If you are planning to lay out a sail plan similar to the one shown in Fig. 2, proceed as described for the jibheaded rig. Be careful to lay out the proper lengths for the two diagonals, 1 and 2, as
these dimensions control the angle at which the boom and gaff swing. Make the head of the mainsail straight unless the gaff buckles, in which case you must allow for this condition. The luff of the topsail can have the slightest roach, but this sail should set rather flat.
There are several methods of bending or securing sails to spars. The most common is to fasten each corner and roll a lacing or thread about the boom and gaff, having hoops or rings on the mast. The principle of this arrangement is wrong, as the sail should not be in a fixed position on the spars. It should be allowed to come and go as occasion requires.
Fig. 5 shows a simple device which will allow the sail to be stretched out gradually and it can be completely slacked up when the boat is housed. The very smallest crochet rings are sewed to sail edges, as at R. Very small screweyes or staples are driven into spars, as at S. A thin wire is passed through these, being secured at gooseneck, and made taut at masthead and outer end of boom. Staples can be made by bending pins or using galvanized wire. A hole is bored in the end of the boom and an outhaul rigged with a bowser on under side of boom.
Figs. 6 and 7 show an arrangement that is neat and efficient. A small aluminum tube, with an inside bore large enough to allow the passage of a bead, is cut lengthwise and spread. (Refer to Fig. 7, view A and C.) This makes a passage for the thread with which the beads are sewed to the sail edges, as shown in view B. The tubes are screw-fastened to the mast, boom, and jib- club. As the gauge of the tubing can be very light the weight will be negligible. Figs 8 and 9 show the jib and masthead rigging, using this device. The halyards, marked H in both figures, can be run down to the deck if desired.
Bend your sail, hauling it out toward the ends of your spars gradually. Do not try to make it go out to the limit at first, for if you do, a poorly set leech will result. Pull out, exerting a fair strain each time the boat is sailed, and eventually it will be completely stretched. When through sailing slack your outhauls and halyards.


