The Model Yacht is a published three times a year by the US Vintage Model Yacht Group
- Model Yacht Restoration Decision Making. by Rod Carr – Organizational plan for restoring model yacht
- Restoration of An Early “A” Boat. by John Stoudt Read on usvmyg.org – Boat evaluation and restoration process with an investigation of origin and history of boat – could it be a Bill Bithell boat?
- Restoration: A Boat Without a Keel. by Margaret Ann Rice – Vintage restoration with design of new rudder and keel
- Busman’s Holiday. by Tom Price – Complete restoration of 1930’s Marblehead hull, deck, keel, rudder, and rig.

The Model Yacht Boat Restoration Journal of the US Vintage Model Yacht 1 Group Volume 21, Number Three Fall 2020
The Model Yacht Fall 2020 US VMYG Leadership President: John Y. Stoudt, jstoudt309@gmail.com……………………………………………………………..(610) 316-8695 President Emeritus: John Snow, jsnowj@comcast.net,………………………………………………………..(978) 594-8521 Treasurer: Tom Alessi, usvmygt@gmail.com……………………………………………………………………(610) 566-9504 Art Director: Bruce Richter, richterbruce@gmail.com………………………………………………………..(917) 575-2221 Journal Editor: Jeff Beck, beck.jeff@gmail.com………………………………………………………………..(240) 252-0236 Editorial Staff: John Henderson, jgnhenderson@atlanticbb.net…………………………………………….(443) 282-0277 Ken Young, youngrun@sbcglobal.net…………………………………………………………(630) 957-7490 Webmaster: Gregg Heimer, gheimer@itcadence.net…………………………………………………………..(610) 960-2185 Membership: Tom Alessi, usvmygt@gmail.com………………………………………………………………..(610) 566-9504 Regatta Coordinator: Nick Mortgu, mortgu@comcast.net……………………………………………………(609) 820-0509 Awards Coordinator: Rob Dutton, edwin653@aol.com.mortgu@comcast.net……………………….(703) 608-8812 Resources Coordinator: John Y. Stoudt, jstoudt309@gmail.com………………………………………….(610) 316-8695 Plans Coordinator: Ivor Walton, modelyachtplans@comcast.net Historian: Earl Boebert, boebert@swap.com……………………………………………………………………..(505) 823-1046 Boat Yard Coordinator: Jim Linville, linvillejim@gmail.com………………………………………………(781) 534-0203 Construction Advice: John Henderson, jgnhenderson@atlanticbb.net…………………………………..(443) 282-0277 Social Media: Steve LaBrenz, srlabrenz@hotmail.com……………………………………………………….(484) 947-1327 Class Coordinators Free Sailed: John Fisher, jfisher577@gmail.com……………………………………………………………….(719) 651-0762 Intl A Boat: Mike Denest, mjd12k@yahoo.com…………………………………………………………………(610) 316-3570 Schooner: Tom Alessi, usvmygt@gmail.com…………………………………………………………………….(610) 566-9504 Skipjack: John Henderson, jgnhenderson@atlanticbb.net……………………………………………………(443) 282-0277 Unrestricted: John Henderson, jgnhenderson@atlanticbb.net………………………………………………(443) 282-0277 Vintage 36: Alan Suydam, alansuydam@comcast.net…………………………………………………………(301) 653-4899 Vintage Marblehead: Bruce Richter, richterbruce@gmail.com…………………………………………….(917) 575-2221 Vintage Power: Peter Kelley, pdkelley@sympatico.ca………………………………………………………..(905) 301-9977 Regional Coordinators Canada: Peter Kelley, pdkelley@sympatico.ca…………………………………………………………………..(905) 301-9977 European Continent: Russ Trapani, teamlebanner@gmail.com……………………………………………(501)-789-3927 Mid Atlantic: Scott Todd, dscotttodd63@gmail.com…………………………………………………………..(410) 310-2453 North Central: Ken Young, youngrun@sbcglobal.net………………………………………………………….(630) 957-7490 North East: Cliff Martin, c_martin5@comcast.net………………………………………………………………(508) 533-5971 North West:…………………………………………………………………………………………………………………….Currently Open South Central:…………………………………………………………………………………………………………………Currently Open South East: Phil Ehlinger, philair41@gmail.com……………………………………………………………….(386) 383-8415 South West: Ernie Mortensen, usvmygsw@gmail.com……………………………………………………….(858) 525-5217 United Kingdom: Graham Reeves, graham@reevesmail.co.uk…………………………………………+44 151 936 1140 3i
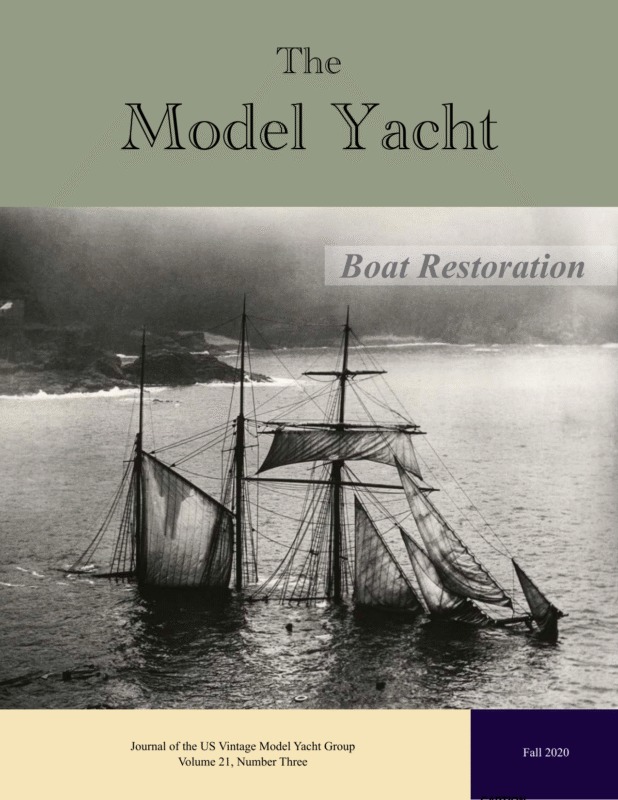
Fall 2020 The Model Yacht The Model Yacht is published three times per year by the US Vintage Model Yacht Group. Copyright 1989 to 2020 by the US VMYG. Reproduction for noncommercial purposes permitted; all other rights reserved. Other copyrights are maintained by the original holders, and such material is used here under the fair use provisions of the relevant copyright acts for nonprofit research and educational purposes. Editorial Address: John Stoudt 309 Sundance Drive Chester Springs, PA 19425 On the Cover: No, it’s not a model yacht in dire need of TLC. But it is what a model restoration project can feel like – huge and daunting – until you plan it out, break it down into steps and tackle them one by one. Learn how in this issue. Membership Renewals: The annual membership fee will be due and should be renewed with the publication of the first journal of the calendar year. Please reference “Membership” on page 34 for dues amounts. Please use the form that accompanies this issue of The Model Yacht to complete your membership renewal. The Layline By John Stoudt Definition: A layline is a straight line (or bearing) extending from the next mark to indicate the course a boat should be able to sail on the one tack in order to pass to the windward side of the mark. (vsk.wikia.com/wiki/Layline) This issue of the journal features renovation. I think you will find it informative and know you will enjoy it. Most model yachts, regardless of condition, can be restored. The topics being covered include restoration of a boat without a keel, restoration of a traditional Marblehead, restoration decision making, and restoring an early “A” boat. Future issues will cover construction techniques, early venues and clubs, and ingenuity. If you have something you would like to submit, suggest as a topic, or know of someone doing something of interest let us know. A lot of individuals are contributing to the Journal. The editorial staff is trying to improve the process by: • Simplifying the digital assembly and streamlining the process • Assembling author guidelines for writing and taking photographs • Working with our new printer to ensure print quality and control costs 1
Fall 2020 The Model Yacht Inside The Leadership Team………i The Layline………..………1 2021 National Championship Regatta Next year’s national championship regatta will be hosted by the Chester Springs Model Yacht Club and held at Tel Hai Camp and Retreat Center, tentatively October 6–10, 2021. You will note that the event will be conducted over 5 days. We are adding a conference day to the regatta which will take place on Friday October 8, 2021. The schedule that day will include four or five 1-hour presentations on various topics related to vintage model yachting and a parade of boats over an extended lunch hour (11:00 am to 1:30 pm). If there is a topic you would like to hear about or you have something you would like discussed, please let us know. More about this later. Barnacles………………..4, 8 Model Yacht Restoration Decision Making…………..5 Restoration of an Early A Boat……………………..9 Photo by Judy Bonanno Did you know that our website has: So, You Want to Restore or Build a Model Yacht…..19 Restoration: a boat without a keel……..….…..22 Busman’s Holiday…..……27 US VMYG Membership…34 • 75 plans available for your use to build boats? • The new WoodenBoat School video Elegance and Joy of Wooden • • • • • • • • Pond Yachts available to view? A nice, enhanced video of children sailing model yachts in Luxembourg Gardens? An updated reference list? A report from Earl Boebert on his experience building a perfect Rip Tide? A map of our regionals? A program from the 2004 US VMYG/AMYA model yacht exhibit at The Museum of Yachting in Newport, RI? Information about Herreshoff and Skene and their connection to model yachting? Information about the first R/C sailboat? A list of upcoming US VMYG events? Webmaster Needed The US VMYG is looking for a webmaster who knows how to use WordPress. This is a sophisticated piece of web development software. The individual who built our website (at no cost to us) is no longer able to assist. If you or someone you know would like to donate some time to help maintain our website, please let me know. 2
Fall 2020 The Model Yacht So, You Want to Build a Model Yacht? The US VMYG has been providing support for years to individuals interested in building a model yacht. We continue to do that by offering expert advice and materials to interested parties. We have experts and resources available to you. John Henderson and others will be glad to guide you through the process. You may also acquire print materials from the website or purchase them from our store. The US VMYG also provides information on where to acquire a fiberglass hull, fittings, and other materials for various boats. The following are available on our Store Page – Publications: • Yankee III by Earl Boebert, 140 pages. A booklet written about the building of a Vintage 36 replica of Yankee III. • Building Planked Models by Charles Farley, 118 pages. An excellent description of the process of building a model yacht using the plank-on-frame method. • Plank on Frame Workshop by Al Hubbard, 75-minute video. This was a video tape of his lecture at the Woods Hole Model Boat Show, May 1997. • Building Madcap, A Vintage Marblehead Model Yacht by Ivor Walton, 38 pages. This is a good photographic sequence of the building of a vintage Marblehead. • Restoring Tritonia: A Vintage Marblehead Pond Yacht from 1934 by John Stoudt, 28 pages. • How to Build a Model Yacht: A Detroit 24”/36” School Built Model Sailboat, 88 pages. The construction booklet written by the teachers in the Detroit Public Schools for the boats (Chico) built in class by their students. 3
Fall 2020 The Model Yacht Regional Regattas As we see ourselves through the COVID-19 crisis, I look forward to the national regatta next year. Some of the regional coordinators are also looking to do something in their region. You can find out who your regional coordinator is either by checking the “US VMYG Leadership” page in this issue or the “About Us” page on the website. There you will find the list of those involved and the map of our regions. Regional regattas can be small and informal or more organized depending on the density of members and boats in your region. Talk to your regional coordinator. Membership Is your membership current? If you joined to sail in last year’s national championship regatta your membership may have expired if you did not renew. Take this opportunity to renew so you do not miss any issues of the Journal. Renewal is easy on our website: https://tinyurl.com/usvmyg-membership Or use the form on page 34. Encourage fellow “vintage” pond sailors to join. The benefits are worth it. Barnacle A great RC power switch—This is the best switch we could find for the R/C hobby and use it ourselves on all of our models. It features a bright LED that lights up when the switch is in the “on” position and a charge port on the face of the switch to easily recharge your receiver battery without unplugging it. The charge port is covered with a sliding door so dirt and debris can’t get into the charge port when the model is in use. These switches are for Futaba-style connectors. They are available from Amazon and come two to a pack. 4
Fall 2020 The Model Yacht Model Yacht Restoration Decision Making Type to enter text Where do you begin? Reprint of article that first appeared in The Model Yacht, Vol. 2, No. 2. (edited) Author Rod Carr, Photos John Stoudt ___________________________________________ Decisions about restoration and preservation of a vintage model yacht may be based on an identification of the importance of the actual model in the history of model yachting. It is suggested that as much information as possible be obtained about the model before attempting a restoration. This information should go into the project file as background for the Restoration Plan. 5
Fall 2020 The Model Yacht Category Designation (importance of the model) Condition Assessment The next step in any restoration project is to identify the existing condition of the original yacht. The condition descriptions on the following page are suggested: There are three categories of importance. Category I—Model yachts that are historically significant by virtue of taking part in a historic event such as Bill Bithell’s Ranger (International A boat won the 1948 Model Yachting Monthly Cup) and Ains Ballantyne’s DX Class champion. From a historical perspective, such yachts should be restored to represent the event for which they are most famous. Category II—Model yachts that are historically significant due to technological features in hull design or rigging or for being prototypes for designs that became historically significant. Yachts in this category should be restored to highlight the features for which they are most noted, such as the Mclass “flipper” keel, etc. Category III—Model yachts that are not significant in their own right but that represent a historically significant model class, type, or construction. The goals of the restoration should be based upon an identification of the model and its assignment to one of these three categories. This is the first part of the restoration plan, and unguided demolition can be avoided. Then a complete restoration plan can be developed to guide the effort. Level 3 Condition: Frames delaminating 6
Type to enter text The Model Yacht Fall 2020 Level 1 Condition—Yacht is in undeteriorated, pristine condition, and could be exhibited or sailed as is. Level 2 Condition—Yacht is in “recent use, well cared for” condition. Suitable for exhibit as is: or, for sailing with attention to watertight integrity or rigging and sail condition. Wear should be the result of use, rather than neglect. Two to three pages seems typical for all but the most comprehensive projects. Failure to take the time to do the research and develop the Restoration Plan will ultimately result in a hodgepodge approach to the project as it unfolds. Having first decided what the finished product is going to be (see below), individual details of the work can be carried out in a consistent manner. –––––––––––––––––––––– A written Restoration Plan should be completed before any work commences on the yacht. Level 3 Condition—Yacht is in deteriorated and/or unstable condition. It requires treatment, preservation and restoration. _______________________ Level 4 Condition—Yacht is derelict, destroyed or partially completed. Document the Boat The Restoration Plan A written Restoration Plan should be completed before any work commences on the yacht. The plan should contain photographs of the “as found” condition, notes on the integrity of the hull, lists of missing pieces, and any other historical background that can be gathered. The Plan documents the basis of the decisions made to guide the restoration. It answers the question: What is the goal of the rehabilitation? It establishes the boundaries within which the restoration work will be carried out and provides the guidance for choices that must inevitably be made while the work is ongoing. Commercial restorations that the author carries out for clients, typically include a statement of the final configuration to be attained and a list of individual worktasks that will be completed to reach that end. 7 Documentation of the project from photographs of the “as received” condition to the completed project should be filed in a project notebook which remains with the yacht. A narrative report of the project would make a good submission to The Model Yacht. As in any historical undertaking, there is a continuous question of how far to go in totally reproducing an antique object. It is the author’s opinion that modern day adhesives and sail materials do not materially detract from the authenticity of the final product, nor does the application of modern radio control systems because they do not materially alter the external appearance of the model. However, the author does balk at modifications to the original that are obvious attempts to gain advantage on the race course. It is my opinion that vintage yachts are to be sailed, seen, and enjoyed … the order of crossing the finish line in a demonstration race is little of the attraction.
Fall 2020 The Model Yacht Description of the Finished Project Completed Project Description The following descriptions are suggested to describe the finished product: Category I – First US DX Class Champion, first R/C national event – 1952. Condition: Level 2 – Rig missing, deck in need of repair, some original R/C gear. Restoration Plan – Restore yacht to R/C sailing condition; provide replacement rig and new R/C gear. Photos of original rig obtained from prior owner. Finished Product – Restored Original – hull, deck, keel, skeg, rudder, deck fittings original. New Sitka spruce mast, booms from 1972 vintage M-class boat, Carr paneled 2-oz Dacron sails, modern Futaba R/C gear, Ozmun Swing-arm winch. Included working stand of ⅝-in plywood, and display stand of 1-in teak. Approximately 450 h of work were involved in the restoration. Original—Yacht is in original as-built condition, or if modified by the user it remains unaltered from the time it ended service. Example: Bithell’s Ranger (A-class) Restored Original—Yacht is composed of at least 50% original components (by surface area or volume) and the remainder returned to accurate early condition made with the same materials, components and accessories. Reproduction—A reasonable facsimile in appearance and construction of a yacht made with similar materials and essentially the same operating systems. In the case of a vane yacht having radio installed, might more properly be called “Reproduction for R/C”. Example: Wooden hulled Cheerio II from John Black’s Plans. Note: The two photos in this article are of a Marblehead class boat that I received from someone. It has given me many moments of pause. It is in very rough shape and I hate to throw a model yacht away. Stay tuned. JYS Replica—A reproduction built from original plans, but using materials not found in the original. Example: J.R. LeBlanc’s fiberglasshulled Cheerio II. Example: Steadman’s M-Class Arrow (~1949) Barnacle Customized Clothing—US VMYG clothing can be customized. For example you can have your boat number added to the back of a ball cap or above the logo on a tee shirt. https://tinyurl.com/usvmyg-clothing 8
Fall 2020 The Model Yacht Restoration of an Early A Boat T Figure 1: Typical Bithell signature Author and photos John Stoudt Author and photos John he owner of a vintage model yacht contacted me by phone and with subsequent texts and emails. He is a collector of nice, well maintained, older model yachts. He had this wonderful old A Boat and was upset about its condition. He wanted it to look nice again. He indicated to me when he acquired the boat he was told the boat was built by Bill Bithell. I asked him a few questions that made me question that claim. The most important factor is the fact that the “W. G. Bithell, E. Boston” signature (in pencil; see Fig 1) that you find in a Bithell boat was missing. I agreed to take on the project. It was delivered in the early winter, and the project began in earnest. 9
Fall 2020 The Model Yacht I must tell you that when the owner was removing the boat from his car, I almost told him to just leave it there. As he handled it, it was twisting end-to-end and side-to-side. He lugged it into my shop with great effort. This boat weighs over 60 lb. It got plunked on my one large workbench and gave one the impression of occupying the entire shop. This was unacceptable because I have boats coming and going all the time. So I went to plan B. That was to build a simple mobile stand that could be moved around the shop. I intended it to support the boat on the ballast with straps placed fore and aft (18 inches in from the bow and stern). Once that was built and the boat was moved onto it, I felt a lot better. Using an article written by Rod Carr and republished in this issue (see pages 5 – 8), I applied his criteria to the initial assessment of the boat. I placed this model yacht in Category III at a Level 3 Condition and documented the boat’s physical deficiencies and prepared a plan of work. Observations (physical deficiencies) This boat is planked with mahogany planks (hull and deck) approximately 3/32 by ¾ in. The keelson and garboard pieces are also of ¾-in mahogany glued together. The deck beams and the bent frames are oak. The toe rail, along with the bow and stern pieces, are made from maple (3/32 by ⅜ in) cut to fit the curve of the deck. The hatch cover is made entirely of mahogany with varied coloration. The spars are a straight, tight grain pine. All of the fittings are chrome-plated brass. The entire boat is glued with a synthetic resin adhesive. This hull was fastened entirely with toothpicks, and most of them were loose. The deck, hatch frame, and toe rail were also fastened with toothpicks. Fig. 3. Damaged frames Fig. 2. Duct tape used to align planking Note: Before I did any work on the boat, I stabilized the hull by placing it upside down and applying duct tape along the entire length of the hull. 10
Fall 2020 The Model Yacht 1. Many of the frames are compromised, broken and/or out of place. 2. The planks have come apart, detached from the frames, or twisted. 3. The skeg is missing. 4. The rudder is broken but intact. The rudder tube is loose, and the support is not glued in place. There is a pin alignment fitting at the bottom of the rudder, but the rudder shoe is missing. 5. The deck is compromised with most joints having failed and one area “punctured”. 6. The toe rail is in good condition. Fig. 4. Damage before restoration 11 7. The hatch cover is finished poorly and some of the veneer inlays are missing. 8. The deck beam glue joints have all failed. 9. The ballast had been painted a mottled brass color and there is surface damage. 10. Nearly all of the glue joints in the boat have failed. 11. The vane steering pintle is on the boat, but the steering vane mechanism is missing. 12. The rig was set up incorrectly with items installed that were just for show and had no function. 13. The fittings are in very nice condition, and all of them are intact. They just need to be cleaned up. One turnbuckle is incomplete. There is a tensioning mechanism in the hull that allows one to apply tension to either or both shroud racks under the deck by simply turning one or both turnbuckles. 14. There is a brass nose on the lead edge of the hull. It extended from bow to the ballast. 15. Two thirds of the inside of the hull was painted silver – one third at the bow and one third at the stern. Interesting and probably later “repair”. See Fig. 5.
Fall 2020 The Model Yacht Fig. 5. Hull frames reinstalled and silver paint Remove the deck The only way the frames could be repaired was to remove the deck. This was done by carefully sliding a putty knife into the seam between the deck and the toe rail. Upward pressure was applied to lift the toe rail from the deck. As the pieces came off, they were labeled in pencil on the back for correct re-assembly. Next the putty knife was inserted between the top of the hull and the outermost deck plank. Upward pressure was applied and as soon as the plank could be grabbed by hand, additional pressure was applied as the putty knife was slid along the edge to release the plank. As the pressure was applied, the glue joints came apart, and the planks lifted away easily. The work had to be done around all of the toothpicks used as fasteners. Most of them were ultimately removed. Restore and Augment the Damaged Frames Plan of Work and Process Dealing with the bad glue joints provide challenges and opportunities along the way. This plan was thought out ahead of time, but adjustments were made as work progressed and other options presented themselves. These frames were typical in many of these early boats. They were bent oak ⅛ by ⅜ in and were very dry and brittle. Their pieces (20 or so) were pulled out of the hull, sorted like puzzle pieces, and placed in the correct locations at each station. Only one 2-in piece was missing. This piece was remade and included in the restoration. The entire inside of the hull was cleaned and sanded lightly to provide a surface for the epoxy to adhere. Each piece was epoxied back in place. The pieces were held in place with clamps and props. An epoxy fillet was formed along each side of each frame. At the same time the planks were forced back into place with props. While this work was progressing, epoxy fillets were placed under the sheer strakes along the inside of the hull to reinforce the joint that I was unable to get apart. Roughly 40 frames were repaired or reinforced. The middle five frames on each side of the hull had plywood pieces sistered onto them to strengthen them. These frames were under the most stress from the over 50-lb ballast. 12
Fall 2020 The Model Yacht Hull Planking Many of the twisted and misaligned planks went back into position with the uploading pressure applied by the mobile stand straps, countering the keel weight, and the props during the frame re-gluing procedure. Skeg Construction A piece of ⅜- by 4- by 7-in mahogany was used to make the skeg. There was a rabbet in the hull in front of the rudder shaft hole. This was cleaned out using a chisel, and the skeg was dry fitted into it. The skeg was cut and sanded into shape. It was then epoxied into the slot, and a small radius of epoxy formed between it and the hull. Rudder Repairs At the same time the rudder crack was repaired. The rudder shaft was removed from the rudder and cleaned up. The rudder was epoxied back together and sanded smooth when dry. Now that both the rudder and skeg were able to be installed in the boat temporally, the skeg and rudder were fitted with a brass rudder shoe. Deck Repairs As the deck was taken apart, as noted above, the planks were labeled with a “P” or “S” for port and starboard and with an “F” and “A” for fore and aft (in front of Fig. 6. Clamps and props to realign planks and behind the hatch opening). The planks were also numbered. So, you would see an S4 indicating the plank was the 4th plank from the starboard gunnel. At the time of deck plank removal, the hatch opening frame was also removed and labeled. The one joint that could not be gotten apart was that of the center deck plank and the king plank. This worked out fine because there was substantial re-gluing around this assembly as the deck was replaced and glued down. So even if this joint failed, the re-gluing would keep it together. 13
Fall 2020 The Model Yacht Fig. 7. Deck repair The Toe Rail A hole had been punched into the deck near the pintle for the vane gear—no pieces fell out. As the deck planks were removed, I realized that I could repair the damage by gluing and clamping the compromised planks. As I flexed each damaged plank in the area where the damage was, I was able to get the pieces to realign. So, I flexed the plank, applied glue, and clamped the pieces together. They went back together so well I was able to sand out the unevenness. As I reassembled the deck and sanded out the irregularities it was evident, I could float clear epoxy into the small void that remained and finish right over it. The toe rail came off in very nice pieces. It was all labeled and put aside. The nose pieces at the fore and aft end of the toe rail did break but glued back together very easily. The Hatch Cover I removed that last existing piece of veneer trim. After acquiring self-adhesive veneer, I cut and fit pieces into place. The whole hatch cover was sanded to fair in all the pieces and multiple coats of finish were applied. 14
Fall 2020 The Model Yacht Deck Beams Glue Joints The deck beams and hatch opening beams were cleaned up, scraping off all the old glue and removing the loose toothpicks. The slots they fit into were also cleaned up. The beams were then glued back into place using TiteBond II. A couple of clamps were applied to the exterior of the boat to pull the beam back into its original dimensions against the ends of the beams. The glue used on this boat failed over time. Whether this boat was built in the early 1930s (as noted by the seller) or the mid-1940s which align with the time when Bill Bithell was building these boats, it is an old boat, and the glue just failed. The glue was probably a formaldehyde resin-based adhesive. The Vane Steering Gear The vane gear was missing; however, the pintle was in place. A vane was acquired from a friend, cleaned up and installed on the boat. Slight modifications were made to enable this vane to engage the rudder control arm. The deck beams flexed and had too small of a cross sectional area, especially at the king plank notch. Sisters were made of 3/16- by ⅜-in cedar with band saw kerfs placed every ½ in. These were The Rig then glued to the beams. The The rig was in very nice shape. Fig. 8. Deck beam sisters kerfs were made to reduce the There were a couple of tears in amount of flattening of the the sails, which have been deck beams when the sisters were glued in place. repaired. After consulting with Rod Carr and the owner, The ample amount of glue that was applied to the it was decided not to replace these fine old Egyptian, joint flowed into the kerfs and strengthened the William G. Bithell (WGB) sails with new sails. assembly. The Fittings The Ballast This became a Murphy’s Law issue. The turnbuckle vibrated loose, and the body of the turnbuckle fell into a nook in the car while it was being transported. The part eventually turned up. Remember to tape these turnbuckles to keep them from vibrating apart when you travel with a boat like this. The finish was removed from the ballast. I found some areas of the ballast where the lead had not flowed completely into the mold when it was cast. These were filled and sanded smooth in readiness for finishing. 15
Fall 2020 The Model Yacht An “Oh No” Moment While I was rolling the boat from one side to the other, I was holding it by the keel (ballast), the heavy end of the boat. Next thing I knew the whole keel had separated from the keelson. Yikes, now what do I do? I do what I had been contemplating all along; remove the ballast from the boat (now a smaller piece of attached keelson). This involved removing two exceptionally large wood screws and the attachment bolt. When this was done, I was able to clean up the keel and repair it. It is not unusual on a casting this large to have cavities form while the lead is cooling – shrinking. If you do not have large feeder sprues to keep the molten metal feeding into the casting, the large mass of metal shrinks too quickly, thus the cavities. Fig. 9. Keel attachment area showing bad glue Fairing in the Planking The deck and hull planking went back together nicely, but they were still irregular and did not line up completely. So some sanding was necessary. I sanded the deck prior to reinstalling the hatch cowling and toe rail. I used a random orbit sander with a 150-grit sanding disk. I then went to 220-grit paper. This is tricky because you must keep the sander moving rapidly to avoid sanding holes in the surface. The hull was a different story. It needed more work with both the random orbit sander and sanding (fairing) board. Finishing I decided to finish the boat using WaterLox. This finish provides a wonderful, amber hew and is totally waterproof and durable. The first area I worked on was the deck applying 12 coats of finish first by 16
Fall 2020 The Model Yacht brush and then by wiping. Sanding or steelwooling was done between all the coats of finish. The last coat was applied with a rag and rubbed out vigorously to develop a matt finish. I allowed the finish to dry for a couple of days. I flipped the boat and applied finish to the hull. A similar process was used to devel op a nice finish on the hull, applying multiple coats of finish with sanding and cleaning between coats. The ballast had been painted and not finished naturally. As I work to clean up the ballast, I discovered that there were voids that needed to be filled necessitating the need to repaint the ballast. I used acrylic paints to paint the ballast to look like aged lead as the ballast was lead. The Bill Bithell Argument The seller of this boat sold it as a William G. Bithell (WGB) boat and dated it as early 1930s. There is one thing WGB did when he built a boat: he signed it in pencil in the bilge. There is no evidence of the signature in the usual location or anywhere inside the hull. Evidence suggests that this boat had been worked on at least once, probably more than that, before. Therefore, there are four possible scenarios: 1. Maybe WGB forgot to sign this boat. 2. Maybe this boat was built before he started signing his work (the rig notations do not support this). 3. The signature was inadvertently removed during a prior restoration. 4. It is not a Bithell built boat. The rig is, without a doubt, a WGB rig for the following reasons: • The sails are made from high thread count Egyptian cotton which WGB always used. • The sails have the Wm G Bithell labels on their lead edges. 17 Fig. 10. First coat of finish on the port side of the hull
Fall 2020 The Model Yacht Dating the Boat This boat was thought to have been built in the early 1930s. If this is a WGB boat we must remember he graduated from MIT in 1932. His national championship A boats were 1935, 1936, and 1937. When did WGB start to make fittings for sale (quite an extensive assortment) and when did the plating of his fittings begin? Did he have time to do this in the mid to late 1930s when he was competing on an international level? So, the question is when was this boat built? I invited Mike Denest, the former AMYA International A Boat class secretary, to take a look. He came to the house to see the boat in person. His estimate, based on the size and shape of the boat, places it in the mid to late 1940s. There was a hiatus during World War II in building and racing which further suggests this boat’s origin is better placed in the mid to late 1940s. Fig. 11. WGB fitting • The main sail is fixed-footed, a characteristic of WGB sails. • The fittings are chrome plated, which is very typical of WGB fittings. • One fitting has the WGB stamp on it. • The lines are not original, and the rig is incorrectly done and not identifiable as WGB work Note: I have an M Class WGB rig including sails, and the similarities are striking. I would say they are made by the same person. Fig. 12. Finished boat 18
Fall 2020 The Model Yacht The WoodenBoat School shop, Brooklin, ME So, You Want to Build or Restore a Model Yacht. Authors, The Model Yacht Editorial Staff You have always wanted to build your own pond yacht or restore your grandfather’s boat that is in the attic. Well now is your opportunity. These two wooden boat schools, one in Brooklin, ME and one in Kingston, NY have courses scheduled in 2021 on building and restoring model yachts. For more information regarding each of these courses click on the link provided or visit the school’s website. 19
Fall 2020 The Model Yacht July 4–10, 2021: Pond Yacht Restoration Restore/complete your own pond yacht and get it ready for sailing or display with John Stoudt. WoodenBoat School, Brooklin, ME. There are various models and pond yachts out in the world in need of repair or restoration. The boat may have been a family heirloom, a model you found in an antique shop or at a flea market, or a project that you began but could not find time to complete. A restoration project Photo John Stoudt John will consult with each student prior to the course to develop an understanding of your boat and plan of work. Together you will determine what materials and supplies you will need to bring along and what John will make available. He will have other materials and parts on hand for the unexpected. A final plan for the restoration and/or completion of your boat will be established on the first day of class. Each morning, the students and John will evaluate where they are, how they have progressed, and how to proceed. For more information: https://www.thewoodenboatschool.com/boatbuilding/pond-yacht-restore.php _________________________________ August 22–28, 2021: Build Your Own Plank-Constructed Pond Yacht Construct a Vintage Marblehead class pond yacht designed for radio control with Bruce Richter. WoodenBoat School, Brooklin, ME. In this course each student will begin the construction of his/her own pond yacht that fits the specifications and class of boat known as Vintage Marblehead (VM) which is 50 in LOA and has 800 in2 of sail. The course boat Norumbega was designed by former instructor Thom McLaughlin. Construction of this pond yacht will pleasantly challenge and inform students in planking practices like those used in building full-sized boats. During this week, the boat will be planked and faired, and the fin and rudder will be fabricated. Bruce will also discuss the steps that follow to complete the boat—decking, rigging, electronic installation, and painting. For more information: https://www.thewoodenboatschool.com/boatbuilding/pond-yacht.php 20 Rigged Norumbega in the shop
Fall 2020 The Model Yacht August 30–September 4, 2021: Build Your Own Vintage Model Yacht Students will build a Vintage 36 (Chico II), Vintage Marblehead (Madcap), or schooner (Brilliant) with John Stoudt. Hudson River Maritime Museum Wooden Boat School, Kingston, NY. Hudson River Maritime Museum Wooden Boat School, Kingston, NY Students will build his/her boat of choice during the week, completing it on Friday and sailing it on Saturday morning. The Chico II was designed by A.J. Fisher, a well-known sailor and a supplier of pond yachts, supplies, parts, and plans in the Detroit area. The Madcap is a H.E. Richardson design drawn in the 1930s and a successful model yacht. Brilliant is a downsized version of the famous schooner Brilliant, designed by Olin Stephens of Sparkman & Stephens. Photo Ivor Walton Photo Ivor Walton Chico II Madcap Photo Judy Bonanno Brilliant All materials will be provided by the instructor and the school, including hull, ballast, fittings, sails, spars, and electronics. The instructor will prepare certain materials ahead of time to ensure the student has everything needed and the time necessary during the week to complete his/her boat. On Saturday, the students will have the opportunity to get their boats wet and sail in a regatta. http://www.hrmm.org/boat-building.html 21
Fall 2020 The Model Yacht “Fig. 1. This 44 ½-in LOA boat was skillfully made with a clean deck and recent paint on the sides Restoration: Author and photos Margaret-Ann Rice A boat without a keel History It is cool to get an email from someone who has a family boat that they want to restore and give to younger generations. My usual reply is “Sure!” Send me some pictures and I will respond with ideas and a rough estimate.” Occasionally, I might grimace a bit when I see the photos, but usually the boats are amazing: handmade with classic proportions and graceful lines. This boat was beautiful! Sleek and spare. Great design and wellmade BUT missing her keel and rudder! The client said that the boat was made by her late father in about 1928 as a Boy Scout project. The Scoutmaster was a master Shipbuilder named Kruse from Coos Bay, OR. The scouts sailed their boats in races on Coos Bay Harbor. All spars, sails, fittings, rudder, and keel for this boat had been lost over time. An old photo showed a steel keel with a crude shape that did not match the lines of the boat. 22
Fall 2020 The Model Yacht The hull appeared to be in remarkably good condition, no damage, dings, or signs of wear. Construction was wood lifts, carved on the outside and hollowed on the inside. The deck was clean with very simple rigging hardware and hand-carved cleats. The bottom of the hull ended where the full keel should have begun. More than likely the keel was removed for the lead it contained. Early pond yacht hulls may be found without their lead keels. The lead was donated as part of the World War II effort for collecting metals. Methods My motto is “do no harm”: recreate as little as necessary and keep as much original as possible. Where do I begin? I do not want to rebuild this boat, but I wanted her to look as best she can. I could envision the shape of what the keel should look like and I remembered the reference of the Thomas Moore designs created by Earl Boebert for the US VMYG library. The diagrams showed the proportions and shapes that I needed to complete the hull. I looked through the assortment of hulls that I have collected and found a hull with a solid wood and lead keel that would fit (with some modification). I sacrificed the boat and took the keel off. Fig. 2. In the 1980s the boat’s maker tried to add a black metal keel. After he passed away, no other restoration was attempted. I planned to attach the keel with two wood dowels drilled and pegged into the hull and keel deadwood. This would do the least damage to the hull and could be removable if there was future restoration. I sanded paint and debris from both glue surfaces and began to reshape the new keel to match the keel base on the bottom of the boat. Once the new keel was glued and dried, I used wood filler to blend in the joint and final shaping. Primer paint and final paint completed the connection of the new keel. 23
Fall 2020 The Model Yacht Remarkably, the rudder posthole in the hull aligned with the married keel. Another boat from my collection donated a brass rudder and steering bar. The boat was completed with very simple rigging and a large foresail. The handmade cleats were used for the jib sheets. Restoration Fig. 3. Drilling and placing the dowels worked better than I expected. Measure carefully. Keep a steady hand and do not rush the process. 24 I do my best to clean up the hull, repaint as needed and repair breakage. I built a custom display stand so I can work on the boat. Following clues from the deck or existing rigging, I research rigging and measure and pattern new spars and sails. Since I have no great expertise in model boat building or sailing, I am always learning and gathering information and techniques. My intention is to bring these boats back to life and to preserve a craft and art form from the early 20th century.
Fall 2020 The Model Yacht Clues for restoring the rigging of this boat came from the remaining hardware, marks and holes on the deck, and the mast step location. This boat had a very clean deck with a location for the mast step, screw eyes at the bow and stern, and two hand-carved wood cleats near the mast. There were brass tangs on the side for the side stays. The deck appeared to be made of clear redwood or spruce with a carved and bent gunwale. Using the proportion of boat LOA times 1.33, I decided on a mast length of 60 in. The mast was made of ½-in hardwood dowels, tapered at the top and in two pieces just above the spreader. A centered steel rod and a brass sleeve joined the two pieces. Early pond boats often had two-piece masts and removable rigging so that the boats could be moved and stored easily. Fig. 4. Blending the old with the new (old) keel and repainting completed and balanced the hull I decided to use standing rigging of stainless coated wire attached with brass turnbuckles. I added a second shorter side stay to stabilize the two-piece mast. The mast step and gooseneck are reproduction Fisher hardware. Fig. 5. The reproduction A.J. Fisher hardware was sourced from a friend who restores boats and makes fine brass hardware. I made my sails from fine natural cotton muslin, trying to reproduce the look of old handmade sails. 25
Fall 2020 The Model Yacht The client reviewed photos at stages and was very pleased with the result. The final touch was a brass plaque on the stand that recorded the date the boat was made, the maker, and a new name commemorating the maker. I was incredibly pleased and relieved when the boat arrived back in Oregon. Restoration of Antique Pond Boats mysmallboats.com was founded in 2009 by Margaret-Ann Rice of Dartmouth, MA to present information and to sell restored antique wooden pond boats. The website has been discovered by collectors from around the world and by people looking for unique gifts or nautical décor. Over 250 small boats have been sold through the on-line store and many handmade antique pond boats have been restored for people wanting to preserve family boats. Fig. 6. The final rigging brings an old boat back to life. I am always looking at proportion, scale, and aesthetics. That is why I like working on classically designed pond boats 26
Fall 2020 The Model Yacht Busman’s Holiday Author and photos Tom Price The find! The Find! There’s no such thing as a free boat. So when a friend asked if I wanted a boat model I hesitated and thought, “mmm, probably some dusty attic relic”. I asked if it was old and he said, yes it’s from the 1930s as far as he knew. A flicker of interest … “How long is it?” “50 in long (ah ha …), and fairly heavy as it has a lead keel.” 27
The Model Yacht Fall 2020 Yes, it was a rather shabby old Marblehead of uncertain origin, no rudder or rig or fittings but obviously well made and with a good looking hull shape: somewhat Cheerio looking. Wiping off the dust, I saw holes where fittings had been, and it was obviously originally rigged as a Braine gearsteered boat. The deck was nicely scribed with plank lines, and it was a plank-on-frame hull, apparently still well fastened. Rickover, and some time ago several hydromechanics technician friends and I got deeply into R/C model yachts. First we built several 36-ft International One Designs (including scaled ballast ratio) that performed poorly but were a good lesson in scaling (sail area scales to the square while displacement to the cube, so as sailing models get smaller the rig power grows disproportionately!). Next, we each designed and built 36/600 class boats.We travelled to the Nationals and I remember that my design did well as long as I could keep the electronics dry. He was glad to have it out of his house, and I was pleased to have it. Happily bringing it home, I laid it on the bed and said to my wife “Look what I have.” Her response of “Get that dirty thing off the bed” wasn’t exactly what I hoped for, so I retired, with my model to the garage. ––––––––––––––––––––– There was also a fleet of Marblehead Class boats there and we fell in love with these tall, elegant yachts seemingly from another planet! Some background I am a model maker by profession. My models aren’t particularly attractive, but they are accurate and of infinite variety. I have made engineering models at the US Naval Academy, largely supporting Midshipmen student projects and Navy research for over 40 years. Towing tank models, wind tunnel models, tooling and parts for Formula cars, an incredible variety of stuff the Mids take on as projects comes to our doorstep, and together we figure out how to build them. Project based learning is the new hot ticket in education, and it fully engages their active minds. I had considered retirement but enjoy working with these young people so much, I think they will have to change the locks to get rid of me. ––––––––––––––––––––– The other problem for us was our first experience sailing model yachts in a large fleet. By the end of the regatta, my boat had streaks of every color boat in the fleet on its topsides. We found a very different ethos in application and knowledge of racing rules, model yachting as compared to “real” boat racing. There was also a fleet of Marblehead Class boats there and we fell in love with these tall, elegant yachts seemingly from another planet! The next summer saw us at the Marblehead Nationals in Central Park with boats of our own design. My boat showed great promise especially downwind, as I drew it with more rocker and a V-shaped underbody aft with a rig and and keel We have a 380 ft long, one million gallon towing tank across the hall from the model shop in 28
Fall 2020 The Model Yacht farther aft, allowing the stern to sink and bow lift, avoiding the spectacular but slow bow diving behavior that more conventional boats exhibited with their tall 95-in rigs. (Note: Modern Marbleheads can have rigs taller than the 85 in above deck permitted for Vintage Marbleheads.) Local Annapolis R/C racing was growing, and we had a good group for several years until marriage, kids, life in general, and other “real” boats called. As quickly as it had appeared, my intense focus on model yachting faded— my own spark extinguished when my dear daughter accidentally sat on (was pushed onto) my frail Marblehead on its stand, and it literally broke in half! So, now, several decades on, with kids moving on and a bit more time available, I found myself again with a Marblehead! This one weighed approximately double what my carbon one weighed but was much prettier, even banished to the garage. Back to work Inverted, on horses, I sanded three quarters of a century worth of paint. Interestingly it had original paint (white) as there were no other colors underneath the topsides. As the red bottom color, painted on in an odd swoop from halfway up the stem, swooping low amidships, to mid transom, disappeared, her true shape became clearer. Her planks, tapered from stem to transom were pine above the waterline and cedar below and smelled wonderful as I faired out some irregularities. Pretty well down to raw wood now, I dusted her off and brought her in (not on the bed) and just admired her for a while. The hull, dimensionally seemed pretty normal, but she lacked the long fine stern of the prettier models. The bow was slightly snubbed in a powerful upturn above the waterline. But the long , flat run aft of her buttocks and waterline ending at a narrowed transom V looked purposeful and “right” (if not as classic as some). At some point, an old model truly becomes “yours”, and I felt liberated to reshape some of the profile. The leading edge to the keel extended forward halfway to the waterline in an odd, thin fillet. The skeg aft was very deep to make for a (missing) large, attached rudder. With spokeshave 29
Fall 2020 The Model Yacht Right side up in her cradle, I cleaned the nicely lined deck and masked off the centerline king plank and covering boards along the sheer. These I stained a red mahogany, and the decks after some relining came up as a buttery yellow pine under seven coats of varnish. I drew a more modern rudder profile extending well below the skeg (checking to make sure the skeg was more than 50% of the rudder area) and carved it from teak and pinned and bonded it to a 1/4-in brass post. and patternmaker’s rasp, I reprofiled both to a more eye pleasing shape. I added a piece to the stem, bringing out the length overall to exactly 50 in and making a more elegant bow curve that matched the newly cutaway underbody. I shaped the solid deadwood above the lead and blended it into the reduced skeg. Sitting in the garage on my “thinking chair”, admiring the hull shape, I was happy with my small modifications. I squeegeed thickened epoxy into the open seams and added epoxy fairing putty where necessary then heavily faired the hull again with 80-grit paper on a flexible block. A saturation coat of epoxy followed by several flow coats of the same brought the hull to rigidity. I gave it several heavy coats of Duratec® primer, which was mostly sanded off again. Now I had to choose a paint job. One of my favorite “looks” is a soft gray contrasted gently with bright white. Her topsides gleamed with a film of Awlgrip (a good choice as it holds up to the inevitable handling a model boat gets) above a flat white underbody. This looked a little anemic so I added a thin red boot stripe. 30
Fall 2020 The Model Yacht Now for a rig With little to go by except for some residue holes in the deck, I decided to rely on my eye to locate and proportion the rig. Just like adjusting the profile, I experimented with some sticks taped together to eyeball the proposed center of effort over the underbody profile. Having looked at sailboats of all kinds for 60 years, I trust my sense of proportion and balance, and in fact, when I first sailed the boat it was pretty close to “right”. I have about a 2-in range of mast and forestay movement 1 in case I got it a bit wrong. I made the I, J, P, and E dimensions1 configured to a more modern, higher aspect ratio than the 1930 hull would originally have had but respected its origins to keep the height fairly moderate. Looking at rig dimensions for the Madcap and other boats listed in the wonderful US VMYG design page was very helpful for comparison. I had some straight grained Sitka Spruce and got out a stick of it about the right dimensions. Rooting through the lumber pile I came across a very tight grained and straight piece of Douglas Fir and ripped it to the same dimensions. As a little experiment, I did a simple 3-point bend test, and the fir was half as bendy. Though somewhat heavier I opted for the fir and reduced the siding a bit. Splitting it in half, I hollowed it on the table saw with shallow segmented cuts between gooseneck and hounds and above. The halves were glued together side to side in a jig then gently tapered above the hounds. The box-shaped section was radiused at the corners and sanded, epoxied, and varnished to a pleasing shine. To support this limber stick I made a set of spreaders with a span equal to the beam of the boat, and I added jumper struts at the hounds. I used engraving brass and hand formed brackets for the spreaders and shroud attachments, soldering them together. This was a most satisfying operation, and polishing them on a buffing wheel was the icing on the cake! __________-__________________________________________________________________________________________________________________________ 1 I, the distance down the front of the mast from the jib halyard to the level of the main deck; J, the distance along the deck from the headstay pin to the front of the mast; P, the distance along the aft face of the mast from the top of the boom to the highest point that the mainsail can be hoisted; E, the distance along the boom from the aft face of the mast to the outermost point on the boom to which the main can be pulled. 31
The Model Yacht Fall 2020 For the turnbuckles, vang, gooseneck, mast step, and other small parts I came across Roger Cousineau’s fine fittings. I ordered these bits and when they arrived it was like getting fine jewelry. I literally played with them and placed them on the hull like bling. Well worth the quite reasonable cost. I wonder how my wife would like a little gooseneck pendant? I love the look of T shaped booms seen on early Lightnings, Comets and 210s, so I made my booms that way with tapers at both ends. With all my spars done and rig dimensions completed I called Rod Carr and ordered sails, which came promptly, rolled in a tight tube with an excellent installation and tuning guide included. The best advice was to keep the topmast stiff with ample jumper tension, to keep some fullness and power in the top part of the mainsail. 32 Assembling all the various finished bits was the fun part but somewhat tedious. The boat came together haltingly, especially in installing the electronics. For simplicity and water tightness, I wanted a lever arm below decks for sail control. The rudder post came up through the deck so I used a flexible aileron control pushrod with flexible links on the ends that slanted through the deck in a watertight housing. The sail controls had to be a 1:2 “disadvantage” to give the range of sheeting I needed, given the narrow beam of th emodel. Figuring out the length of sheets, arm and location of attachment on the booms was an interesting geometrical exercise—ultimately made easier with the use of adjustable endpoints on the transmitter. I used Flysky
The Model Yacht electronic components. These items had come a LONG way since I had last used them! And amazingly the prices are about the same. Few things can make me feel older or stupider than these amazing electronics but I have managed to stumble through them to workability—mainly thanks to YouTube! Now for a name It so happens that I race a small boat called a Comet. What better name than that for my nearly finished model yacht! I ordered some vinyl lettering and put these finishing touches on the transom and hatch cover. One of the few places in the house where it fits when rigged is on the fireplace hearth. In plain view, it has gotten the full approval now of my tolerant wife and is not in danger of being edged into the grate! Fall 2020 the club I rigged it, remembered to turn it on and gently placed Comet in the water. Immediately, the sail filled and away it went – just like it should, heeling substantially then stiffening up. After a while I brought it in, tuned the backstay and sheet adjustments a bit, and then raced it against the DF95s with some success upwind and a bit less downwind. Six races later it was time to call it a day, I did a few sail bys and took some photos and a little video. For a while I just watched it go … beautifully classic yet purposeful as it heeled to the breeze—just so … with quarter wave almost coming aboard. The final joy came as I lifted it out of the water and removed the hatch…it was DRY inside! The first sail The first sail came rather suddenly. Some friends were gathering at our sailing club to race DF95s. I was tying small knots and crimping wires at home when all of a sudden I realized I had done enough to try a trial sail! I found that I could loosen one side of the turnbuckles 22 turns and get enough slack to ease the mast step out of its rack and lay the whole rig on deck (carefully!) then gently carry the whole assembly to the car and slide it in. At 33
Fall 2020 The Model Yacht 34


