
- Title. Author. Summary

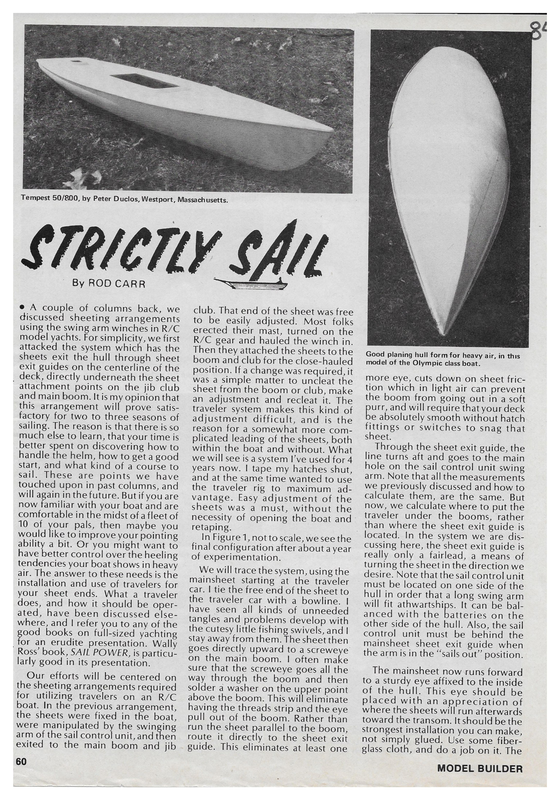
By ROD CARR ® A couple of columns back, we discussed sheeting arrangements using the swing arm winches in R/C model yachts. For simplicity, we first attacked the system which has the sheets exit the hull through sheet exit guides on the centerline of the _ deck, directly underneath the sheet attachment points on the jib club and main boom. It is my opinion that this arrangement will prove satisfactory for two to three seasons of sailing. The reason is that there is so much else to learn, that your time is better spent on discovering how to handle the helm, how to get a good start, and what kind of a course to sail. These are points we have touched upon in past columns, and will again in the future. But if you are now familiar with your boat and are comfortable in the midst of a fleet of 10 of your pals, then maybe you would like to improve your pointing ability a bit. Or you might want to have better control over the heeling tendencies your boat shows in heavy air. The answer to these needs is the installation and use of travelers for your sheet ends. What a traveler does, and how it should be oper- ated, have been discussed elsewhere, and | refer you to any of the BO0¢ books on full-sized yachting for an erudite presentation. Wally Ross’ book, SAIL POWER, is particularly good in its presentation. Our efforts will be centered on the sheeting arrangements required for utilizing travelers on an R/C boat. In the previous arrangement, the sheets were fixed in the boat, were manipulated by the swinging arm of the sail control unit, and then exited to the main boom and jib 60 club. That end of the sheet was free to be easily adjusted. Most folks erected their mast, turned on the R/C gear and hauled the winch in. Then they attached the sheets to the boom and club for the close-hauled position. If a change was required, it was a simple matter to uncleat the sheet from the boom or club, make an adjustment and recleat it. The traveler system makes this kind of adjustment difficult, and is the reason for a somewhat more com- plicated leading of the sheets, both within the boat and without. What we will see is a system I’ve used for 4 years now. | tape my hatches shut, and at the same time wanted to use the traveler rig to maximum ad- vantage. Easy adjustment of the sheets was a must, without the Good planing hull form for heavy air, in this model of the Olympic class boat. more eye, cuts down on sheet fric- tion which in light air can prevent the boom from going out in a soft urr, and will require that your deck be absolutely smooth without hatch fittings or switches to snag that sheet. Through the sheet exit guide, the line turns aft and goes to the main hole on the sail control unit swing arm. Note that all the measurements we previously discussed and how to calculate them, are the same. But now, we Calculate where to put the traveler under the booms, rather necessity of opening the boat and _ than where the sheet exit guide is retaping. located. In the system we are disIn Figure 1, not toscale, wesee the cussing here, the sheet exit guide is final configuration after about of experimentation. a year We will trace the system, using the mainsheet starting at the traveler car. I tie the free end of the sheet to the traveler car with a bowline. | have seen all kinds of unneeded tangles and problems develop with the cutesy little fishing swivels, and | Stay away from them. The sheet then goes directly upward to a screweye on the main boom. | often make sure that the screweye goes all the way through the boom and then solder a washer on the upper point above the boom. This will eliminate having the threads strip and the eye pull out of the boom. Rather than run the sheet parallel to the boom, route it directly to the sheet exit guide. This eliminates at least one really only a fairlead, a means of turning the shee in the t direction we desire. Note that the sail control unit must be located on one side of the hull in order that a long swing arm will fit athwartships. It can be bal- anced with the batteries on the other side of the hull. Also, the sail control unit must be behind the mainsheet sheet exit guide when the arm is in the “sails out” position. The mainsheet now runs forward to a sturdy eye affixed to the inside of the hull. This eye should be placed with an appreciation of where the sheets will run afterwards toward the transom. It should be the strongest installation you can make, not simply glued. Use some fiber- glass cloth, and doa job on it. The MODEL BUILDER
When the boat is set up, none Oe fe am x Lu ze “9 O2 Pie (<= oc x Lu oc moves from the bow eye “‘A”’ aft. So it doesn’t matter if you use 2 or 3 eyes. I’ve used some tubing, but you must prevent it from moving under sheet tension, or your trim will change when you get hit by a puff. The mainsheet nally arrives at the exit guide and comes out onto the deck to be cleated down. | put these exit guides about an inch off the centerline of the boat so that water won't go in if the boat heels. | also place the cleats as far aft as | can, and usually put a chunk of tape down to prevent accidental snagBing of a sheet. The jib sheet takes a similar route from traveler to the SCU and finally to accessibility on the rear deck. The drill for setting the boat up is as follows: A) Set up rig, attach all stays. B) Uncleat sheets from rear deck, then cleat only the last 2 inches. Don’t let them disappear back inside the boat! C) Lay the boat on its side. D) Turn on radio and pull SCU to close-hauled position. E) Adjust traveler car stops for prevailing conditions. F) Tie forward ends of sheets to traveler cars, using a bowline knot. G) Unlceat mainsheet and set close-hauled position of the main boom, recleat. H) Uncleat jib sheet and set closehauled position of jib club, recleat.. |) Slack sheets with SCU prior to picking boat up for launching. Close-hauled sails will make for trouble if you are carrying the boat. Note that this arrangement Is a more sophisticated way of con- trolling the leech tensions and sail shapes while sailing close-hauled. It does relatively little for you on the runs and only a bit of help on closereaches. If you do not know how to use your vang, nor how to adjust your jib leech tension using the swivel offset .. . there is nothing for you to gain by making your boat more complex. There is nothing you can glue or bolt onto your boat that will make it faster. However, a lack of knowledge of the power producing elements of your boat will keep you at the back of the pack. Get smart ... get fast. It is as simple as that. sheet now runs aft with the purpose of exiting the deck somewhere near the transom. I’ve shown a phantom eye and block, since you can route JULY 1978 the sheets in a convenient manner for the rest of your installation. (You don’t want to have them wrap around the rudder mechanism!!!) I'll continue to answer questions that are accompanied by a selfaddressed, stamped envelope, either direct or in care of Model Builder. Rod Carr, 7608 Gresham St., Springfield, VA 22151. While you have the writing equipment out, why not send in your $5.00 annual dues to the American Model Yachting Association, 2709 S. Federal Highway, Delray Beach, FL 33444. e 61