
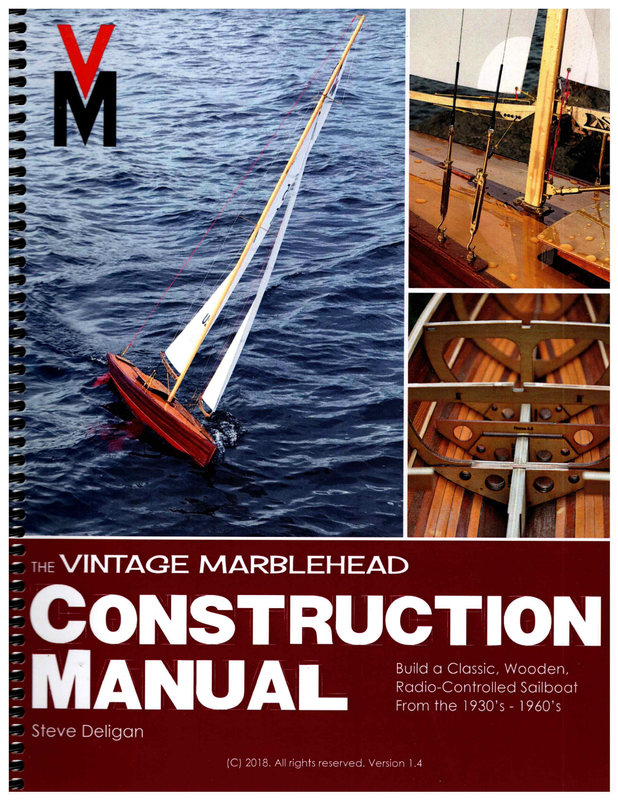
This manual will focus on a very specific ‘special interest group’ of Marblehead sailboats… the “Vintage Marblehead” class. These boats conform to the Marblehead rules and designs that were in place between 1930 — 1970. Vintage Marblehead’s are not a separate class as such but are really a special interest group of people who enjoy building and sailing the older style Marblehead’s.
Today, all Vintage M’s are still able to compete (but will lose) in any modern M regatta, but not all modern M’s are allowed to race in VM regattas unless they conform to the stricter rules of VM.

Build a Classic, Wooden, Radio-Controlled Sailboat From the 1930’s – 1960’s (C) 2018. All rights reserved. Version 1.4
PURCHASE REQUEST: Thank you for reading the Vintage Marblehead RC Sailboat Construction Manual! Writing this manual took thousands of hours and much wailing and gnashing of teeth. | thank you so much for purchasing it! If you have received this manual by means other than a purchase and have used and valued this manual, even if you haven’t followed it entirely, please show your support by purchasing your own copy or by making a donation. You can purchase it through an easy PayPal payment of $25 to stevedeligan@gmail.com then email me from the email address you want me to send the manual to. | will then email you the PDF as soon as | can (within 24 hours in most cases). Professionally printed, full-color manuals with stay-open coil bindings are available through Lulu Press. Go to www.lulu.com and search for “Wooden RC Sailboat Construction Manual”. As of the time of publication, the printed version is $45 but prices may change, and due to the difficulty of making changes to the printed version, it may be several iterations behind the PDF version. The electronic version of the manual comes in PDF format. You can clearly see and zoom into the full color images on your computer, tablet or mobile device and you can also print out just those pages that you need to have with you at your work table. You have the right to print one copy for your own use. Please do not sell, print multiple copies, distribute, or otherwise share this manual in any way with anyone else, electronically or otherwise. Thank you! | also ask that you encourage others to purchase their own copy. I’m relying on the honor system, and on the support of all builders out there to fairly respect the intellectual efforts of everyone who is trying to build the popularity of these beautiful ‘vintage’ wooden RC sailboats. Your support for this project is greatly appreciated! FEEDBACK: THERE ARE LIKELY TO BE ERRORS IN THIS MANUAL AND YOUR FEEDBACK IS REQUESTED! | would appreciate any feedback or suggestions thatJ can add to this manual. Additionally, | would appreciate any alternate methods, tips, tricks, and missing steps. Please know that there are certainly many errors in this manual and I’m relying on all of you to find them and report them back to so | can make corrections. Please also know that you need to be on the lookout for mistakes, typos, omissions and errors, both in text and in processes, and you need to make adjustments to your build to account for them! If something doesn’t sound correct to you then think about it and report back to me about it so | can correct it or make it more understandable. Report any errors, mistakes, improvements, suggestions, tips and tricks to me at stevedeligan@gmail.com. | AM NOT LIABLE FOR ANY ERRORS IN YOUR BUILD DUE TO ERRORS IN THIS MANUAL. USE THIS MANUAL AT YOUR OWN RISK! DISCLAIMERS: NO GUARANTEE OF QUALITY, PERFORMANCE, APPEARANCE, WEIGHT OR COMPLIANCE WITH THE RULES OF ANY CLASS OF SAILBOAT: This manual was written by a hobbyist for other hobbyists attempting to build a wooden radio control (RC) sailboat using the available-for-purchase 2ser-cut frames. The manual demonstrates ONE POSSIBLE WAY to construct a wooden RC sailboat and does not attempt to cover all possible weriations. It is solely up to you to determine if the boat you are building is within the rules for your particular RC sailboat class and your fleet. It is 2!so up to you and your abilities to make a boat that is competitive, light-weight and that looks satisfactory to your eye. This manual makes no guarantees of any sort and the boat you get will be a result of how much time and talent you put into it. It may not perform as expected and there may De other and better ways to build a wooden RC sailboat. This manual is simply a guide to help you on your construction project. SAFETY, TOOLS, TOXINS, CHEMICALS, ETC…: Please use caution when using any tools and when working with toxic materials, solvents, glues, etc. Know how to use your tools properly and always use safe practices. Be sure to use safety glasses and hearing protection when appropriate. Wear respirators or quality paint masks approved for the types of paints you use. This manual does not cover safe tool use and it is understood that you 2re solely responsible for any injury due to tool use, or exposure to chemicals and other toxins. BE SAFE AT ALL TIMES!
The Wooden RC Sailboat Construction Manual Table of Contents The Wooden Radio Control (RC) Sailboat The Marblehead Class… The Vintage Marblehead Class About this Construction Manual . . . . .+ + esenens Considerations …….scscsssscssseeseseeseseenseseeeseresnennsesse 000 gettsseeee naccnennngnssnsnssssgs ssseceesssssnnnnnnnnns Working with Epoxy …sssssssssssssssssesssesssseseensnnannnnes neseseseeseseeneneees The First Steps …..scsssseseeseeressssseeneneeeeee Buy Stuff (Electronics, Lead Bulb, Fiberglass…) …..-.-.:-2+ Prepare the Frames and Make a Strongback ……… Assemble the Frames, Fin and Keel Assemblies Mill or Purchase Wood Rubber Band Clamping System ……….:seseeee Install and Fair the Sheer Rails & Stringers… Planking the Hull seseuseaseaceseseesuensesecseasenseasensecssaseneess Fiberglass the Hull Remove the Hull & Clean Up the Inside …….-:seee Optional Drain Plug Step seees Make and Install the SErvo Tray……scssseereeseeeseetstsee 61 egeeettU C000 00 00S 20 0 gQege@egQe ccecsucsuucsuesuecanectsusenusssvcesuessucesesseessesssecesectHeeeueesHee4sesseeQAeeQAeaMe enee 65 S20 0002200009 enous ette SeeeenQQseQQn cccsuusasuucaaucsusnucenssessuscesssessuscesusesssnesssece4iseeeseesGHseeQsesOQQHegQssenOQ c 0200095 0 g ste g@e 68 sesuucaueceauesuucasuecuucssscsssessessuuessesseesseeeseseueeQeeesuseanensuenaeeQeseDesQeseQssQQeegeuegeese@es eeee 22nn Water-Test the Hull and Waterline Check…….sssssssssssecsseeseesesssssnnnenensenenennett nssenssse 70 Make a Wooden Mast….. Install the King Planks and Shroud Plates… The Appendages: Installing the Rudder and Fin Bulb Install the Lead Ballast ¥ oss Order Fittings, Mast, Booms, and Sails Make the Deck Finishing: Filler, Paint, Varnish, Ct… …eeeereere Complete the Hatches …. Install the Deck Hardware Make and Install the Standing Rigging Install the Running Rigging……….ssseecerereees ensnnns t gS nnnannnse gee ttte eget ssessenen enneceees Fimally… Go Sailing! ….ssssssssccsssssssscesssssesssees FENG ‘il RYE extn r mmr Etc EAR ene ESA RES APSE 107 t 108 EEET TTEEnni nnrnnn nnnnmnAT I ennnnneesstennn APPENDIX B: General Parts & SUPPIieFS ….ssssnsenennnneenssnnun 109 E saneennne i EE i irnann eenntnstse sesee eee APPENDIX C: Supplies & Suppliers…esssessssssesssssessesnesstnene tieQQ 110 C0 CCCeeseeeesio e e gtU st0STeeseetQQ cvceuucuuecaucanccnusceuscssecssscsnecsuecsueesusesseeesesgueesutesieeQs et eet APPENDIX D: Electronics & Suppliers ……..ssssessssesersessessseseensentennsensenenncenenessnetsets etees 111 ETE QeseeQneeeeeuess Oo 220 C0QQQQneee cesuussssussessuuecensanscassnsceesssecesnusessssisesessnueeesHueeeeQeseeQQsuses a APPENDIX E: Make your own Wind Indicator…. ae EEE 112 iin APPENDIX: Pour your own lead ballast…..sss#nnssnssnnnnntennnnnnnesnnnnnnnmnnininnQennnnnn geen QQhnQeesnee eee QQe nee neseee ee OO OO OO EE I SESS? 118 Quick Reference Tuning Chart ……… soeaun igest .119 eceanueausaueanssasansenuesecanecescsssssessessussseesessssHeseHesueseeeQeasenseGUeGsetUereneQesesagsegeeeeeeeeeeeg0se200008 aye cee Transmitter (Tx) Quick Reference Chart……ssesseseserees EF ni LEESS 120 etnnnn n iiitin nnsnnniiin TT iiinnn ANA nnnmun Inde sccccccesesnusinitinainieee The Wooden RC Sailboat Construction Manual yr Page 1
The Wooden RC Sailboat Construction Manual The Wooden Radio Control (RC) Sailboat Wooden model sailboats have been popular for well over a century. Since the 1960’s, radio-controlled (RC) sailboats have taken over from “free-sailing”. The AMYA (American Model Yachting Association) currently lists about 30 separate classes of RC sailboats; some of which you can build yourself. Different regions of each country tend to focus on only a few specific classes, so first check out what’s popular in your area or your country if you are interested in racing. If not, build whatever you wish! The Marblehead Class From the AMYA website: “The M or Marblehead Class, sometimes called the ‘50/800’, is a medium-size high performance development class. It’s original concept in the 1930’s was to produce the largest model that would conveniently fit in the standard American car of the time. The class is a development class with the main restrictions being a hull length of 50 inches and a sail area of 800 square inches. The class has been highly developed over the years to produce a high-performance model that can be sailed in a wide range of conditions, assuming the owner has the appropriate rigs.” Modern era M’s are extremely fast, extremely technical, and extremely expensive. They are raced in much of the world. While you could still technically build an M and race it, it would not compete well against modern production boats made of carbon fiber and other advanced materials, and that cost a fortune. Therefore, an interest has grown in the older style M’s from the 1930’s to 1970. While not as fast as modern M’s, they still sail very well, look beautiful, and can be built by an average builder. The Vintage Marblehead Class This manual will focus on a very specific ‘special interest group’ of Marblehead sailboats… the “Vintage Marblehead” class. These boats conform to the Marblehead rules and designs that were in place between 1930 — 1970. Vintage Marblehead’s are not a separate class as such but are really a special interest group of people who enjoy building and sailing the older style Marblehead’s. Today, all Vintage M’s are still able to compete (but will lose) in any modern M regatta, but not all modern M’s are allowed to race in VM regattas unless they conform to the stricter rules of VM. The Vintage Marblehead special interest group has two divisions: 1. Vintage Marblehead “Traditional” division: (1930’s — 1945) This division is represented by the “Wampum VM” in this manual. Yes, you can still build a NEW “vintage” boat if you follow the current VM rules for its specific division. These boats started it all in the 1930’s. Think small J-Class style yachts. They carry keel or skeg mounted rudders. Materials are wood, brass, aluminum, stainless steel, etc. No carbon fiber or Kevlar. Epoxy and fiberglass are allowed even though they didn’t have them back in the day. Rigs must be wood or round aluminum. Cloth sails are required (Dacron is allowed). Rigs are not tall because the drafts are not either. Draft must not exceed 12” or so. Keels are generally full, but fins are also seen if the draft does not exceed 12”. They must have prognatheous keels: No portion of the keel appendage, including the lead, may project forward of the leading edge of the keel fin. Minimum keel fin chord length shall be five inches. A boat with a fin with draft less than 12” and a skeg rudder can qualify in this division if made to the designs of those days. Examples: Wampum, Wampum II, Madcap, Cypher, the original design for both the Rip Tide and the Sun Wind, etc… 2. Vintage Marblehead “High-Flyer’ division: (Designs from 1945 — 1970) This division is represented by the “Sun Wind HF” and occasionally by the “Rip Tide HF” in this manual. These boats generally have fins and spade rudders. These are the first boats to use very tall, high-aspect rigs, sometimes up to 85″ (ours is much shorter). Same materials restrictions as in the Traditional division. Draft may go to 16” with a 3” cord, and rudders may be spade or balanced. Must still have a prognatheous keel: the lead still cannot protrude forward of the keel. For this reason, these bulbs are swept backwards in a very distinctive look. Examples: Both the Rip Tide and Sun Wind HF designs that have been updated with deeper fin and spade rudders, Warrior, Cheerio, etc… The Wooden RC Sailboat Construction Manual * Page 2
i d to fit in the current rules of the “High-Flyer” division. The And below are the new lines. The fin and the rudder have been reworkerequired , it really is a new boat, so has been renamed to the fin is deeper and the boat has a spade rudder. Because of the changes =e = ll “Sun Wind HF” (HF for High-Flyer): _> – “Traditional” division “Sun Daze” which eventually evolved into The primary boat seen in this manual is a “High-Flyer’ revision of the yacht designers — Gus Lassel. A copy of the original lines was the “Sun Wind”. It is a 1949 design by one of the most famous model are the 3D put into a CAD application and from that developed a 3D model. From that model, laser-cut frames were made. Those lb ln li ll ll ll ll ll lll all The Wooden RC Sailboat Construction Manual The Wooden RC Sailboat Construction Manual er Page 3
OU ooden RC Sailboat Construction Manual The second boat occasionally featured in this manual is our updated version of the Wampum I/. There were two Wampum’s, one from 1932 and this one from 1933. Our new Wampum VM, based on the Wampum II, will sail in the “Traditional” division under the Vintage Marblehead rules. It has a full keel with the ballast built into it, rather than in a bulb shape as on the Sun Wind HF. The rudder is attached to a skeg Here are the original lines for the 1933 Wampum II: é _— a saana ade —=—+ rea cas, ||| 1e84 Here is the updated boat with newly designed laser-cut frames showing. The older boat and the newer boat are very similar with the obvious exception of the slightly larger rudder: The Wooden RC Sailboat Construction Manual yar Page 4
The Wooden RC Sailboat Construction Manual The third boat that is occasionally mentioned in this manual is the Rip Tide. It’s a 1949 design by the well-known RC sailboat designer Ted Houk. We’ve redesigned the Rip Tide to be a “High Flyer” boat with an extended fin and a spade rudder. We’re calling it the Rip Tide HF. As of writing time, we have just designed this boat and the laser-cut frames are just becoming available. Here are the lines for the original Rip Tide by Ted Houk: too. All boats featured in this manual will be built as “plank on frame” boats using variations of the same techniques. In general, the Sun Wind HF will be shown, but if you are building the Wampum VM or Rip Tide HF, then you will use virtually identical techniques with appropriate changes for obvious design differences. Not every single step is shown in this manual: Remember, you will often have to simply figure things out for yourself! Don’t expect to see every single detail mentioned in this manual. If you are building a boat different from the one shown in a particular picture, you will have to adjust as needed. You will need to be resourceful, creative, and independent. You can do this! The Wooden RC Sailboat Construction Manual fir Page 5
he Wooden RC Sailboat Construction Manual About this Construction Manual This manual is for the first-time builder who wishes to scratch-build a wooden RC sailboat using available-for-purchase laser-cut frames. This manual does NOT cover designing and cutting your own frames. The idea here is that you are going to build an established class of boat that already has plans and frames available. IF you want to build a boat for which no frames exist for sale, then you will need to figure out how get or make the frames. if you follow this manual, you will likely end up with a fun boat and will, hopefully, also have a lot of fun in the building process. It can be an extremely challenging and rewarding project. The extent to which you follow this manual is up to you and you will frequently make your own decisions. The true custom experts will make many variations on the process and go their own way. You are certainly free to do the same, but always keep an eye on the class rules for your class if you intend to race. Wherever possible, alternatives to the listed steps will be offered. The manual will also point out choices and decisions that you must make. In this way, no two boats following this manual will be the same but should all still be within the rules and hopefully be competitive. Read each step all the way through before attempting anything. Make your own decisions and have a good idea of what you’re doing before you commit. And have fun! It is a hobby after all… Considerations Thoughts to Think & Stuff to Know Before Scratch-Building a Wooden RC Sailboat Assumptions about you, the builder: This manual must make some assumptions about you. Since you’re thinking seriously about scratch-building a wooden RC sailboat rather than buying a ready-made fiberglass hull or a complete boat, it is assumed that: 1. You have some type of building experience. Perhaps model building, boat building, woodworking, etc… Because of this assumption, this manual won’t go into deep detail on how to use glue, tools, and such. READ ALL SAFETY PROCEDURES THAT COME WITH YOUR TOOLS! USE COMMON SENSE AND DO NOT OVERESTIMATE YOUR SKILLS. 2. That you have access to the necessary tools. Some of which you will only need if you do it the way described here. In many cases, there will be workarounds that you can do so that you don’t have to have the same tools or materials we use. We will use a table saw extensively for example. You might have to figure something else out for that step. Or you might just buy the wood already milled from some online store. There are almost always alternate methods to how something is done in this manual. Experiment, be safe, and have fun. PRACTICE SAFE TOOL USE! 3. You’re capable of figuring things out for yourself, and that you have some confidence in yourself. Deviate from these instructions whenever you feel that it is appropriate and when you find a better way to do things. This manual is a BASIC GUIDE of ONE POSSIBLE WAY to build a wooden RC sailboat. If you don’t have the supplies or tools or whatever… punt! THINK FOR YOURSELF, MAKE YOUR OWN DECISIONS, AND BE SAFE! Oh, and try to have some fun along the way too… That’s the whole point. Are there other options for getting a wooden RC sailboat other than scratch-building it myself? Yep, buy one. But wooden boats are harder to find than mass produced fiberglass or plastic boats. You may have to find someone to custom make one for you. They simply are not mass produced, which means a custom built one like the ones seen in this manual will cost you upwerds of $4,000 or more. So just make it yourself and save some money. Or buy 2n RTS (“Ready to Sail”) plastic boat. There are loads of options in this route; Victoria’s, RC Laser’s, Dragon Force’s, etc… Take © Option that suits you the best and have fun! If you simply want a boat, regardless of the material it’s made from, then this Oj=ct might be more than you need. Just go buy something off the shelf. The Wooden RC Sailboat Construction Manual ie Page 6
Can | actually build something that’s not from a kit? Sure! Probably. Maybe…? You’ll need to decide based on your prior experiences with building things. Have you built models in your past? Done any woodworking? Tinkered on boats? Ever done any home improvement projects? bits, parts, and pieces, and NOTE: This is not a kit! This is definitely not an off-the-shelf kit. You will need to cobble together ALL the and loads of decisions. make or modify many of them yourself, in order to do this. You’ll need to think through some challenges to punt at times Have some confidence in yourself. Don’t rush, do some research, and you’ll eventually figure it all out. You’ll need too. If you want a kit, then look into the 737 from Tippecanoe Boats. It’s a full kit, including radio, and sails very well. Fun too! Can I do my own thing? Does the boat allow for variations? POSSIBLE WAY to This manual is only a basic ‘rookie’ manual and should be treated as only a starting point. This manual is onlyonONE our boats and you build a boat… and a not very traditional one either! Use your own judgment! We have made many mistakes thinking as well. As will too in yours. Figure it out. It is designed to give you a rough road-map to follow, but you’ll have to do some long as you stay within your class rules you are free to deviate from this manual and discover new ways of doing things. know your class rules to Depending upon your particular class, you may or may not have a lot of ability to change the boat. Read and color be sure that you end up with a legal boat. And of course, you have aesthetic decisions to make regarding finishes, colors, mast and type, boom material, sail colors and trim, lines, deck, etc. Some boats have simple “box rules” like the Marblehead’s, others have very strict rules, like Star 45’s and |OM’s. If you do not care to conform to a specific class rule, then the sky is the limit. Do whatever you want… it’s your boat! Changes in links, suppliers and prices are notorious Included links are current at the time of publication but might not work when you try them. RC sailboat parts suppliersDeal with it. future. the in available be not or away go might to referred for going out of business. The suppliers and parts that are Look around for substitutes and figure something out. How long will it take to build? will at least take two months That’s really up to you. If you focus and coordinate all your purchases and work on it every day, then it take you longer. Plan on four to slam together a basic boat and go sailing. To get a quality-built boat that looks like a work of art will to six months at least, or more, to get a masterpiece. Don’t rush it. Enjoy the process. Tinker away at it! How much will this cost? $1,500 (USD/CAD, 2017 It’s going to cost you some cash to make this. It is hard to forecast exactly although it will probably cost at least can really add up. that s prices). If you go high-end all the way, then perhaps it will cost well over $2,500. It’s the fittings and electronic also add up The frames and wood are much less than the mast, blocks, line, sails, etc… Epoxy, supplies, paint & finishing can depending on how you go. You will need to make choices as you go and determine what you’re willing to use. you You can build things “the right way” the first time or buy the cheap stuff first and replace it later. Doing it the right way may cost expensive most the make you that mean doesn’t that However, road. the more up front, but hopefully not too much more down decisions either. Do what is best for you and within your budget. You’ll have to make your own decisions. You could make your own has made hundreds of bulb for example, or you could buy one. You can make your own sails for $20 or you can have someone who is mostly high-end other sails make a proper racing one for you for $200. You get the point… make your own decisions. Our boat than using a sail-arm servo instead of the much more expensive drum winch. The Wooden RC Sailboat Construction Manual jar Page 7 KCRARAARAAARABRAARARRARBAARARARARALABARADAADADADAAA The Wooden RC Sailboat Construction Manual
he Wooden RC Sailboat Construction Manual What tools and materials do | need? if you don’t have a certain tool you may need to be creative and figure out a workaround. This is only a very basic list. You’ll need more than this! Many are only used once or twice. These are some of the tools we used to make the boat in this manual. 1) 1 (1 1) 1) Acid brushes… buy ‘em by the gross! Seriously. You’ll use most of them. They’re cheap online. You’ll use them almost every time you epoxy. %” is fine, but L] CL] 11 the smaller 3/8” are better. Get an entire box! Clamps. Smallish plastic ones in a few sizes. Get C1 Push pin tacks (Random orbital sander! Get a good one! loads of them. 4” bar clamps too. (1 Clothespins for clamps can work too. So can large binder clips from office supply stores. Craft sticks (Popsicle sticks). Buy a box of 500 or so. You’ll use them every time you mix epoxy. ~Dremel® Tool with cutoff wheel and small grinder. Otherwise you’ll need a hacksaw. Nice, but not (1 Sanding block. A piece of wood can work (1 Sandpaper. Lots and lots of sandpaper! C1 Scissors C1 Screwdrivers (small ones too) LC) Small drill bits Stationary belt sander (very helpful for fairing the fin necessary Needle nose pliers Paper towels. Several rolls. Pencils/ball point pens Rubber bands… bags of them. All sizes. and hull). See note below. 1 Electric drill and a variety of smallish bits 1 Fine tip Sharpie® pens and it will get used for several steps. However, you (1) (1) Hobby knives and many spare blades Hobby saw and hobby miter box to one, but it will cost you additional money to (] Japanese style flush cut pull saw for removing the collect all the necessary planking material. See note boat from the supports below. (1) Metal straightedges 12” & 48” and tape measures {1 Table saw. It really comes in handy if you have one, can often find a workaround if you don’t have access C1 Tweezers A NOTE ABOUT TABLE SAWS: You will find a table saw with a sharp blade to be an EXTREMELY useful tool in making this boat. You do not necessarily have to have one, and alternatives can be found. However, if you have access to one, your job will be made much easier. For the boat in this manual, a table saw was used to: 1) make the strongback, 2) mill the stringers and sheer rails, 3) mill all the hull planks, 4) mill all the deck planks and hatch parts, 5) make the boat stand, 6) make the mast, 7) to make many other parts, and a few other assorted tasks. It really is a valuable tool. If you’re considering buying one, then this boat might be enough of an excuse to go get one. Or, do you have a neighbor or friend with one? Usually, they sit unused… so ask! REGARDLESS, ALWAYS BE CAREFUL!! Use a sharp blade. Use all the safety equipment. KNOW how to use one safely. While you’re buying tools, consider a stationary sander too. It was used even more than the table saw. There are various sizes of them, but once you use one, you’|l be surprised how often you turn to it. We have a small tabletop one and love it! Where do| get all the stuff? Materials? Parts, supplies, electronics, etc…? You will need a large assortment of materials, parts and supplies to complete your RC sailboat. Some you may already have. Others you’ll need to acquire. There are suggestions throughout the manual at places where you’ll need to make some decisions. You can 2!so find many of these materials in the appendices in the back of this manual. oS F A note on the focus of the builder: Weight vs. Appearance vs. Strength (or all of it!) you build your boat, you will need to keep in mind what YOU want out of it. Do you want the lightest racing boat you can get? Do went 2 museum-quality work of art? Just a fun boat to mess around with? These decisions will matter when it comes to wood jolces, fittings, finishing, etc… -| © author’s preference is for building a strong and beautiful boat, and is less concerned about weight. The author doesn’t race much though. If a choice between weight or aesthetics/strength had to be made, we sided with aesthetics/strength. Racing builders wil! focus On weight. That is not to say that our boat is heavy (it weighs 17.5 lbs., 11 of which are in the too-heavy bulb. We could oO y ‘awe sawed 2 Ibs. there alone). Our boat is entirely wood, even the spars, and yet still could weigh at little as 15-16 lbs. if carefully ~ t with 2 more appropriately sized 9 |b. bulb. The Wooden RC Sailboat Construction Manual jer Page 8
TC Measuring Epoxy using epoxy exclusively as the adhesive, and how to use it. You’ll build this boatamoun We’ll take a time-out here to discuss epoxy ts that you’ll need, so you’ll want and your ability to mix different amounts will be crucial. Epoxy is not cheap in the to be economical. resin with some hardener in a specificare art adhesive and coating. You mix some Epoxy is a very strong, waterproof, two-p System Three® is excellent too. Both to boat uses WEST System® epoxy, butwell. ratio, and then apply it to your project.c,Thishobby ver brand you use, be sure -shop brands as they don’t flow WhateStick highly recommended. Avoid the generi to one brand and follow their r. stick with it. Never mix and match resins from one company and hardener from anothe instructions. hardener uses a p ‘A’ size cans) 105 resin with their 205 hardeofner205(this Specifically, this manual uses WEST System® (Grou er). harden tin 5:1 ratio of resin to hardener; therefore, you’ll buy a quart of 105 resin and a much smaller ratios and you must follow them or even 1:1 ratio. Each brand has their ownm 105 ATTENTION: Some hardeners use a 3:1,This2:1,manua 205 hardener which es you are using WEST Syste resin with carefully! READ the directions closely.another hardenl assum er, or a completely different brand, make sure you follow their requires a 5:1 ratio. If you are using AL ACCORDINGLY. instructions and ADJUST THE INSTRUCTIONS IN THIS MANU USING THE WEST SYSTEM® MINI PUMPS: (They actually put out a lot of epoxy!) Be sure to buy their ‘Mini Pump’ kit which includes small measuring pumps for each can. They are easy to set up and use, and will dispense the proper 5:1 ratio. making small a fair amount of epoxy for hobbyists , despite their name, still put outreally The WEST System® mini pumpsnot , etc…). You will canoes s, (kayak rs boat builde for hobby people, but for smallg out sailboats. The mini pumps are really clear coating for and cloth, lass laminating the fin and rudder, for wettin the fiberg still need these larger amounts for the hull and such operations, but most of the time you will need smaller amounts. ts of resin and hardener MIXING SMALLER BATCHES OF EPOXY: Most times you will want to dispense much smaller amoun for small gluing jobs. the cans every time you you do not want to be removing the pumpssofrom [_] small batches stored in separate jars: First, find yourself two small, uce air into the pump and screw up the ratios, want to use a small amount as it can introd into the other. Store with ner harde of pumps few a of resin into one, and shallow glass jars with lids and put a fewnotpumps ner is amber. Both will hard to remember that the resin is clearcansandwiththetheharde the lids on. Label clearly, although it’s trying on them. Do NOT mix pumps the of to suck small amounts out need to have lids. The jars let you avoid each jar. up the lids or you will permanently adhere your jars shut! Clearly label a pack of most marine stores sell. We buye them Syringes: Next, get two small syringesusethat [_] Make Two Calibrated & Markemd 807-1 after replac to have might but now 2” packages of 12). You’ll only two 3/8″ 12 (search online for “WEST Syste . Take hole a make to body main the the two syringes and cut the tip off from a year or so, so having extras is helpful large enough. part of the syringe (not the some lines on them. Starting at the wide body To use them accurately you’ll need to mark lines. This will be your HARDENER syringe. Do NOT use in it the resin! It helps angled part), mark a line every 1/8” for 2 orto3make the marks. to use a fine tipped Sharpie® or paint pen The Wooden RC Sailboat Construction Manual ier Page 9 RR RRRRRAARARARARARARARALARAREARED Working with Epoxy nm em ee me eee The Wooden RC Sailboat Construction Manual
The Wooden RC Sailboat Construction Manual The top picture to the right is what the HARDENER syringe looks like: — HARDENER Syringe ONLY Take the second syringe and mark a line every 5/8″. This will be your RESIN syringe. Do NOT use it in the hardener! Do NOT let the two syringes touch each other. ONLY use the resin syringe with resin, and the name Start measuring here… fi hardener syringe with hardener! The lower picture to the right is what the RESIN syringe looks like: Use the edge The idea is that, assuming you are using the WEST System 205 hardener, of the stopper that you need a 5:1 ratio of resin to hardener and these two marked as your gauge. syringes will do that for you (Some other hardeners use a 3:1, 2:1, or even a 1:1 ratio. Each brand has its own mix and you must follow them carefully or they will not work! READ the directions closely! Adjust these instructions accordingly.) To make a small batch of epoxy, draw one ‘mark’ of RESIN in the resin syringe (with the %” marks), and one ‘mark’ of HARDENER (with the %” marks) with the hardener syringe. Squirt each into a very small mixing cup that you can buy at your hobby store. Mix with a small craft/popsicle stick and apply. For slightly larger batches simply draw two or more ‘marks’ in each syringe (just keep the number of ‘marks’ the same for each to retain the 5:1 ratio). Store the syringes separately in their own plastic cups. This will also let the excess drain out without getting all over your work surfaces. Do not let them touch each other! FOR EVEN SMALLER AMOUNTS OF EPOXY: You can use the syringes to dispense even smaller amounts. You can use the ‘count the drops’ method. Just remember 5 drops of resin for every drop of hardener. 10 drops of resin and 2 drops of hardener can actually glue quite a bit. Plop onto a Post-It Note®, mix well with a toothpick and apply. ADDING EPOXY ON TOP OF CURED EPOXy: If you ever want to apply epoxy on top of epoxy that has already cured, you will need to clean off the amine blush (warm water and a cloth easily removes most of it) and then SAND the area where you want to add epoxy. The epoxy will need the tooth from the sanding to have something to bind to mechanically since it won’t bond chemically after the first coat has been cured. THICKENED EPOXY: To fill gaps, or to make smooth filets, you will use thickened epoxy. One useful type is red phenolic powder (often available where you bought the epoxy). Mix up some epoxy and then mix in small amounts of powder. Keep adding small amounts and mixing until it reaches the consistency of mayonnaise. A little goes a long way so add in small amounts. Sometimes, for example when laminating, you might want the epoxy less thickened and still a little runny. Silica powder is another type of thickener and has other uses; thick fileting for example. Read online about the various types of thickeners. There are several, and each has its own purposes. BE VERY CAREFUL WITH PHENOLIC POWDER AS IT IS VERY LIGHT AND GOES EVERYWHERE! TAKE CAUTION NOT TO BREATHE THE POWDER! See the section later in this manual on how to actually fiberglass things! The Wooden RC Sailboat Construction Manual * Page 10
The Wooden RC Sailboat Construction Manual Right… are you ready? Then let’s get started! — Wampum VM Notes: This manual follows the building of a Sun Wind HF. Most of the same techniques can processes can be used 2 VM, Wampum the for used is technique or order, process, different a to construct the Wampum VM. In those instances where note like this will be included that is formatted like this box. If you’re building a Wampum VM, follow these instructions and keep your eye open for these boxes. Otherwise, if building a Wampum VM, use your common sense to transfer the Sun Wind HF techniques over to the Wampum VM. In most ways, they are similar builds. Good luck! The First Steps 1. [_]Decide to build a wooden RC sailboat! Alright! Fun decision. You’re well on your way. 2. [Join the AMYA The American Model Yachting Association is the governing body that oversees RC sailing in the U.S. It’s worth it to join. If you intend on racing, then using their directory, research which boats are popular and often raced near you. But, if like me, there are no wooden, developmental class boats sailed around, and you still want to build a wooden RC sailboat, then do it anyway! 3. [_]Read the Class Rules for your boat If you are building a boat within a specific class, then read the rules and know what you can and can’t change. 4. (_]Buy the Laser-cut Frames for your class This manual assumes that you will be using purchased frames, and therefore offers no alternative for them. Be careful with these frames if you have to remove them from the plywood. They can be fragile. If frames are not available, then you may have a big project ahead of you either making your own or finding someone who can develop and cut them for you. There are people out there who do such things but can be hard to find. Good luck!! The Wooden RC Sailboat Construction Manual jie Page 11
The Wooden RC Sailboat Construction Manual Buy Stuff (Electronics, Lead Bulb, Fiberglass…) DECISION TO MAKE: it’s already time to think about the electronics you’ll use and which servo you’ll use for sail control. Your choices are a ‘sail arm’ servo or a ‘sail winch’. Both work and have their advantages and disadvantages. The racers go with the RMG SailWinch (expensive but fast), but there are less expensive sail winches from Hitec® too. Winches have complex set-ups. For the boats that are not raced, or not raced very competitively, use a simple swing-arm (“sail arm”) servo like the Hitec HS-815BB. 5. Purchase your electronics: (See APPENDIX D: Electronics and Suppliers). This is a good time to patronize your local RC hobby shop and have them help you get set up. At a minimum you will need: 1 Radio Transmitter (‘Tx’). You’ll need at least two channels and it will probably be a 2.4Ghz system. Spektrum, JR, and Futaba are all very popular brands. So are many of the cheaper brands popping up lately. Because most RC sailboats only use two channels, you can get by with a cheaper radio. Most sailors still use the “airplane” style radios with two sticks. You could opt to use one of the “surface” radios that are often used with RC cars and RC powerboats. They are pistol-grip style with a wheel on the side. They work well with cars and powerboats but haven’t caught on with the sailing group. The aircraft-style seems more natural for sailing. 1 Aradio Receiver (‘Rx’). This is a small thing with electrode pins that is installed on board the boat. Everything on board the boat plugs into the receiver: batteries and both servos. Your receiver also needs to be “bound” to your transmitter. See the instructions that came with your transmitter for how to bind your receiver. Talk to your local hobby shop. L] Two Servos: O A Sheet servo: You will only use one sheet servo to adjust both the mainsheet and the jib sheet. Both lines are connected to the same servo. There are two styles of servos commonly used for the sheets: A sail arm servo or sail winch servo. NOTE on Sail Arms vs Winches: We are using a fairly simple “sail arm”, or “swing arm”, to control our main and jib sheets. They are cheaper, almost as fast, and generally easier to use. They are less fussy too. For our sail arm servo, we use the Hitec HS-815BB, which only requires 4.8 volts (ideally 6 volts though) but there are several other options. Do your research. Generally, the entire class uses the same type of servo. For example, all Tippecanoe T37’s use a sail arm. Most Star 45’s use a winch. Most VM’s use a Sail arm. If you are using a winch system you will need to research how to set up the winch, including the long bar that is usually used below deck, or alternatively, the long stretch of elastic cording that is often used to keep tension on the winch. There are above deck and below deck options for using a winch. You would need to decide which setup is most appropriate for your boat. In addition, many winch servo systems require a larger voltage supply. This can add another layer of complexity to your power system. Again, see your local hobby shop for advice on power systems. A Rudder servo. We use the Hitec HS-322HD. It’s cheap and reliable, and plenty strong for the rudder. There are many options for your rudder, but for most boats up to 60” or so, this style of servo will turn your rudder just fine. And they only need 4.8-6 volts. You can even get waterproof ones. The Wooden RC Sailboat Construction Manual yr Page 12
Depending on your servo’s power needs, you may have several options. Higher Voltage Batteries: C1 LiPo Batteries: Use LiPo batteries if your servos need more than 6 volts. If you are using an RMG Sailwinch for example, you will need at least 7.4 volts. But because most rudder servos only need 4.8-6 volts, you then have to use a BEC or some other converter to avoid burning out a servo. Talk to your local hobby store for advice. Also, be cautious when using LiPo batteries. If not charged and balanced properly, they are prone to catching fire! Below is a LiPo battery. It has two cords coming off of it. The larger cord is for powering your winch servo. The smaller cord is to hook to your battery charger for recharging when needed. Lower Voltage Batteries: Most servos though can run on 4.8-6 volts. You can get several hours of sailing out of 4 AA batteries if your servos only need 4.8 — 6 volts. These systems are generally the simplest to install and use. Whenever possible, we use these style batteries. However, make sure of your servo’s power requirements! Disposable Batteries: Regular AA disposable batteries put out 1.5 volts each, or 6 volts for 4-AA battery holder. Most servos will run fine at 4.8 volts, and stronger at 6 volts. 6 volts will be plenty of power for most servos, even including the larger swing arm styles like the Hitec HS815BB that we are using. Rechargeable Batteries: Use rechargeable batteries if you can, as they cost less in the long run and are more environmentally friendly. Rechargeable AA batteries only put out 1.2 volts each, so four only totals 4.8 volts. However, you can also buy bundled rechargeable battery “packs” that include five bound-together batteries for a total of 6 volts. The challenge is to find a charger for these packs. But if you can find the packs and the charger, then this is the way to go. The picture to the right shows a 4-AA battery holder. When filled with rechargeable batteries, it will put out 4.8 volts. When using disposable batteries, it will put out 6 volts. The battery below in the picture is a rechargeable “battery pack” that has five 1.2-volt batteries hooked together to also put out 6 volts. Have your local hobby shop work with you on matching your batteries, servos and receiver so that you don’t burn anything out! The Wooden RC Sailboat Construction Manual yr Page 13 BR BRRRRRARRARARRRARARARAAAARAARA AA RAR AAA AAKAALAAAAKAAK LLL Batteries: ea C1 Sa The Wooden RC Sailboat Construction Manual
The Wooden RC Sailboat Construction Manual 6. _] Get Lead Ballast: Order one or make your own DECISION TO MAKE: You can purchase a ready-made fin bulb or you can pour your own. If you choose to make your own bulb you will need to do your own research online or with your local molten lead person! Be sure to read the rules as to size and weight. And BE DAMN CAREFUL! Now is the time to order your lead fin bulb or keel ballast. It may take some time to arrive so do it now. As of press time, bulbs for Vintage Marblehead’s are quite difficult to find. You’ll probably have to find some old-school RC sailor who will custom pour one for you. Good luck. This may be one of the biggest challenges of this entire project… finding a ballast. If you are going to make your own, then you’ll need to read how to do that online. It’s dangerous in many ways and you will end up with an untested bulb. But it will be unique! Make sure you stay within the class rules. (see APPENDIX F and try not to get killed or severely maimed!) You class rules will dictate the weight, placement, shape and other parameters for the ballast. Know the rules for your class! BE SAFE! YOU ARE ON YOUR OWN IF YOU MAKE YOUR OWN BULB!! HANDLING AND WORKING WITH LEAD IS DANGEROUS! LC] Buy Fiberglass Cloth Now is also a good time to buy your fiberglass cloth. Order now and it will be here when needed. Depending on your wood choices you will need to select an appropriate ‘weight’ fiberglass cloth. You will probably have to buy this online, as your local marine supply store will only stock fiberglass cloth that is too heavy. If you are building a big boat, kayak, or canoe, then you would probably use 6 oz. weight cloth. Those are much too heavy for our use. The boat in this manual has relatively strong cedar planking, so one layer of lightweight 1.4 oz. fiberglass cloth is sufficient. The 1.4 oz. fiberglass came from ACP Composites. They are popular with the RC sailplane crowd for lightweight fiberglass. You might go a bit heavier with the fiberglass, but less than 1.4 oz. really doesn’t hold up well. They also sell heavier weights if you are using balsa. NOTE on the use of Balsa Wood: If you use balsa to plank, you will probably want to use two layers of 3oz. fiberglass in order to get enough stiffness and protection. This adds weight, but balsa is so fragile that you will need it. However, keep in mind that if you are building a Vintage Marblehead, like the boat in this manual, that the VM rules do not allow you to use balsa and fiberglass if it is apparent that the balsa is simply used as a form, and the fiberglass actually makes up the structure. The intent is that the fiberglass and epoxy are used as mostly a waterproofing method and not a structural one. Other classes don’t care as much, and many racers use balsa to keep the weight down, although the weight savings may be negligible due to how much extra epoxy and fiberglass cloth you have to use. How much to buy: For the boats in this manual, and other boats up to 50”-65” or so, to be safe, get at least two yards of the 50” cloth… it’s cheap! You will have some left over, but you also need to glass the deck, fin, and rudder. They cut you a deal if you buy 5 yards, which is what we do. Who knows… you may make other boats or projects in the future! The Wooden RC Sailboat Construction Manual yr Page 14
Prepare the Frames and Make a Strongback For the Sun Wind HF, the next few steps (laminating the doubled-up frames, laminating the fin, clear-coating the frames, laminating the aft keel assemblies, and building a strongback) can all be done in any order and in conjunction with each other. They are all separate, but you cannot go any further until all these steps are completed. Read through the next few steps and figure out which order of operations works best for you. For example, you can build the strongback while waiting for epoxy to cure. WAMPUM Notes: If building the Wampum VM, then you will want to use the strongback as a flat base on which you laminate the keel. Make the strongback first, and then BEFORE you glue down the building boards and frames, use the strongback as a flat table to laminate your keel. Notice that there are %” holes drilled where the keel alignment holes will go. With the Wampum VM, you will want a very flat space on which you laminate the keel. You’ll do this before you glue down the frame building boards and frames. The large holes will allow for some movement of the keel as it’s being laminated with the alignment sticks running through the layers. * Make sure you have some 1/8″ x 1/8″ stock to use as alignment pieces. NOTE: Use the alignment sticks to, get this, align the keel layers. But don’t let them cure in the layers, at least not on the starboard side. It works best if you leave them in place while epoxying the layers and aligning them and weighing them down. But once they are settled, then remove the sticks. Then periodically use the sticks to clear out the alignment holes while the layers are curing. It just works better, and it makes it easier to get subsequent layers epoxied down. Cover the strongback with plastic so that the epoxy doesn’t stick to it. I’m using transparency sheets for copiers, but you can use garbage bags, plastic backed tape like strapping tape or packing tape, whatever… Then cut out or makes slits in the plastic where the holes are. You’ll do the entire starboard side first. Then when cured, you’ll flip it over do the entire port side. Lay out the inner core down so that the alignment holes are directly over the holes you drilled in the strongback and plastic, and then set the two “layer 2” panels on top. Draw around the 2nd layer panels to mark where to paint on the epoxy. Remove the layer. The Wooden RC Sailboat Construction Manual jar Page 15 CRRAAAARARARARAAARAARARARAARARAAAARAREAEA The Wooden RC Sailboat Construction Manual
The Wooden RC Sailboat Construction Manual Paint or spread ona thin layer of epoxy to BOTH the inner core and the 2nd layer where they meet. Set the 2nd layer down on the inner core and align by running alignment pieces through the holes. Repeat for the third layer. Wipe up any excess epoxy. flat. Make sure that you don’t Then use bricks or whatever else you can find, to weigh down the layers so that they lay perfectly the holes cleared out. accidentally glue down the bricks! Notice that the alignment sticks have been removed and and ready to be epoxied. Here are the first three layer on the starboard side the next day. The fourth layer is already aligned over and start to laminate the port When you’ve laminated all of the layers for the starboard side, then the next day, flip the keel side. You will simply need to NOTE: For the port side, it will be difficult to use the strongback as the starboard side is now too built up.clamps to hold each layer clamp the layers on instead of piling on weights. Buy several (and then buy several more!) plastic spring on until cured. The Wooden RC Sailboat Construction Manual yr Page 16
8. LC] Prepare the Laser-cut Frames Before removing the parts from the laser-cut sheets, lightly sand them with 200 grit paper (or even lighter) to remove the slight scorching that the laser cutter makes. It comes off easily. Be cautious and do not sand off the numbers inscribed into the frames or half-frames. NOTE: When you remove the frames from the plywood, DO NOT DETACH the larger bottom pieces that the frames are attached to! These are what hold the frames in the perfect position on the strongback that you will build later. Carefully remove the parts, still attached to their bottom plywood forms, from the laser-cut sheets. Very lightly sand all the edges of the frames to remove the burned stuff. Be careful to not remove any of the actual frames material as these are very accurately cut. Clearly number the frames if they aren’t already labelled. Take a Sharpie® pen and write the frame number so that it’s readable from both sides. Remember to write them with the bottom of the hull upside down so that the numbers are rightside up. It’s nice if you put the numbers on both the front on the back as well as both sides so that later you can reference any frame from any viewing position. 9. [_]Laminate the double-frames & clear-coat the other frames C Laminate the double frames: If your boat has any doubled-frames, then now is the time to laminate them together. The Sun Wind HF has three sets of doubled-up frames. The Wampum VM has four. Find all the doubled frames and make sure that you have the correct sides meeting each other. Some doubled frames have a clearly marked “Forward” or “Aft” marked on them. Pay attention to this. Mix some epoxy, paint onto the sides that meet, clamp together. Wipe up any excess and clear any notches and slots of all squeeze-out. Let cure. Make sure that they are aligned as perfectly as you can make them! CJ Use the excess epoxy to clear coat the frames: Now is a good time to also clear-coat the frames with epoxy. This waterproofs them. IF you used clear epoxy to laminate the frames, then use the excess epoxy you just used to laminate the fin and brush it on the frames except for the outside edges and any notches or places where other wood will be glued later. You want to keep those areas as bare wood so other glues can stick to them later. DO clear-coat the limber holes though. All the other surfaces on the frames can be clear coated now and it will save you a lot of time later. Get the flat surfaces and all the inside edges now. IF you used thickened epoxy to laminate the frames, then just mix up a small amount of clear epoxy to coat the frames. Don’t smear on thickened epoxy… it looks horrid! You can do a very light clear-coat. You can even let the epoxy sit on the frames for a few minutes and then wipe off the excess with paper towels. You’re just trying to waterproof the frames against any water that gets in the boat. Clean up any drips and runs. Set them upright leaning against something for best results. Otherwise you can lay them down on some plastic. Epoxy generally doesn’t stick to plastic like cut up garbage bags and such. Wait for it to completely dry then rip it off. The Wooden RC Sailboat Construction Manual * Page 17 ABARLBALAALABARBARARAAARARAARARAARARRAAR AAA 4 The Wooden RC Sailboat Construction Manual
onstruction Manual 10. (_] Build the Fin and Rudder from the Laser-cut Kit Wampum Notes: You should already have built-up the keel by now, but you will still need to laminate the rudder. Follow the same concept here to laminate the rudder components. Gather the pieces for the fin and rudder. They have alignment holes (actually squares so you can use stringer material) to help you keep them straight. When you have the fin parts collected, hold them together so you can get a sense of where you’re headed. There is one center piece, and then several more layers on each side of the inner core. Cut a few small scraps of stringer material and push them through the square alignment holes. You can see the thickness and shape of the fin. LL] Mark the panels: While all aligned, take a ball point pen and trace down each side of each piece so that you will have an outline of where to spread the epoxy. L] Make a gluing jig for the fin and rudder: You will need the remaining piece of %” MDF that you had left over from making the strongback. Set the center layer fin panel on the flat wood and trace around it with a pen. Also, mark each of the square holes. Remove the center panel and set aside. On the jig, you should now be able to see where all the holes are. Take a very large drill bit and drill through each hole mark. This gives you some wiggle room later on for using stringer sticks to align the panels. Also, have some plastic ready to cover the jig. A cut-up garbage bag works well. Even better are copier transparency plastics. LL] Glue first two fin panels: Glue up the center panel with the one of the ‘Fin Ply 2’ panels. Make up some epoxy (clear is fine, but lightly thickened is probably better) and generously apply it to the center panel, staying within the lines you drew, and on the inside of the ‘Fin Ply 2’ panel. Press them together snugly and line them up using stringer material through the square holes. Do a bit of clean up on the excess. Lay the pieces flat on some plastic that is set on the jig so that they won’t stick to the surface. Do some more alignment. Poke some sticks through the holes to clear them out and to align the panels. Keep clearing them occasionally so they stay open and aligned. Let dry with weights or clamps all around the fin. Use paper towels to clean up and squeeze-out. L] Glue the Remaining Panels in stages: The Wooden RC Sailboat Construction Manual ir Page 18