
- Title. Author. Summary

NOVEMBER/DECEMBER 1993 | | oa British Steel Challenge Yacht === Steamship Collier
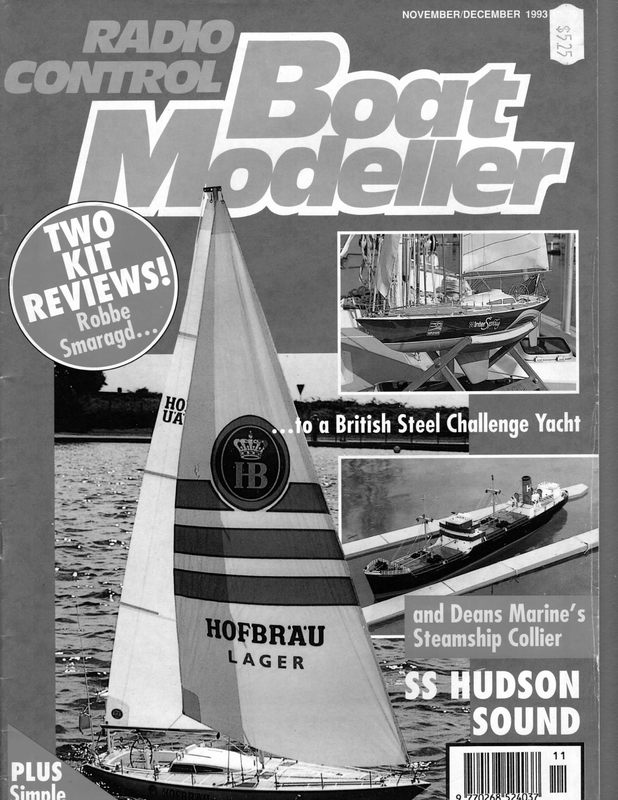
Robbe Smaragd fo a B.S.C. Vacht Ken Pickersgill builds Robbe’s yacht as the British Steel Challenge Hofbrau Lager – and Loris Goring’s pictures show his model painted as Inter Spray eing the coward that | am | would not say to my wife “| am going to build a model yacht, 55ins long and over seven feet tall.’ No not me. | said. ‘| would like to build a model yacht one day,’ as we looked out from Ocean Village in Southampton at all ten of the British Steel Challenge yachts sailing out together. They were a magnificent and inspiring sight. It was only when my wife picked me up from Westbourne Model Centre, where | work, and out walked a huge box with a head, hands and feet, that | realised how close a wife’s tolerance and understanding to a model boat builder can be stretched, especially as | have to work inside the house. Mind you, the box is nearly large enough to make a workshop when empty. A beautiful shot of the modified Robbe Smaragd, distributed by Ripmax. The Kit The Robbe Smaragd (translates to Emerald), imported by Ripmax, is a superb model yacht that | had admired since its introduction. | soon worked out that little had to done to make a reasonable stand off scale model of a BSC yacht. | had given some thought to removing the cabin and building a more scale-like version, but decided to keep it as simple and easy as possible. Colour and design is very much a personal choice, and choosing a BSC yacht to copy was easy for me.F Hall & Woodhouse sponsored yacht Hofbrau Lager really caught my eye. Getting under way The Robbe Smaragd is a build, =. Dent — then reassemble kit. | worked this way before, but = t0 be a good method. To ome piece Plura hull and The real Hofbrau Lager which formed the basis of Ken’s modification. gs cleaned along the mould = Gering the size of the hull © and filler soon puts it right. So. F. p..s AA…
Fitting the rudder servo. Even the stanchions have a little square of ABS keep them in place. To One of the bigger jobs is cutting out the ‘bubble’ made during the moulding process. When cut out this is the only access into the hull and the well made vac-formed cockpit sits in this well. The instructions and diagram say you should cut above the deck line to form a coaming under the cockpit edging. In practice this doesn’t work. The cockpit is wider than fix them in position you have to put thread through the pre-drilled holes in the deck, then through the ABS, tie a knot, apply epoxy and pull up into position. To get the thread from the bow to the cockpit try this method. Use a needle and cotton, stand the hull upright on the transom, push the needle through the hole and its own weight will bring it down to a reachable position. the ‘bubble’ making it necessary to cut into the deck area before the cockpit will sit fully on the deck. The cockpit is held down by the four large winches, but the joint does need waterproofing. One easy method is to make a silicone rubber gasket. Cover the deck area for an inch or so around the cockpit with low tack film or oil. Spread the silicone rubber under the lip of the cockpit, press into position and screw down the winches to keep it in place. Once the silicone has set the excess can be trimmed off. Further assurance can be given by smearing Vaseline onto the joint when al1 the Fitting the rudder in place is straightforward and accurate if you clamp the rudder to the skeg as per instructions. One point to remember here is that the rudder is moulded from Rudder, made from a ‘waxy’ type of plastic which can be difficult to paint. See text. radio equipment has been installed. Unless a problem arises at later stage the cockpit doesn’t need removing again. The switch and charging leads are accessed through the sliding hatch cover. Deck reinforcement With a six foot mast and large sails the strain on the standing rigging is tremendous. For this reason all anchorage points on the deck are reinforced from underneath. A large ‘slab’ of 3mm thick die-cut ABS plastic is supplied for this purpose. Remembering that the only access into the hull is from the cockpit you cannot do this job without the help of aids and appliances as supplied in the kit, unless you have arms four feet long. All the pieces are cut out and drilled to take the studs to screw the eye bolts into. They are then glued under the deck with epoxy. Not all epoxy glues will stick to ABS plastics. ‘Stick’ to the recommended Stabilit Express, if you The author adds some scale to his model at Wessex MBC’s lake. November/December 1993 will pardon the pun, it is very strong and will do the job without any cause for concern. The 8Kg cast iron keel. a very waxy type of plastic and will not take some types of paint. | used enamel as an undercoat and this was OK, after | had tried acrylic paint and it all fell off! Keel The ballast keel is 8kg of cast iron, rough cast at that. A fair amount of filing has to be done to get a reasonably good finish. To obtain a really good surface for painting | used P38 filler. Having planned to paint below the water-line with acrylic | proceeded to undercoat the keel before fitting it to the hull. As the acrylic rapidly dried the whole keel developed a strong attack] of the measles — rust! As | had sanded the filler | had revealed tiny peaks of bare iron. Luckily ‘Stop Rust’ is water based and two coats of this had me back in business.
protect it in the vice and from slipping drills. The standard spreader is made up from threaded rod onto which the lower shrouds are held on with nuts. Rather than use the round section tube as supplied with the kit to make the spreader | used aerofoil shaped tube to match the mast. The dummy spreaders are just pushed onto tight fitting brass rod. If you wish to paint the mast then this is the time to do it The standing rigging is fitted by levelling the deck and using a door frame as a sight line for the mast. This method works very well, if any tiny adjustment is required this can be done with the eyebolts on the deck. Extras Two extra items that | made make a big visual difference, the radar and the radio aerial. The latter is easy to make from The radio tray with fittings for two winches, batteries, etc. The two pullies are for the Genoa. The keel is fixed in place with two large bolts down through the reinforced hull. True vertical alignment is essential Typically, with Robbe kits, a vacmoulded tray is supplied for the radio equipment. This is moulded to the here, use a spirit level across the deck interior of the hull and is fixed in place by pouring a spot of Superglue into the holes you pre-drill. Shredded Wheat, then offer up the keel and start off the bolts enough to hold the weight. 8kg soon gets heavy! Now take up the bolts evenly until the keel just touches the hull at the first point. You will almost certainly find a gap on the other side, 3mm on my model. Carefully pack the gap and tighten up The mast so that the weight of the keel will pull down at 90-. If you are doing this job alone start off with three or four Plastistruct, and can be used as a ‘live’ Rx aerial. The top section is steel wire coated in plastic to which a foot or so of wire is soldered. This fits neatly into a This is aerofoil shaped silver anodised aluminium, very nice as it is, and is fitted with one spreader. The BSC yachts have a white mast with three spreaders, your choice! | chose to add two dummy spreaders and paint it white. It looks very much better in my opinion, especially the effect of the three spreaders. The appearance changes to that of a really large yacht with a 70 or 80 foot mast, far more realistic. The first job is to do some accurate drilling and cutting for the ‘T’ piece at the top of the mast. This is not difficult, but wrap some tape around the mast to Mast head fitting. piece of tube which in turn fits into the next size tube. Just a little drilling out is required for this joint. Don’t glue this into the deck in case you find as | did that the model won’t fit in the car. | made the aerial a tight fit in the deck Pulpit with extra rail. Pulley for Geno sheet. and unplug it for travelling. Because of the good finish to Plastruct tube etc., | didn’t bother to paint it, other than a silver band around each collar. the bolts. Check the alignment of the keel with the rudder, and adjust the packing if required. When you are satisfied that you have true alignment with the bolts at full tension, slacken them off again and apply plenty of Luckily, | had several photographs of the radar from several angles. It was easy to see that it was a standard Raytheon radar, on a pole, with a bracket with knobs on, great! Oh! and a light in a box. | made no attempt to get an exact replica, | made one which epoxy. Fully tighten up the bolts and double check the alignment with the rudder. There will probably be quite a lot of filler required here. | used Milliput for this job for two reasons. When set, Milliput is very hard and strong, and secondly, when first applied it can be ‘looks’ about right. The pole is again Plastistruct tube, the dome is made from plasticard. This was sprayed and when dry the red line was put on, from vinyl, smoothed out with a damp cloth. This saves a lot of hard rubbing down later. and Raytheon was hand painted on each side. As best as | could see the bracket started behind and under the dome, it The mast support bolt is fitted in the deck and then a strong square section tube between this and the keel for maximum strength. With the fitting of the sliding hatch cover the work on the hull is complete. 10 The standard spreader. then moved out and back, then up, forward and out, then up again, but back and in, then a bar across the top. Clear! Well, after three or four(teen) attempts | (ose. =e, se a . Lee) FU ee ee
The lift-out cockpit. Deck anti-slip panels These are self adhesive vinyl and are supplied with the kit, they are joined in groups by small tabs for accurate spacing. It is easier to apply them in Mast support and tensioner showing the standard shroud hooks. these groups and cut out the tabs later. Soapy water gives plenty of time to position them correctly. Starting in the right place is important, | didn’t! Much to my disgust | was a little out with the final section. Working it out, after the event, the best place to start is with the five panels that surround the raised roof light forward by the bow. Then work back towards the transom from side to side, not along one side only. Keep the central joint to 4mm and the edges will work out correctly. wet, was used between each coat. ‘Er indoors was not too pleased with me for spraying a hull this size indoors! | am saving up for a set of good quality paint brushes. had it. It was quickly painted and nailed on! The domed ‘knobs’ were added and the box with a working red light was the final job. When the race finishes | will go to Southampton to have a close look at Hofbrau and find that my attempt is a stand (well) off scale. | could have done some research and made a true scale model of the radar, but as the whole model is very much a stand off scale | wasn’t that concerned. The livery Even though the model is only a resemblance of the BSC yachts | wanted the livery to be as close as | could get it. At this point | would like to thank Brian Miller of Hall & Woodhouse and Mike Thrasher who designed the livery for their help. In brief the deck is Humbrol gloss white enamel. The topsides International Paints Tahiti yellow enamel No.571 and the anti-fouling is Tamiya XF8 flat blue. The stripes are made from car trim, 6mm and 3mm blue and 6mm white. 1200 grade wet and dry, used November/December 1993 Pulpit and Pushpit The pulpit and pushpit had a centre rail added for a little more realism and they, and the stanchions were sprayed (yet again) with Humbrol polished aluminium paint and gloss varnished. The logo and the lettering are made of the same vinyl as is used on full size boats etc. The logo and letter style had to be digitised by computer from original artwork and as a result were expensive. A further ‘run off’ would cost about half the original cost. Application of the lettering proved much easier than | expected. Even though the letters are individual they are correctly spaced into words onto a backing strip. The white ‘shadow’ is a full size letter and is applied first. The blue letters are held taut over the white and when the amount of ‘shadow’ looks correct, gently applied. The two steins on the bow were scratch built, hand drawn onto vinyl and cut out. The logo was made from layers of blue and white vinyl and the letters and crown hand painted. The red Munich on the transom was hand painted and POOLE is Letraset. The radar assembly. Genoa As an optional extra you can fit a Genoa. You will need a multi channel radio and a second sail winch, but this is a very nice option which you can fit quite easily at a later stage. Peter Wiles of P.J. Sails in Poole made me a Genoa in the same colours as the Hofbrau spinnaker and, to me, adds the finishing touch to the overall appearance of the model. If you have a Futaba Fl4, F14 Navy, FC16 or in my case an F16 converted by Model Avionics, you can add a Genoa module. This is a neat little three way switch which when moved from one side to the other will move the Genoa fully from one side to the other. A proportional linear switch is included to give intermediate positions. 11
| must confess to one indulgence; Pekabe yacht fittings, eye bolts, blocks, shackles etc., they are superb. The necessary fittings in the kit are perfectly good for the job, but | like Pekabe fittings and think they add a touch more realism. Summary | would say that the Robbe Smaragd is an excellent kit and an excellent model yacht when built. Currently around £325 to £360 for the kit, fittings kit, mast and keel it is very good value and a lot of boat for the money. Care, and attention to detail is important throughout the building, but nothing is ‘over’ difficult. Read the instructions and plans — until you understand, that is my motto when kit building. If you just want a good large yacht, or, with a little extra work a good semi- scale model of a BSC yacht you will not go wrong with this kit. This is my first attempt at building a yacht and it took me 12 weeks to complete in my spare time. It would be really nice to see a model of all ten BSC yachts on a lake together one day. The plans, instructions and extra parts to make a BSC yacht are available with the kits from Westbourne Model Centre. Come on, let’s have a model British Steel Challenge next summer. Ready for action with the Genoa fitted. Close-up of the deck layout with that wonderful steering wheel. Sailing at a fair speed with less than 5mph wind. The only word to describe its performance is ‘exciting’.


