
- Title. Author. Summary

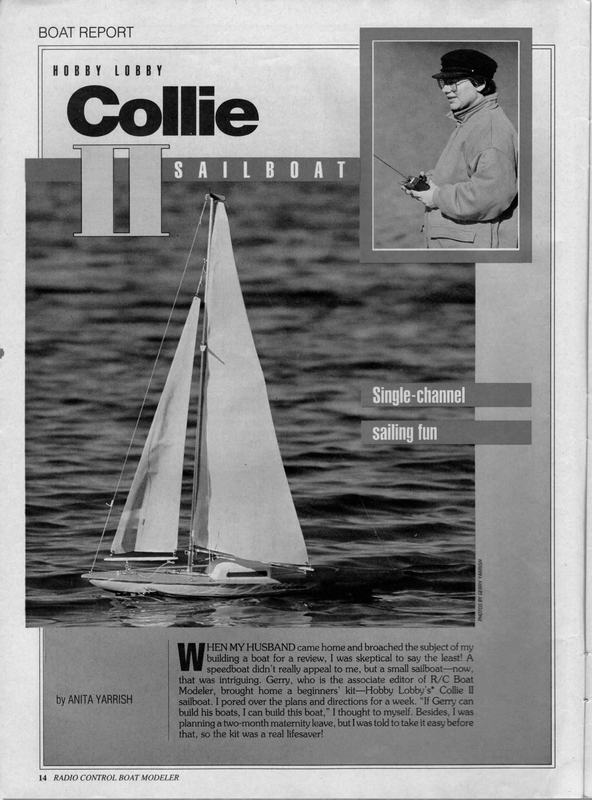
BOAT REPORT HOBBY LOBBY Collie SAITLLBOAT ‘Single-channel Sailing fun 14 RADIO CONTROL BOAT MODELER
SPECIFICATIONS Type: Sailboat Length: 28 inches GETTING STARTED Using thick CA, I glued the keel When I opened the box, | was impressed with the packaging. All the little parts and fittings were sealed in plastic bags and easy to identify. On checking the parts list, I noticed there were extra screws and plastic fittings (which was comforting, because | figured I’d lose or break a few by the time my sailboat was completed). I took a deep breath and began to lay out the pieces. The die-cut plywood parts (which fell out of their sheets) required very little edge halves together; then, I cut an open- ing in the top surface and poured in the lead-shot ballast. It took about 2 ounces of slow-curing epoxy to seal the shot in place in the bottom of the keel. I was impressed by my handiwork—and Gerry was, too! I turned the one-piece hull upside-down on Weight: 4 pounds (with ballast) Mast Height: 33 inches the table and epoxied the keel to the bottom of the hull. To prevent the keel from moving while it cured, I taped it securely to the hull. This finished, I set aside the keel/hull assembly and went to work on the sanding. The mast was too long to fit in the box, so there was a nicely machined, zigzag splice cut into it about two thirds from the top. (You plywood cabin parts. can use this mast, or buy a 3/s-inch dowel at a hardware store.) I used their supplied mast so that I could do a true kit review. The rest of the kit consisted of vacu-formed hull parts, keel halves, Beam: 5 1/2 inches | WOODWORKING Having already sanded the cabin pieces, I was ready to begin assembly. It took time to sort everything out, but I realized that the cockpit tub and cabin were really nothing more Hull Material: ABS vacu-formed plastic | Power Req’d: a light breeze Radio Channels Req’d: 1 (rudder; sail-contro! optional) Sug. Retail Price: $119 Features: the wooden mast comes in two pieces with a machined splice that you glue, The molded ABS hull is easy to finish, and all the wooden parts are of top quality. | rudder halves, a cabin rooftop, sail material, sail string and lead-shot ballast. HULL AND KEEL CONSTRUCTION First things first: I trimmed the excess material off the keel halves, marked the trim lines with black magic marker and cut out the keel halves with scissors. I sanded them quickly and easily to the trim line with a stationary belt sander. I was surprised, however, at how much sanding was required to finish shaping them. than elaborate boxes. I glued the cabin onto the sub-deck sheathing and attached the cockpit tub from underneath. I sprayed clear urethane onto the inside to seal the wood against moisture, and I sealed gaps in the joints with model airplane filler. Once it had dried, I sanded the joints smooth and painted the outside with Krylon spray paint. If 1 say so myself, it looked great. The directions tell you to attach four wooden tabs to the top surface of the sub-deck. These tabs automatically make the sub-deck flush with the sides of the hull. After and the deck comes in two pieces with the planking printed on it. When the wood has been sealed with urethane, it’s very attractive and water-resistant. Comments: although it’s easy to assemble, the Collie requires attention to detail. The rudder provides control, and the sails are adjusted manually. With this setup, it’s easy to lose the wind, so | installed a 4- to 6V trawling motor that has a simple forward/ott/reverse switch. The motor is only used in small bursts, so the battery pack lasts along time. | replaced the supplied sail material with a lighter fabric. Although the boat is too small to catch all the wind at the pond, it performs well and was fun to build. JULY 199] 15
Collidl measuring to make sure the whole cabin/sub-deck unit was in the right position, I glued it to the hull sides from the inside, and I sanded off the tabs. This little step was the most difficult, time-consuming part of the entire The keel halves must be trimmed before they’re glued together. project. Next, I installed the wooden deck crutch that runs from the inside of the bow to the front of the cabin. Another crutch goes from the back wall of the cockpit to the stern. This provides a hard point from which to attach the deck hardware, and it produces a crown when the deck is attached. Join the keel halves with CA, and Sand the seam smooth. I glued the deck to the hull sides and secured it with clothespins while the glue dried. After I had sanded the hull’s edges to meet the deck’s edges, the hull was complete. It took me about 5 hours to get to this point. (I knew it was important to make sure that the pieces were straight and true before | glued them, and above all, to relax and have fun.) EASE- let sails out TRIM – pull sails up = i= = PORT et STARBOARD ASTERN GS Basic right of way goes to: 1. Boat on stbd (sail on left) 2. Boat being overtaken 3. Boat to leeward (7) HARDEN UP – head boat closer into the wind (trim sails) BEAR OFF head boat away from the wind (ease sails) TACK – turn boat into, through and put the wind on the other side of sails (leave sails alone) is) eal! =) LUFF ~ JIB CLUB TOPSIDES BOTTOM Pa BOW WING AND WING- sailing directly away from the wind with the mainsail on one side and the jib on the opposite side RUNNING RIGGING – movable lines that control sails, called “sheets” – jib sheet main sheet STANDING RIGGING – fixed lines that support mast called “staysTM or “shrouds” 16 RADIO CONTROL BOAT MODELER — LEECH JIBE – turn boat away from the wind until the sails swish across the boat, and the wind hits them from the other side (leave sails alone)
DECK FITTINGS The deck fittings consisted of eight metal eyelets and two plastic fittings. I screwed the eyelets through the deck into the wooden crutch pieces. I used four stainless-steel screws to secure the plastic fittings to the deck. The fittings are used to attach the sail and the mast. (To prevent the wood from splitting, I pre-drilled all the holes in the deck as shown on Sailing without the wind? the plan.) RUDDER The plastic rudder is made just like the keel: I cut two halves and sanded and glued them together, but I installed a brass pivot shaft between the halves. This shaft goes through a pivot tube and is held in place with the plastic tiller arm. | glued the brass tube into two holes drilled in the hull’s bottom and the aft deck. (Their correct positions are marked with a circle on the deck and a dimple in the hull.) I greased the pivot shaft lightly before I installed it. MAST AND SAIL The mast must be sanded to a taper before you seal it. I gradually tapered the top one third of the mast until it was about !/4 inch in diameter at the top. I attached two plastic fittings to the lower end of the mast and glued them into place. The boom/hinge fitting that’s used to attach the boom is larger than the mast’s diameter, so, following the directions, | wrapped paper around the mast to achieve a tight fit, and I secured it with a drop of glue. I glued the die-cut plywood cross members to the top of the mast, and to hold the mast firmly in place, I ran rigging string through the cross-member holes. The rigging looked more complicated than it was. I started at the bow and worked my way back, and I kept the strings long, which helped to set their lengths. Once the mast had been centered and the rigging drawn tight, a drop of glue set the side-rigging string lengths and prevented the mast from shifting. The mast and rigging can be positioned forward and aft along the center mast/deck fitting. The sail material that comes with the kit (it’s also used for model airplanes) was satisfactory, but I replaced it with a Hobby Lobby’s Multispeed 140 motor/gearbox and shaft assembly was installed just in case the wind died down. The prop shaft exits the hull just behind the ballasted keel. The hole in the foreground is for the rudder’s pivot tube. The Collie sport sailboat is easy to assemble, and rudder control is all that’s used to operate it. When you’ve adjusted the sails on shore, you only have to give the boata slight push, and the sails will catch the wind. If you don’t want to depend onthe wind for power, you can install a simple trawling motor, and if your sails go to catch the breeze. A motor limp, you can move the boat would also help you to run the model in a more scalelike manner, e.g., at regattas where docking and reversing are required. The parts you’ll need for the trawling motor are: e Graupner’s* Multispeed 140 geared, motor-drive unit (no. 1147 or its equivalent) e a4 to GV battery (arechargeable battery is preferable) and wiring e a simple switch (forward/off/reverse) to act as a speed controller e solder and thick CA The Graupner Multispeed 140 drive unit has motormounting tabs molded onto its case; screw them onto the hardwood motor-mount rails; then glue the rails to the wooden belly pan (this stiffens the hull). Drill a ‘/sWith the hull upside-down on a flat surface, you can strike the water line with a pencil and a wooden block used as a guide. lighter cloth, which I bought at a hobby shop. I enlarged the sail dimensions by 1/2 inch all around so that the material could be doubled over and ironed together. This also strengthened the material where the mast’s attachment rings were installed, and it helped to prevent it from ripping. The corners have three layers of material, and they have inch hole behind the ballasted keel right on the hull’s center line. Elongate the hole slightly to allow the shaft tube to exit the hull at an angle. With a mixture of thick CA and baking soda, seal the shaft from the inside where it exits the hull. The motor has a double-pole/double-throw switch, and it’s actuated with a servo. If you use the motor just for catching the wind, the battery will last a long time. To keep the bilges dry, grease the prop shaft occasion- ally. Knowing that you can move under your own power is comforting, especially for the beginner, and it takes less than 20 minutes, using simple hand tools, to install the motor. JULY 1991 17
Left: The cabin assembly (built separately from the hull) is installed later as a single unit. The small balsa tabs keep the assembly flush with the top edge of the hull. eyelets to strengthen the attachment points. Gerry hammered and flattened the eyelets into place, and then he flared them outward with a center punch. Above: The hatch in the cabin roof makes it easy to reach the radio and the batteries. The radio’s on/off/reverse switch is visible to the left. Left: The author uses sandpaper for a really smooth deck finish. The deck was sealed with two coats of Red Devil clear spray urethane. FINAL ASSEMBLY Originally, the model was only controlled with the rudder, but I installed a trolling motor in case the wind died down. Using double-sided tape, | attached the servos to wooden cradles inside the hull; then I attached the receiver to the inside wall of the | cabin. To keep the boat’s center of gravity as low as possible, the batteries are installed low in the hull (I used double-sided tape). I drilled a hole in time to charge the batteries, it’s simply popped off with a hobby knife. tipped it over. I brought the model RUNNING THE COLLIE We ran the model for the first time ona bright day in February. The day The mast and it heros eat the aft cabin wall, and with a wire pushrod, I attached the rudder tiller arm to the servo. The radio on/off switch is also attached to the aft cabin wall and is easy to reach. The cabin roof is made of vacu-formed plastic and, to simplify the assembly, it’s attached to the cabin with a couple of drops of CA. The roof doesn’t have to be removed during normal operations, and when it’s 18 RADIO CONTROL BOAT MODELER went. The first time out, its sails were too tight, and the strong wind almost slowly and carefully. was rather warm, and we found a large area of a nearby lake that was free of ice. Here’s an important note: take tall boots when you runa sailboat. You’ll be in deeper water because of the boat’s keel. February isn’t a good time to go wading, but we had a deadline to meet, so I got my feet wet. The model was a lot of fun to run, and I was surprised at how fast it back in, adjusted the sails and tried again. The Collie ran smoothly and turned easily with the large rudder. The kit included directions on how to sail the model, and I found it easy to play the wind once the sails had been loosened. I turned port (left), and the sails filled. As the Collie II accelerated, | adjusted the rudder until I could feel a balance between the forward motion of the boat and the sideways push of the wind. Allin all, itwas very easy. It was strange, however, to be sitting barefoot in the sun, running a model sailboat while, about a 1,000 feet away, people were ice fishing. I was really having a good time, but we soon called it quits as my feet were wet and cold. Asa beginner, I found the Collie to be fun and challenging to build and run. If you’ve built even just one other model, you’ll have no trouble getting the Collie II from the box to the water. I think my next one will have red sails… *Here are the addresses of the companies mentioned in this article: Hobby Lobby International, 5614 Franklin Pike Cir., Brentwood, TN 37027. Graupner; distributed by Hobby Lobby International, 5614 Franklin Pike Cr., Brentwood, TN 37027. qg


