
- Title. Author. Summary

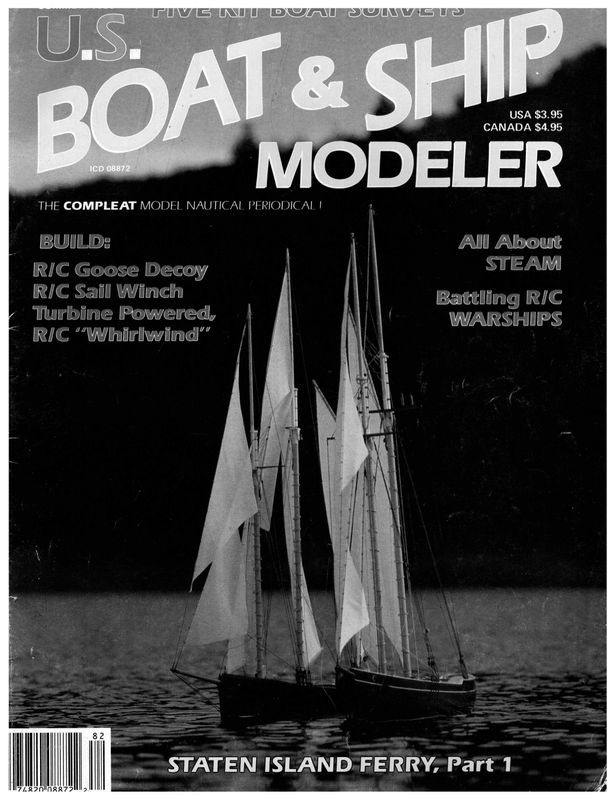
s 5 USA $3.95 CANADA $4.95 M ODELER THE COMPLEAT MODEL NAUTICAL PERIODICAL ! R/C Goose Decoy | TLRININRRT IBN D 82 : io — a = STEAM ‘
ing blocks in the area of the sheet exit guides so that the sheet touches only the guides while entering and exiting the hull. Check the class rules for allowable deck beam dimensions and using fila- The “12US 949” belonging to Ron Banner, of Puyallup, Washington, on its maiden sail. STRICTL ment tape, strap the beam to the proper measurements. The Ozmun hull comes from a mold which is closely related to the original EC/12 hull form, and that, coupled with the sturdy deck flange, means a substantial effort must be made to meet the required shape. For later reference, mark the location of the chainplate backup blocks on the outside of the hull. I usually make some cardboard patterns so that I can draw them on the deck after it is down and I am locating the chainplates. I drill a small hole at the location of the jib mounting bolt in the deck so that Ican use a piece of stiff wire to locate that point accurately as I lay the deck down. Use plenty of thickened resin to bed the deck onto the beams and hull lip. Use only a little catalyst so that you’ll have plenty of time to get everything just right. Tape heavily all along the deck edge, and that should pull the deck tightly down against the deck beams. Don’t get over eager and ruin your beautiful work by untaping the hull too soon. Let it cure completely. When fully cured, remove the tape, including that which you used to hold the deck beam measurement. Finishing the deck/hull joint is a matter of personal preference. Figure 8 indicates some successful approaches. The important thing is to have a complete seal at this joint. The joint goes underwater routinely while sailing, and needs to be tight. By ROD CARR n our last installment, we had gotten as far as the R/C gear installa- tion. To avoid problems, I always erect the mast with temporary shrouds which run to screw eyes put into the chainplate mounting blocks. Then I can rig the sheets through temporary beams which hold the sheet exit guides. I check to confirm that as the sail control unit lets the sails out that the jib goes out slightly faster than the main. I also check to make sure that both sails can go out to at least 90 degrees for nmning downwind. Move sheet exit guides or attachment points on the sail winch arm until things work properly. The farther out on the booms you can attach the sheets, the more control you will have over the shape of the rig while sailing. 24 We have had to complicate the mainsheet path a bit due to the size of the hatch cover we chose. The sheet is tied to the winch arm with a bowser loop, then runs aft to a pulley (block) affixed to the hull, back through the winch arm, and finally out the sheet exit guide. Adjustment of the closehauled position is made at the bowser on the winch arm. Now back to work. ATTACH DECK The first step in deck attachment is to mark the location of the sheet exit guides on the underside of the centerline of the deck by laying the deck on the boat and marking from inside with a pencil. Then drill the deck 3/16-inch to accept the sheet exit guides. If necessary, thin the underside of the mount- Alternative commercial mast fittings from Probar Design, Escondido, California. U.S. BOAT & SHIP MODELER
MOUNT DECK HARDWARE Mounting of deck hardware proceeds from the bow aft. Locations are shown in Figure 2. The attachment point for the jib mounting bolt has already been established (Section 2). The mount itself is a modified 10-32 bolt with the head removed and the shaft flattened and drilled as shown in Figure 2. The lower end of a swivel turnbuckle is attached there. The jib club fitting is modified to increase the offset between the swivel point as shown in Figure 9. Attachment to the jib club by through bolting, using 2-56 machine screws, is recommended. Drill clean 3/16-inch holes through Fig. 9 JIB CLUB ATTACHMENT \ of the mast step. BUT. . .only drill for the two center holes in the chainplate base. We will sail the boat a couple of times before we decide the final position for the mast and the chainplates, and this avoids having to cover up holes in your deck. Use the same procedure for the backstay mount as we did for the jib stay. But plan to simply hook the backstay into the mount rather than using a turnbuckle. Mount a cleat on the centerline of the hull near the stern to receive the bitter end of the main sheet. If you will not be using radio controlled jib trim, mount a second cleat two inches or so forward of that. Drill small holes in the deck to allow the sheets to pass out to the cleats. These provide adjustment for the closehauled position of the sails without opening up the hatch while involved in racing. Drill a small hole near (1/2 inch) the backstay mount for the receiver antenna to pass through on its way up the 2) — a 2″ May be lapped with polishing compound for free rotation. the deck for mounting the sheet exit guides. Bed them in epoxy, but avoid making a mess on the deck. You will be putting a metal pin of approximately 1/8-inch diameter in the bottom of the mast. Drill a series of holes of the proper size in the brass stock you purchased for the mast step. Countersink for two flathead wood screws at either end and mount the center of the piece 25-1/2 inches from the bow. Make the step approximately 2-1/2 inches long. This allows an inch of movement in either direction for final tuning. Mount the chainplates with the forward loop directly abeam of the center Forestay BE Bow ——____—__ Swivel/Turn buckle Starting at the mast head, affix a mast crane as shown in Figure 10. The forward eye is not needed if you are not going to fit jenny struts to the Goldspar mast (The jenny struts are shown in Figure 11 for completeness). Use 2-56 machine screws to hold the crane in place. You can epoxy it, but I like to be able to completely disassemble the mast whenI rerig it. The class rules prohibit the jibstay at- taching any higher than 59 inches above the deck. Make sure that a straightline extension of your jib stay does not ex- MAPLE DOWELING ceed 59 inches. FIG. 10 MAST HEAD CRANE backstay. MAST The class rules stipulate that the height of the mast is to be no more than 72 inches above the deck. Measure your mast carefully. Then cut off a small piece equal to the thickness of the mast step you will use plus 1/8 inch more for good measure. SUMMER 1988 Forward eye in mast crane is not required if jenny struts are not to be fitted. 25
: ‘ MAX 72” MAST HEAD ¥ . CRANE \ UPPER TERMINATION FOR SIDE STAYS oe FORESTAY, 59” max. ¥ 58.5” JENNY Tn STRUT FIG. 11 JIB STAY ON & \ “6 oO %, % FIG. 12 JENNY STRUT | MOUNT | | 5 Py | 34” RY) Ss | SPREADER | I So | 1 al CHAINPLATE UPPER TERMINATION FOR LOWER SuROUDS LOWER FOR FIG. 13 SPREADER TERMINATION JENNY staYs MOUNT Mast fittings of 1/4inch aluminum epoxied to mast avoids weakening from drilling holes for bolts. Next, proceed to a point 58.5 inches above the mast heel and affix a mounting block for the jib stay and jib halyard. Ihave made them out of 1/4-inch alumi- num and 3/16-inch brass, epoxied to the mast. I would imagine that ash or maple could be used. I would then drill out the holes and epoxy some of the rigging swagging sleeves in them to avoid having the stays saw their way through the wood. The reason for such complexity is to avoid putting holes in the mast, thereby weakening it and risking it collapsing at worst, or taking up a “kinky” bend at best. Wooden masts usually require jenny stays, and they are shown in Figure 12. The spreaders are located 34 inches above the deck using a mounting block as just described. Figure 13 shows the configuration. Two brass stubs are let into the mount so that the spreaders can be slipped on and off for transporting the rig. I use a homemade gooseneck fitting which uses the Fisher gooseneck to attach to the main boom, but a clamping fitting which fits around the mast as shown in Figure 14. This fitting provides two benefits; first, it avoids piercing the mast with holes, and second, it allows an arrangement whereby the swivel point of the boom is offset from the mast. This will make the mainsail become more cambered the farther off the boom is slacked. On the reaches and runs a more cambered, rounded sail profile is more efficient. Of course, FIG. 14 GOOSENECK & VANG MOUNT FIG. 15 METHOD OF RIGGING MAIN DOWNHAUL commercial fittings can be used, and I don’t think a hole or two in the mast near the base is going to be critical. Mount the gooseneck so the top of the boom is four inches off the deck. This leaves room for the vang, which needs to be right down next to the deck, and gives it a good lead angle as shown in Figure 15. The mast heel is finished off by epoxying a two-inch long wood plug in the bottom, drilling it out and epoxying a nail of suitable size to act as a locating pin for the mast on the mast step. The pin should protrude about 1/8 inch or SO. 26 U.S. BOAT & SHIP MODELER
Deck is taped securely to the hull in order to maintain proper shape while resin cures. MAIN BOOM AND JIB CLUB The main boom is approximately 23 inches long, no more than 3/4 inch in cross-section and can be tapered at either end. Figure 17 shows the main boom and its important parts. The eye to receive the mainsheet is located so that it is directly over the sheet exit guide when the rig is on the boat. We want a direct downward pull from the winch to tighten the leech and make the boat point when required. The outhaul cleat is mounted under the boom and should be loose enough to act as a jam ig. 16 MAST HEEL N cleat, rather than having to depend on a tiny half hitch to keep the outhaul from slipping. The jib club is rigged the same way. It is 19-1/2 inches long and should be made light consistent with strength. Sitka spruce is a good choice, though pine, cedar, fiberglass arrow shafts and other materials have all been successfully used. See Figure 9 for the arrangement at the forward end of the club. RIG SET UP With the cradle on a level surface and the waterline of the boat parallel to that surface, the mast should be raked approximately 1 to 1-1/2 inches aft from vertical. Hold the mast with a piece of string thumbtacked to the ceiling and move the cradle around until it is in the right place. Loosely connect all the shrouds to the mast and the turnbuckles with the turnbuckles loosened up all the way. I recommend using 30-pound test Steelon plastic-covered leader wire from Berkley. The swaging sleeves will let go before the wire breaks, and the wire would break before anything on the boat, so it acts as a weak link. Use only one swaging sleeve for each connection. Never reuse either sleeves or wire if something comes undone, start with totally new parts. Then carefully tighten everything down. Attach fishing clips to the ends of the sheets then lead them inside the boat, through the winch, and back out onto the deck to the cleats. This procedure will allow you to set the boat up more quickly at lakeside. NEXT TIME Next issue we will have some photos of 12 US 55 on the water, but we had to wait for some better weather and couldn’t get them done in time for this month. We will also have a column full of all sorts of bits and pieces which I have received from our readers, including reports on some new 10-Rater Class planing scows that are under development. I hope to be able to provide lines and plans that you will be able to order from the publisher. Till then, remember to pay your $20 dues to the American Model Yachting Association, Pat Hein, 1884 Campus Court, Rochester Hills, Michigan 48309. Send your photos, comments, and questions to me at: 3011-177th Ave., NE, Redmond, Washington 98052. A self-addressed, stamped envelope will get a faster reply. Good sailing! ° “ Wood Plug | Ss 1/8” Steel Pin (Nail) ? \ Fig. 17 MAIN BOOM C8 Cleat for mainsail outhaul adjustment —— n i 7) = Small scew eye to receive mainsheet Hole through Boom/Club JIB CLUB SUMMER 1988 27
High aspect ratio keel (with cast iron streamline weight) and rudder match high A/R of sails on Robbe ‘M’ Class, 50/800 “Pirol.”” ROBBE’S < By JOHN OIAN \ , T hat’s 8-1/2 feet tall and weighs | © 12 pounds? An anorexic reject from the NBA? No, it’s Robbe’s ‘‘Pirol”’ sailboat, and a good one it is. Let me start off by saying this was my first encounter with an R/C sailboat. I’ve sailed full-size boats for years and have spent a fair amount of time nunning around the pond with R/C power boats, but never an R/C sailing yacht. Thus, I entered upon this project with a little trepidation. The Pirol is what is known as an “M” class boat, this is also known as the 50-800 class. The rules for this class are pretty simple and can be summed up by saying that the boat can be no longer than 50 inches and have no more than 800 square inches of sail area. There are some other rules for the class, but the two above basically say it all. It is also one of the more popular classes of model sailing yachts. The kit itself is very complete, so much so that all you need to finish the boat is some glue, paint, a two-channel surface radio, and a sail winch. The boat arrived in three different boxes. The first being a very well done, color- Futaba S-10 servo has the power to handle the sails. See “Radio Waves,” this issue, for more servo specifications. PIROL” ful, and large box which contained the hull, sails, and all the hardware needed to complete the boat. The second box contained the six-pound keel bulb, and the third was a 7-1/2-foot long, heavyduty mailing tube with the mast extrusion. Before you order one of these boats, you will have to decide which sail you would prefer; they make several which are shaped and sized to fit your works flawlessly. When you first open the box, you will see just how complete this kit really is. I suggest one of the first things you do is go through the instruction manual ht air sail, which is of a very high aspect ratio; Le., it is very tall and narrow. This one is good for most conditions, but if you live in Hurricane Gulch, various bits and pieces. Because the kit is made in Germany, the various dimensions are given in the metric system, but this is really not much of a problem ual sailing conditions. I opted for the you may want to select one of the others. In addition to the various parts from Robbe, you will need some sort of sail winch. Typically, there are two types of winches available. One has a very large geared motor attached to a long arm. This type takes up a lot of interior room, but does not require further internal hardware. The other type looks like a very large servo with the exception that there is a drum arrangement where the normal output arm would be. This type requires some internal pulley system in the boat and is the one that is recommended for this boat. The parts for the pulley system are included in the kit. The recommended servo is the Futaba S-10, which is the one I installed, and it parts section and start identifying the Receiver, batteries, and one of two keel bolts added by author as extra precaution. Left: Gooseneck and van g setup for mainsai l boom. Above: Jib boom and fittings, showing adjustable baseplate. U.S. BOAT & SHIP MODELER
tos, and a text in several languages, including English. The instructions are step-by-step and should get the average person through the building stages with ease. The biggest piece in the box, of course, is the hull, which is a one-piece unit with the hull and deck joined at the factory. It is made from something they call ‘‘Plura’’ I don’t know the exact composition, but it is a very tough white plastic. This is the same material that they use for some of their R/C glider fuselages. You won’t have to worry about breaking it in in this application. The construction itself is not difficult at all, there is a little gluing involved, but most of it is a matter of a hand-drill, bolts, and screws. The keel fin consists of two halves made of the same material as the hull to which the preformed (sand-cast iron) keel bulb is attached. There is also a very thick-walled brass rod that connects the keel bulb through the fin to the hull and deck. This is an area where I made a slight (and probably unnecessary) change; along with the recommended gluing of the keel rod assembly to the hull, I imbedded some small bolts into the keel fin halves with the threaded portion sticking up. These were put through some holesI drilled in the hull and fastened by nuts placed on the inside. This modification can be seen in the photo showing the inside of the hull. Again, probably not necessary, but I Continued on page 70 The ‘‘Pirol,”’ with its tall mast and sails, will pick up light air not normally available near the surface of the water in a calm. Hull shape is modern “‘state of the art.” if you get yourself a small ruler with metric markings. Upon opening the box, I found two very detailed construction drawings. Even though they are in German, they are easy to follow. Part of this is because of the well done construction manual, complete with pho- Tumbuckles and baseplate for shrouds (or sidestays). Note metal clevis ““keepers.”” SUMMER 1988 Exposed tiller arm is handy for adjustments. Backstay with tension adjust and keeper. Profile photo out of water. Very high aspect ratio sails. Downhaul on main could possibly use a little tightening. 35


