Article and photos by Ivor Walton
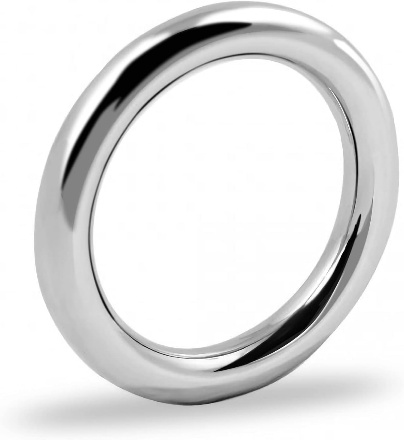
This article describes how to make a spring-loaded boom vang. The spring compression allows the boom to be pulled down lower than its normal position in order to tighten the leech under certain upwind sailing conditions. Vang lengths can be from five inches for a one-meter boat to six inches or longer for a larger boat. The finish is either polished brass or aluminum. Figure 1 shows a completed vang.
Materials for a brass vang
- 1/8, 5/32, 3/16, and 7/32 inch diameter nested brass tubing. Each tube fits exactly into the next larger size. Hobby shops and hardware stores carry these tubes in 12-in lengths.
- 4-40 threaded rod
- 1/16-in sheet brass
- 4-40 threaded steel clevises from Great Planes
- Spring from a Paper Mate ballpoint, click pen, 1-1/8″ long.
- 3/16 inch diameter wooden dowel
- 5-minute epoxy with Microballoons filler
I use a Dremel rotary tool with a cut-off wheel to cut the tubing. The Dremel tool is very effective for cutting small tubes because it cuts without distorting the tube. It’s better to cut the lengths slightly oversize and then trim to the correct length after gluing. A bench disk sander with a sliding guide is a good tool for squaring tube ends. De-burr the inside ends of finished tubes with a sharp drill. With a file or sandpaper, roughen surfaces to be glued, and use slightly thickened epoxy for gluing.
Directions for a 6-inch brass vang

Fig. 1. Completed vang.
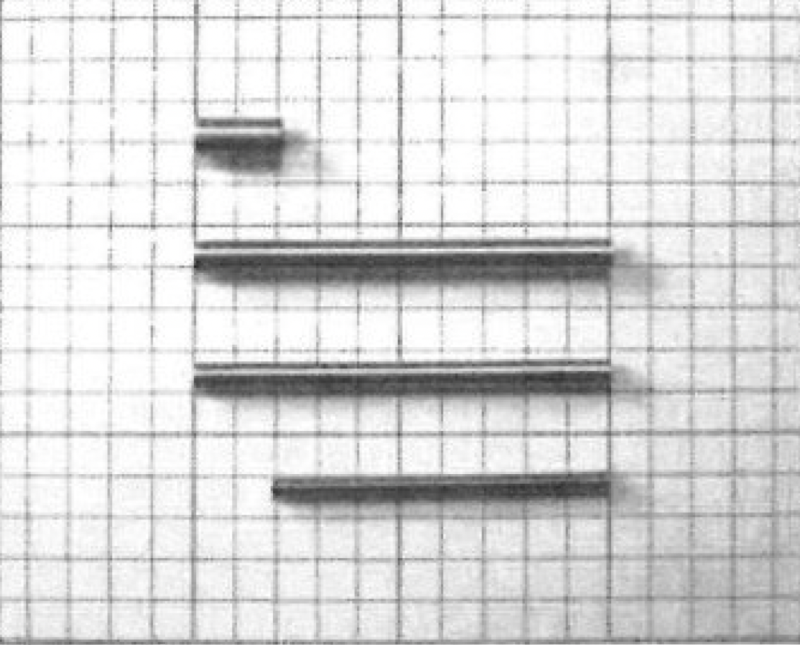
Fig. 2. The parts for the sliding piston a short piece of 3/16-in tube, 1/8- and 5/32-in tubes, and a section of 4-40 threaded rod.
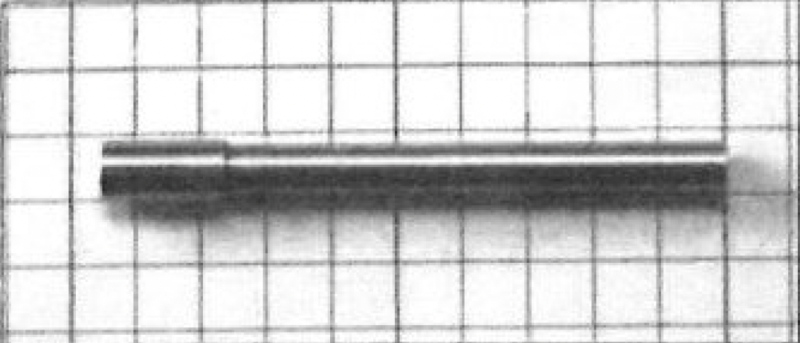
Fig. 3. Glue the three tubes together, one inside the other, with the 3/16-in tube at one end. Trim the 3/16-in section to 3/8 in long, and the overall length to 1 7/8 inches. Make sure that the shoulder formed by the 5/32- and 3/16-in tubes is square (trim before gluing) and free of epoxy, because that is a bearing surface when the piston is inside the vang body.
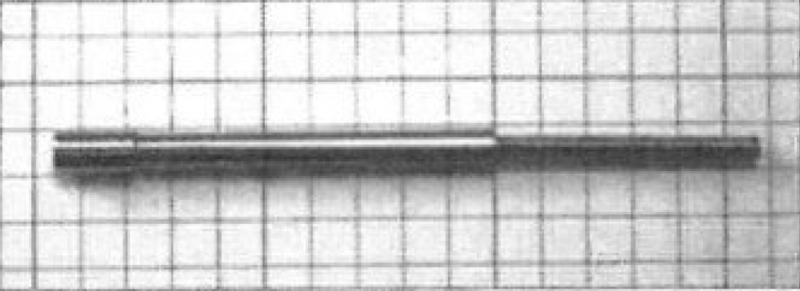
Fig. 4. Now tap a 4-40 thread, about 1/4 inch deep, into the narrow end of the piston. Coat the end of the threaded rod with epoxy and screw it down into the tapped hole. After gluing, trim the threaded length to 1 1/8 inches.
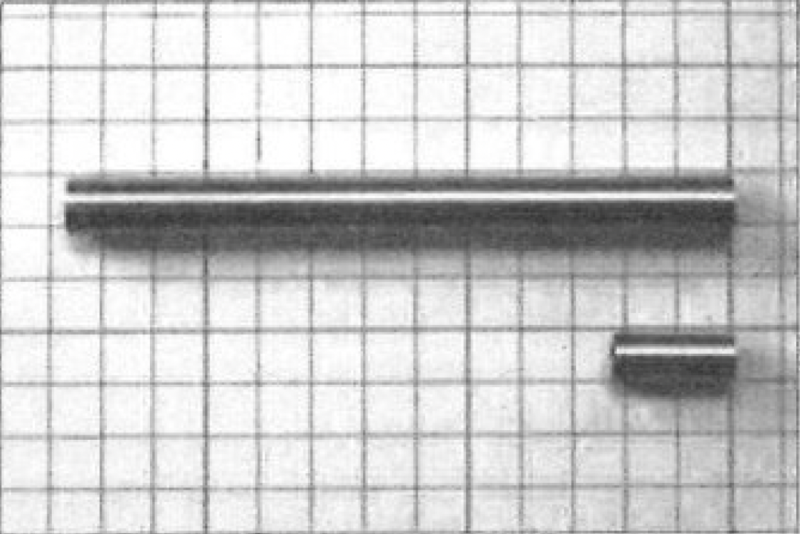
Fig. 5. Two tubes for the vang body, one long 7/32-in tube, and a 3/8 in length of 3/16-in tube. Square the inside end of the 3/16-in tube before gluing, because it will be the bearing surface for the piston. Epoxy the 3/8 in length of 3/16-in tube into one end of the 7/32-in tube, being careful not to get epoxy on the inside end. Trim the body length to 2 1/2 inches.
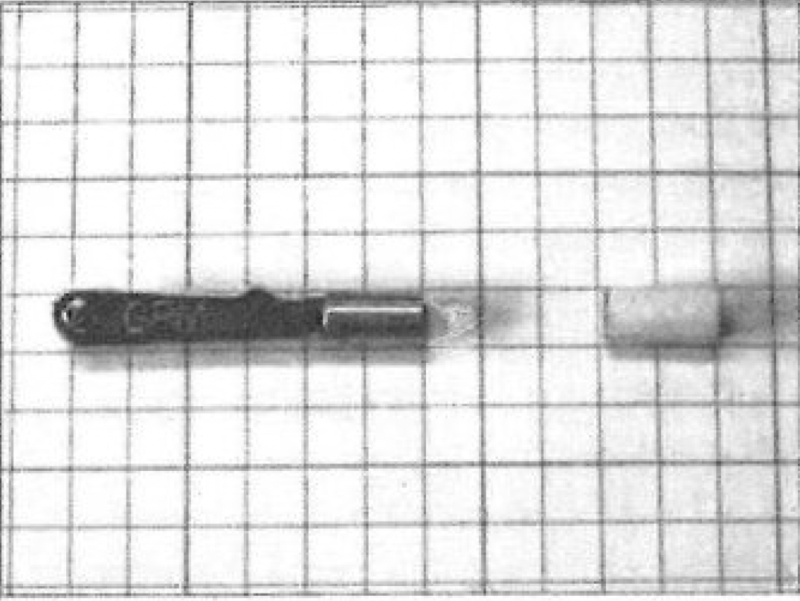
Fig. 6. Ероху а 3/8 in length of 3/16-in tube onto a 4-40 threaded clevis, and cut a 3/8 in length of 3/16 in diameter wooden dowel. Sand the dowel so that it is a loose fit in the 7/32-in body.
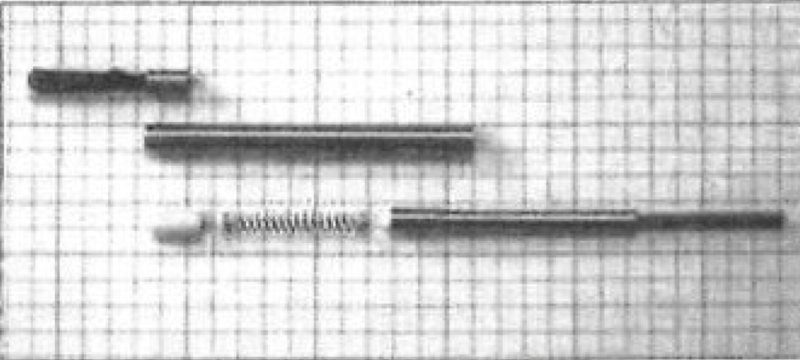
Fig. 7. Trial fit all the parts made so far. Put the piston into the barrel, followed by the spring, the wooden dowel spacer, and the clevis. The dowel spacer should be long enough to just compress the spring about 1/16 in, but no more than 1/8 in, otherwise piston travel will be limited. Adjust the dowel length as necessary. The piston should rotate freely in the body and should travel about 518 of an inch when the spring is fully compressed.
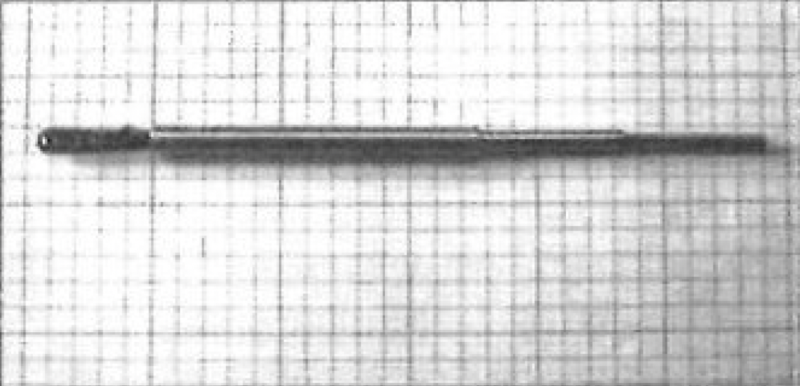
Fig. 8. When everything is working correctly, ероху the clevis into the end of the body. In order to hold the clevis in against the spring pressure, you will need to clamp the assembly while the glue dries. Before gluing, be sure to roughen the clevis and the inside end of the body. Also, because the Paper Mate spring is not stainless steel, coat the spring with marine grease before assembling.
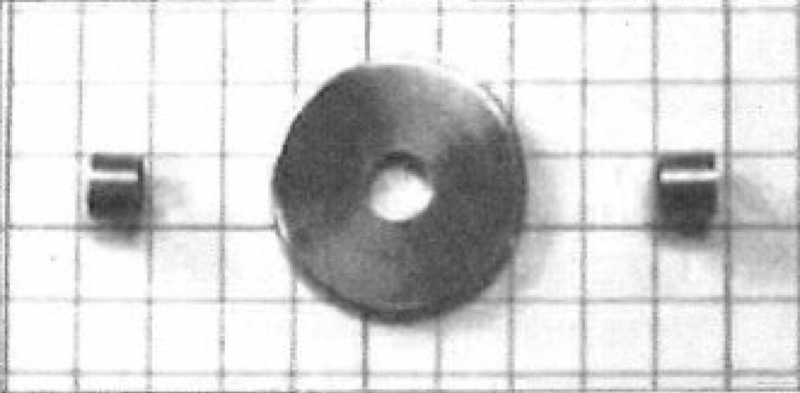
Fig. 9. This photo shows the parts for the turning wheel. The wheel is made from 1/16-in sheet brass with a 5/32-in hole in the center. It is held in place by two 1/8-inch-long collars of 3/16-in brass tube. A 5/8-in diameter wheel works well, but you can use any size that you wish.
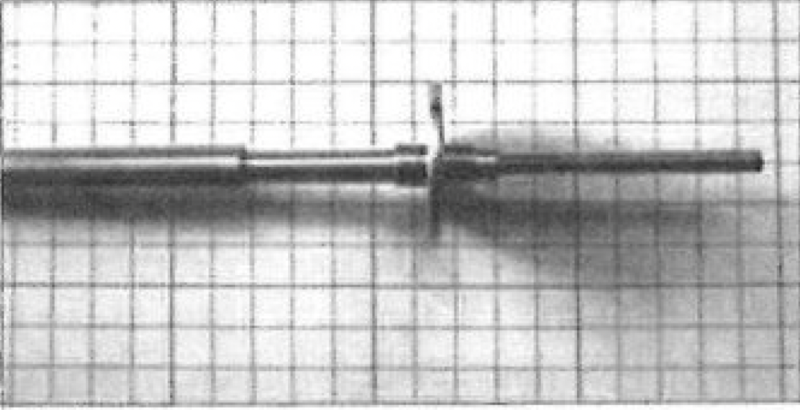
Fig. 10. Epoxy the wheel and collars to the piston, making sure that they are far enough from the end of the body to allow for full compression of the spring. Polish the brass with very fine steel wool; attach a 4-40 clevis to the piston thread, and the boom vang is complete.
Directions for an Aluminum finish
[Model Yachting Editor’s Note: Not recommended due to galvanic action between dissimilar metals in contact with each other (about 0.5 volt between brass and aluminum.]
Replace the 5/32″ brass tube in Figure 2 with a 5/32″ aluminum tube, but use brass for the other two tubes.
Ерoxу a 2-1/2-inch length of 1/4-in aluminum tube to the outside of the 7/32-in brass body in Figu. 5.
Make the wheel parts in Fig. 9 from aluminum.
Other Options
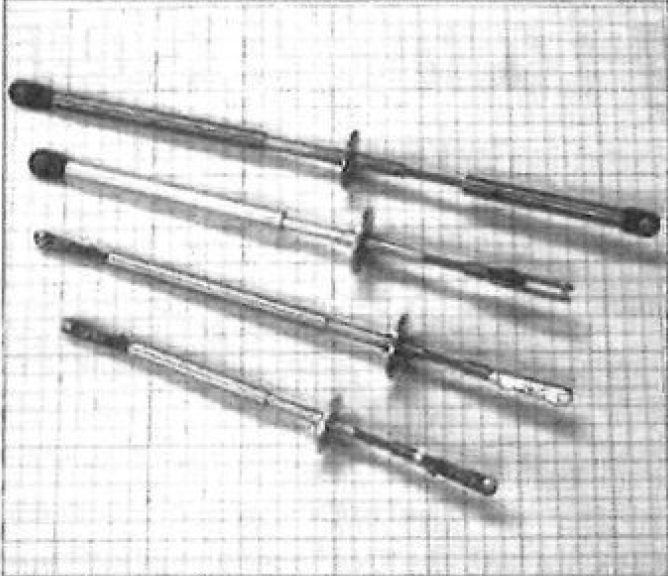
This design can be easily modified for different lengths and end fittings. Figure 11 shows a variety of vangs, from 5 to 7 inches long. The ball ends are 2-56 swivel ball links from Du-Bro, which can be glued directly into 7/32-in tubing. Any questions may be e-mailed to (ivorwalton@comcast.net).