
- Title. Author. Summary

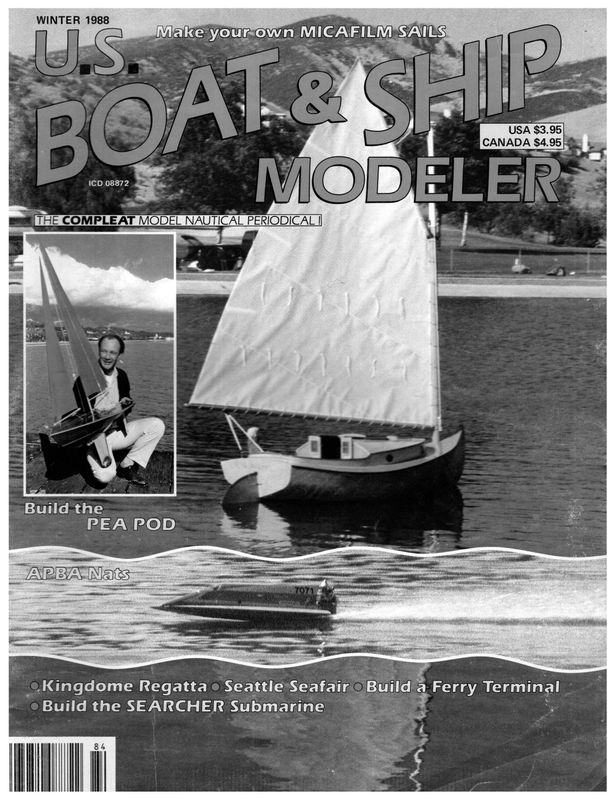
WINTER 1988 Build.the PEA POD -¢Kingdome Regatta Seattle Seafair B ° Build the SEARCHER Submarine Wi ¢ *
Don Becker’s 1975 vintage ‘““Shadow’’ 50/800. It was designed and manufactured in Portland, Oregon. After breakfast in February with founders in Arkansas, there is now an EC/12 fleet. Contact Kevin Saunders (see text). These boats by Tony Mays, Kevin Saunders, and Paul Garner. ing rules. Clenched teeth were few and far between, and even the questions asked by the onlookers were answered quite promptly. y local club has taken part in the first annual Northwest Racing Circuit (NORC). The five clubs, spread from Portland, Oregon, to Vancouver, BC., Canada, each year host a two-day regatta. So, once a month we’ve had an opportunity to travel to a different sailing site; endure the complexities of transporting gear, batteries, sails, and in the golden age of sailing. In the first three events (a total of five individual regattas) there was not a single protest filed, though many a ‘‘720” was turned in penance for an infraction of the rac- In setting up the NORC series, the founding fathers from each club wisely chose a pair of classes for sailing: the famous M-Class, or Marblehead, and the one-design East Coast 12-Meter. The intent was to provide both kinds of popular sailing by holding two one-day events at each meeting. Skippers who place emphasis on the sailing skills were served by the one-design, and the designer/builder/tinkerers were provid- often families; eat in new restaurants; and sleep in different beds. When all was said and done, nothing could have been more enjoyable. When the season started, there were some 45 or 50 skippers who didn’t really know the others existed. Now each of us has a whole raft of new friends; we don’t need name tags any more except for the newcomers, and the enjoyment of having lunch at lakeside and watching the sailing unfold has become something that makes us look forward to each NORC weekend. From my historical readings, I believe what has happened is a planned return to the gentlemanly manner in which yachting events were held and described 18 Author’s EC/12 and monster g-Forse, a winged-keel open class boat. Contact Dan Gaines (206) 243-8033, for more information on this one. US BOAT & SHIP MODELER
work which has provided such a benefit M-18 is Chet Purdy’s first of three designs which culminated in the 1975 ‘‘Yankee,”’ shown at the first Mid-Atlantic, 1971. Does anyone recognize the other boats in this photo by Rod Carr? ed the most popular formula class boat. Most of the clubs involved were dominated by one class or the other. We hoped to encourage each club to become dual-classed, as we felt that it would: make for healthier clubs and hence a healthier region. As we had hoped, the clubs who were short in one class or the other started to build. First to appear were new EC/12s from the Vancouver and Portland clubs. Now expectations are that new M-Class boats will be built over the winter in the three central clubs, balancing out the fleets. The central clubs will also broaden their recruiting to encourage designer/builders to enter the M-Class and join the local club. A benefit to be realized at the club level is having members of one fleet act as race committee for the local events x of the other fleet. By rotating duty as Race Director, the M-Class skippers can take turns officiating at EC/12 events, and thereby make their contribution to the club without missing any sailing in their own M-fleet. Skippers who sail in both fleets will take turns both ways, but they will already have so much sailing going on that they will probably be happy to spend an occasional day starting the countdown tape and writing on the score sheet. Credit for the establishment of the NORC should be given to Kelly Martin and Ron Moblo of the Gig Harbor MYC, Herb Hoser of the Oregon MYC, Bob Sterne of the Vancouver MYC, Maury Thoresen of North Sound MYC, and Bob Rieger of Greater Seattle MYC. These are the folks who put their transmitters down and did the home- for all the enthusiasts who sail in the Pacific Northwest. While each NORC event provides the usual trophies for first, second, and third place for each class and while there is a cumulative scoring tally that will eventually award an antique sixmeter trophy to the EC/12 series best performer and a new trophy to the best of the M-Class skippers, the real interest in scoring happens at each event. Bob Sterne has devised a handicap system that measures the performance of each skipper against his previous average performance. At the end of each event, one skipper from each fleet is handed a trophy as big as the regatta winner and becomes the Most Improved Skipper at that regatta. The statistics make it possible for virtually anyone to win the award, but it is more often than not a dedicated skipper who has committed himself to study and practice and who is rapidly working his way toward the top of the fleet. We’ve also worked up a hard luck trophy, called the Deep Six Award, which was made to Ron Banner, a skipper from Gig Harbor MYC, who was so intent on maintaining his lead over the reigning national champion that he walked right off the end of the dock! Ron will hold the trophy for 1988, then be responsible for finding the new awardee for 1989, and awarding it at any time he sees fit. (Quick, Eloy, we need an article on waterproofing transmutters! wen) I hope some of these ideas may be useful to you out there. It has given our area clubs a real sense of fellowship, and we are eagerly looking forward to the start of the season in 1989. WHERE ARE THE LINES? Vowing to build an M-Class boat this winter for sailing in the 1989 NORC, I started casting about for a competitive ; NX a nh \e ico S SS ti : My MARBLEHEAD “POCAHONTAS” WT DaNWtELS: 2 ese ees ee ee ae WINTER 1988 eee Ee | ante =
LWL 5 | WIND III a 7/23/88 MOD A ON WIND I WIND3FRM. DWG design which could be home-built. I came up against virtually the same sit- uation with regard to U.S. designs as I did 10 years ago. There are a number of hulls around which can be purchased and then outfitted, but if I wanted to start from scratch there was not much out there to start from. Unlike the emphasis on sharing technical data and hull lines, which is a hallmark of the AMYA’s One Meter Class and it’s Class Secretary Bob Debow, the M-Class seems to be still holding everything quite close to its vest. I wrote an article about this back in 1974 for Model Builder (USB&SM’s | sign a fair hull with only a minimum of drafting ability (See article in a recent AMYA quarterly newsletter). With these new tools, I would hope that we might still turn around this vicious Catch 22 cycle in which we seem to be trapped. Few designs are published because it is perceived that there is no in- parent magazine). The premise is still the same: the American approach seems to be that anybody who designs a boat immediately makes a mold and tries to sell hulls. Karl Kirkman is one of the exceptions to that rule with his Bone series, the lines of which are available through AMYA. While the general unwillingness to share design information seems to be the same, the tools which we have to deal with design information have changed drastically since 1974. Microcomputer-based drafting systems now exist that use the most modern approaches to line fairing (the famous Beta-spline), and programs are available which allow almost anybody to de- 20 ! ! terest; there is no interest because no designs are being published. I would love to be in a position to publish a new design for the M or any other class in each issue of USB&SM. So if you would like to give something back to the sport and become a little bit famous because of it, let me know. My search for M-Class designs had only a couple of stipulations going in. First, I needed a design that would be as little affected by a water weed called milfoil as I could find. I believe that the fin keels and bulbs and the dagger rudders that are typical on the local fleet put them at a disadvantage when the milfoil is finally uprooted by storms or at the end of its growing season. Second, I wanted an M that looked like something other than a high-tech Formula One racer. In short, something that looked nautical and could be enjoyed in both its performance and appearance. Author’s daughter, Tracy, shows snuggly warm “‘transmitter glove’ from B.C. Inc. At about this time I got a newsletter from Russell Potts of the English Vintage Society. Russell is working on recreating some of the beauty and craftsmanship of the older designs in all the classes. Being a historian of model yachting, he was quick to point out some of the designs from yesteryear. I was surprised to discover that our advertiser, A.J. Fisher, in Royal Oak, LIS ROAT & SHIP MONFI ER
Michigan, is carrying the late 1930’s designs of James Black’s ‘‘Cheerio II” and ‘‘Cheerio III,’ and Lassel’s “Sunkiss.” So at $6 a set, off went a check for those. Then the mail man brought a surprise package from Russell: lines for a 1936 design by Tucker and a 1937 design by Daniels called “‘Pocohantas.” Included was an offer of directions for how to make sails out of Egyptian cotton as was done in the old days. What a sight! With only a 36-inch waterline, “Pocohantas” shows graceful overhangs, with the lovely counter stern that was typical of yachts in the 1930’s. Her hull had recently been redrawn by Jack Roberts of England, with the canoe body separated from the keel. Remember that the M-Class rule used to require a minimum one-inch radius curve where the keel and hull faired into one another. It may be that Jack is going to experiment with a fin keel on the older hull form. For myself, I will keep to the original design. I’ve a nice pile of half-inch mahogany up in the loft and will hunt down someone with a nice sharp table saw blade so it can be ripped up for planking. I’ll put fiberglass cloth on the inside and build the hull over removable shadows, 3/16 x 3/8 steamed oak with ribs at each station. This time I’ll taper the planks so that a proper appearance will result when she is varnished. The hull form is somewhat at odds with current practice, being Vbottomed and fairly straight-sided with a hard and fast turn at the bilge. It is almost a chine. The displacement is shown as 14-1/2 pounds, a little heavy foran M by today’s standards. But since greater weight means greater momen- tum, maybe she will coast through the light spots in the wind. One thing is for sure, she will not be as maneuverable as the fin keel wonders and will have to be sailed with patience and with an emphasis on straight line speed. The rig is quite interesting. The mainsail foot is 22 inches, as big as that on an EC/12. Most of the area is in the mainsail, 575 square inches or 71 per- cent of the measured triangles. It is also quite short by today’s standards, having only a 54-3/4-inch luff. The mast is quite far forward, and the jib is rather small and narrow. From a distance, one gets a first impression that she is related to the Soling that Vortex used to produce in the seventies. I’ve stared at the lines long enough that I have taken the plunge, and the station shadows are being cut out and mounted on the building board. The station drawing reproduced here has allowed for 1/8-inch thick planking over SPECIAL OFFER: NEW HIGH PERFORMANCE U.S. 12 METER PHASE 3. SPECS: Hull 60”, Ht. 0.a. 86”, Wt. 25#, Lw.l. 42” Beam 12”, Sail area 1300 sq. in. HULL & KEEL LIST PRICE $225 SALE PRICE $175 with purchase of $100 worth of hardware. SAVE $50. NO HANDLING CHARGE ON HULL AND KEEL SAVE $14. HULL: hand lay up in 2 layers of 6 oz. glass, finished in high gloss blue gel coat. WING KEEL: cast in one piece unfinished. EXTRA DISCOUNT ON QUANTITY ORDERS FROM CLUBS AND DEALERS. MINIMUM ORDER $10. MINIMUM SHIPPING $2. Send check, M.O. Visa, or Master charge. © MASTS CARBON FIBER 85”, 3.7 oz. TAPERED .440 to .580, 035 WL. $74.4 FOR $260. 6 for $330. a sssere 8 FOR “+. ZA, $15.95, BSCS $108.00. ALUM. 72” $13.95 EA. 8 FOR $92.00 Ys} EYELET PLIERS 1/8” or 3/32” i $29.95 \ ( .\ NS ©) NOSNAG BLOCKS $4.00 ea. END $3. FOR Catalog and prices. Get 14 how-to plans FREE, to: POP UP 27 Emerson (516) 842-9309 the shadows, so no deduction for that need be made to the stations. At the same time I was delving into the history of the class, experiments were started on the computer with a benchmark design from the design board of Forest Godby. ‘“‘Wind IT’ was a 16-pound M that I sailed with rather good success in 1975, winning the Eastern Divisional Championship in Richmond, Virginia. Her lines were published in Model Builder of May 1976 (Still available as Plan No. 576-S2. Cost is $5.00 plus charges per plans ordering, page 78.). Through recent cor- respondence with Forest, I learned that he had worked his way through a series of Winds, with the “‘Wind II” performing best in the medium/heavy air regime. Forest is a firm believer in the necessity of designing an M for a specif: ic wind and wave combination. One of the Winds was the point of departure for the design exercise which culminated in John Elmaleh’s ‘‘Archer,’ which recently won the European Championships. Such a report made me want to work on a modified Wind that much more. I asked Forest what he would do to the Wind and showed him an approach called Wind IIIa that I had come up with. Wind IIa was an exercise to make the Wind II more successful in light air and flat water. I rounded the bilges, reducing the wetted surface of the hull form. That also took about a half pound off the original displacement. Satisfied that the lines were fair, I then replotted the hull stations at 90 percent of the original beam and 95 percent of the original depth. This reduced the total displacement to 13.7 pounds, as shown on the frame drawing. What else could we do to modify the Wind II for different kinds of conditions? The designer was very open and has provided his comments here for all of us to benefit from. I wish there were more model yacht designers in this country who could see their way to educating the rest of us. My hat’s off to you, Forest. People like you and Karl Kirkman are too few and far between! Here is what Forest had to say: I did much experimentation with the basic Wind II lines. I must have built 15 versions over a period of seven or eight years. Some were minor modifications and others were in completely new design directions. I had one Wind IT variant that was V-bottomed, which gave Stanley Goodwin cause for alarm and completely wiped out the J-boat fleet at Mystic. It worked best in heavy wind and planed easily. In a moderate to light wind, an Epic with an able skipper would beat it. I had Continued on page 57 US BOAT & SHIP MODELER
by TOM PROTHEROE If R/C sailboats turn you on, but the initial cost turns you off, never fear, the PEA POD is here! Unless we miss our guess, the PEA POD, complete with jam cleat sail control, will get many would-be sailors off their….. The Pea Pod takes off on a starboard tack… which won’t hurt as long as you don’t sit on it! The PEA POD was first published 15 years ago tn our parent magazine, Model Builder, back when if was our only publication. Although primarilya model atrplane magazine tn 1973. articles on model cars and boats were occasionally presented, and, tn later years, columns on boats and cars were published monthly. Incidenially, Rod Carr and Jerry Dunlap, contributing editors forUSB&SM, were also regular columnists for Model Builder. Ever since its first appearance in the April 1973 issue of MB, the PEA POD has been one of our most popular construction projects, with hundreds of plan sets and article reprints being sold. Several schools throughout the country were given permission to reproduce the patterns and make construction manuals for shop projects, finishing with giant R/C andfree sailing regattas for the students. Some A modified Olympic sailing course, as described in the text. Half the fun, and a big help toward winning, is hitting that start line on time. 38 ER In November 1982, we published an article on modifications to the PEA POD, written by Ken Cashion. Ken added a conventional sail servo, installed more sophisticated operational rigging, and presented several sail plan modifications to make the boat very competitive in the 36-600 class. As Ken stated, the original PEA POD is a very special design that should be Dreserved as such. His intent was to present a new-design using the basic PEA POD hull shape and method of construction and showing what could be done to customize the original. This article willfollow in the Spring 1989 issue of USB&SM Jor those who wish to experiment. The plan set we offer includes all the necessary full-size hull patterns, as well as reprints of both articles. Those ordering plans before release of the Spring 1989 issue will actually receive the Cashion article prior to its being republished! as Here’s the whole sail control ball of wax, right before your eyes! It’s so darn simple and inexpensive, you can hardly believe it! US BOAT & SHIP MODELER
/C model yachting interest and activity has grown rapidly since the forming of the American Model Yachting Association. There are good kits and sail control units available as well as reliable twoand three-channel radios. These are all key factors in the growing sport and fill the need of the racing skippers pretty well. However, it does put a slight dent in the budget to purchase some of this equipment, and it has probably dis- couraged some beginners. The PEA POD is not only very eco- nomical to build and rig, it is simple and fun to put together. It literally pops into shape without having to build any interior framework whatsoever. No special yacht fittings are required, and materials are available from the local lumberyard, sporting goods store, model airplane-type hobby shop, or that old box full of goodies in your own workshop. For a variety of reasons, most attempts at small non-competition RIC sailboats have used only rudder control and are sailed without sail control units. The sails are usually tied off half way out, which limits the boat’s ability to sail into the wind and is not an optimum setting for sailing downwind. The funny-looking stuff on the PEA POD’s deck, and a length of 1/8 inch flat rubber, will enable you to position the sail for every point of sailing. Assuming you already have at least a two- channel radio, it will only cost about $1 to set it up! The basics of this system are: (1) a jam cleat which will retain or release the mainsheet on command and (2) a long length of 1/8-inch flat rubber (as used in rubber-powered model airplanes), which will take the slack out of the mainsheet. To “‘pull”’ the sail in, head the boat into the wind ‘til there is no wind force on the sail and open the jam cleat. The rubber band will pull the sheet through the jam cleat. Then close the jam cleat to retain that particular setting. To let the sail out, open the jam cleat and head the boat downwind. Wind force on the sail will overcome the rubber tensioner and the sail will travel out. Then close the jam cleat to pre- vent the setting from changing. SAILING THE PEA POD The main sheet must move freely through the jam cleat when it is open and requires at least five pounds of tension before it slips when the cleat is closed. In other words, you can almost lift the boat with the mainsheet. In very light winds, use a little rubber tension as you can get away with. Use just enough to pull all the slack out of the main sheet when the boom is over the centerline of the deck. As wind velocities increase, tension of the 1/8-inch flat WINTER 1988 FULL SIZE PATTERNS AVAILABLE — SEE PAGE 78 39
PARTS IDENTIFICATION (Fig. 2) Jam Cleat A. Small Du-Bro steering arm. B. 5/32-inch wheel collars, two required. C. 5/32-inch OD K & S brass tubing. Rigging ; D. Small screw eye, seven required. E. Perfect line connectors, six required. F. 1/8-inch flat rubber, 40 inches re- quired. G. 7/16-inch diameter hardwood dowel, 77 inches required. Deck is placed inverted on bench. Spruce strips are temporarilly nailed down along edges, and keel blocks are epoxied in place. Sides have been stitched … yes , stitched. . . together! | H. Bicycle spoke and nut. I. Veco tail wheel hub. J. 1-inch nail. K. 7/16-inch ID x 1-inch K & S brass tubing. L. 1/2-inch No. 2 wood screw, three required. M.°5/32 x 3-inch K & S brass angle. N. 5/32-inch ID x 4-inch K & S brass tubing. Y. Plastic Bowser, seven required. Z. Perfect brass hinge. Keel Weight O. 4-pound fish sinker or lead shot and resin casting. | | R/C Installation P. Kraft KP-2 (shown). Q. Plastic clevis, at least two required. R. Small diameter Ny-Rod. | S. Wood spacer block. T. Large Diameter Ny-Rod. U. Half pint plastic freezer container. Sides have now been spread apart and pressed down and outward toward side strips. Entire hull Rudder V. Small Du-Bro steering arm. W. 5/32-inch OD x 6-inch K & S brass tubing. X. 5/32-inch ID x 3-inch K & S brass tubing. Resin is first brushed onto keel seam where weights will rest. After placing the weights over waxed paper to prevent sticking, the rest of the keel and side seams are resined. Presto! A hull! rubber can be increased. SAILING DIAGRAM The course shown in the diagram is a modified Olympic course, and it will demonstrate most of the common sail settings and maneuvers. Prior to launching, make one more check of the strings and things to assure yourself everything is in proper working order. When you are satisfied, batten down the hatch (that means put the freezer lid on). Face the boat into the wind and actuate the jam cleat so the sails are pulled all the way in. With this sail setting, launch the boat at a 60-degree angle to the wind. As the boat picks up speed, head it up to a course of about 45 degrees to the wind (F-1). If the sails start to shake (luff), steer a course a little further off the wind. (In this case, it would be to the is made of 1/8-inch Luan mahogany door skin plywood. 40 US BOAT & SHIP MODELER
O@O0 0 @® Drawings by DAN POST WINTER 1988 41
— lf four-pound fishing weight is available, cut fin to fit, glue together, then reinforce joint with strips of glass cloth and resin. left.) You are now beating to windward on a starboard tack, in case you wondered. It is impossible to round the windward mark (1) if the yacht remains on this course, so two tacking maneuvers are required. Application of right rudder is the only control necessary to bring the yacht around through the eye of the wind to a course that is 45 degrees off wind (F-2). You are now beating to windward on a port tack. When No. 1 marker is at a 9 o’clock position, switch over to a starboard tack for the mark. The next leg of the course is a broad reach, which is a lot of fun, even witha sailboat. It is the fastest course of sailing for most yachts. As you round the No. 1 mark, blip the jam cleat control lever to ease the sail out (F-3). The boom position should be about 45 degrees off the centerline of the yacht (F-4). Steer a straight course for the next mark, which incidentally can be a real dilly to round in a strong wind with this sheeting system. Completed bird shot keel, nose rounded off, filled and sanded, and ready for painting. 42 & To make bird shot keel weight, pour six ounces of resin into form which has keel inserted, then add and mix in bird shot to top of form. You will notice that to round No. 2 mark, the boom will swing from the left to the right side of the boat (F-5). This is no problem; the trick is to accomplish this (rather fast) maneuver on course to No. 3 mark with a sail (boom) setting of about 20 degrees. To obtain this setting, open the jam cleat as you start to round the mark. The moment the main boom swings across the stern, close the cleat, stopping the boom just off the centerline of the yacht. ( You gotta be quick on that one! Ed) Continue your turn and sail for the next mark (F-6). If you didn’t catch the sheet soon enough and the sails are too far out, continue your turn up into the wind with the jam cleat in the open position. As soon as the boat is pointing about 20 degrees off the wind, close the cleat and apply right rudder to steer back on course. (As indicated by the broken arrows.) Rounding No. 3 mark is done by applying right rudder and opening the cleat to let the sails all the way out. The jib is not working too well on F-7 because it’s being blanketed by the main. Slight application of right rudder will pop the jib out on the opposite side, then application of left rudder will get the yacht back on course (F-8). You’re now sailing “wing and wing.’ The next leg of the course is a beat to windward for the finish line. This requires the sails to be in as tight as possible. In rounding Mark No. 4, apply your left rudder, open the cleat, and continue the turn clear around the mark. When the boat is facing directly into the wind (F-9), close the cleat and continue the turn ‘til the sails fill. You should now be on a course that is 45 degrees to the wind on a starboard tack and driving for the finish line (F-10). If for some reason you are still floun- dering back there at the mark with the boat*heading directly into the wind and no control whatsoever, quit jumping up and down. Relax, this condition is known as “being in irons’ and was practiced to perfection by the inventor of the sailboat way before the escapement era of R/C. To get the boat back in gear again requires (somehow) positioning the sail more broadside to the wind (Wading out to the boat is not permitted, even ifpossi- ble! Ed). First release the sheet momen- tarily to make sure the sail is not going to be all the way out when it fills. Don’t tinker with the sail any more. Some- Finished Pea Pod with four-pound fishing weight keel. Cloth, plastic, or Micafilm sails. US BOAT & SHIP MODELER
times the bow will drift around and the sail will start working enough for you to gain sufficient headway to get going again. Hold rudder direction to take you on a course more broadside to the wind. If you have succeeded in doing a wonderful job of getting “‘in irons” and the bow doesn’t swing one way or the other, just be patient and wait a few seconds. The boat will finally start to move backwards. If you feel embarrassed about going backwards, forget it. It happens to everyone who sails at one time or another. Look on the positive side, as we now have water moving past the rudder, which means there should be some rudder effect. Application of right rudder control will swing the stern to the right and the boat will back around broadside to the wind, the sail will fill, and the boat will take off (P.S.: going forward!). When you have mastered this little boat, you will have learned a great deal about sail trim and sailing in general. This sail control system is not intended for competition sailing against the more sophisticated units, but racing against four or five other yachts of identical design and equipment can open up a whole new sport for you. Pooling facilities with a few of your R/C buddies and cutting out five or six kits at once will save you considerable time and money. It’s more fun to struggle through the learning stages with other people who know as much about it as you do. It will become obvious there will be arace on when more than one boat is in the water; it just happens naturally. At least one of the crowd should squander $20 and join the American Model Yachting Association, c/o Pat Hein, 1884 Campus Court, Rochester Hills, Michigan 48309. This investment will result in all kinds of good stuff, like: methods of running regattas (races), race rules, race courses, regatta schedules, a list of specifications on the official one-design and development classes, and a quarterly newsletter Announcing the end of the 7 minute Pleasure Cruise: The Vee Sport RC Sport Cruiser! Up to 30 Minutes Cruising Time! Fully Assembled Exact Scale Ready To Run RC Boat w/Radio Stock# ARIO2100 $14995 > A POLK’S HOBBIES State of the Art Products at Sensible Prices Introducing the Vee Sport – first of the new wave of READY TO RUN RC boats. High ore, up to 30 min. cruising time. Wire Harnessed for up to three 7.2v NiCd. attery packs. Exact Scale model of popular Vee Sport licensed by Cruiser Intl. Specially designed Mabuchi motor for maximum RC boating performance. 30-60 Amp speed control w/ reverse. Includes a Challenger 250 RC System w/ servos and receiver already installed. Charge the batteries and go! (Batteries & Charger not incl.) MONEY BACK GUARANTEE! To Order.. Call TOLL-FREE 1-800-225-POLK. We accept Visa, Mastercard and AMEX. Incl. Card # , Exp. Date. Or send check or MO to: Aristo-Craft/Polk’s Model Craft Hobbies, Rm 21, 346 Bergen Ave, Jersey City, NJ 07304. NJ and NY residents inci. sales tax. Allow 2-3 wks for UPS Insured Deliiv. For More Info, Call 1-201-332-8100 Available through better hobby dealers! Visit Our N.Y.C. Store- 314 5th Ave. N.Y.C., N.Y.,10001.150 Steps from Empire State Bldg Distr. in Canada by Canadian Hobbycraft Ltd., 24 Ronson Dr, Rexdale, Ontario, MW1B4.(416) 241-2661 ga : ee Boat? Your wish is our command! Se Swing Arm type Contained Power Supply _With one of our two types of Sail Control Units, you will have control of both the Main – and Jib Sails from the Simplest 2 Channel Radio. “BOTH UNITS SERVO CONTROLLED* y) #3000 unit minor modifications. WINTER 1988 ee CONTROL ONLY in your R/C Model Sail rules before you have a chance to read them. They are almost identical to the rules used in full-size racing with a few Continued on page 75 ee Wisn you had MORE THAN RUDDER which is worth the price alone. I would like to comment on the race Ordinarily, when the word “‘rules”’ is mentioned there is a natural inclination to be “‘turned off.’ Basically, the race rules are written to prevent two (or more) yachts on a converging course from crashing into each other. They will state that one yacht may hold its course, while the other(s) must do something to avoid a collision. a Linear Block & Tackle Type 9.6 to 12 Volt External (201) 870-2966 For further information send $2. for complete catalog to: Power Supply DEALER INQUIRIES M.A.C.K. Products Model Marine INVITED! P.O. Box 464 VISA & MASTERCARD ACCEPTED ($50.00 MINIMUM PURCHASE) Long Branch, N.J. 07740
n my dresser is a digital-display LCD clock that keeps almost perfect time, is reliable, was inexpensive to buy, and sports more features than I can remember without reference to the sales brochure. But, it never really commands my attention. There are a number of clocks throughout our house, all spring or weight-driven, that tell time (and not much else) ina much more approximate manner. Unlike the electronic marvel, these timepieces are ever subject to the influences of varying temperature, humidity, lubrication, and wear. It’s difficult, though, not to notice and appreciate their presence, even when you’re not interested in the time because. . .well, because they are crafted. It’s easy to see that care, skill, and experience were necessary for their assembly; but what really sets them apart from their modern cousins are some more subtle ingredients. Discretion, taste, and emotion had to play a big part here, to have this much complexity still end up as a thing of beauty. I have to think that those old clocks are as much the product of artistry as industry. Wooden boats are like that. If cost, upkeep, and longevity were the only considerations in choosing a construction medium, it is arguable that metal or plastic should be the materials of choice for most hull applications. But By CRAIG LaCHANCE …A smaller than life-size replica of a wooden boat, if also made of wood, is not just another model, it is an art form of which wood, skillfully shaped by hand, is the primary medium. The author’s choice of woods, and the natural finish applied, adds to the classic appearance and full-scale realism of the Cape Cod catboat model. No finished drawings were made. 44 US BOAT & SHIP MODELER
The author’s daughter, Amber, is not a midget, the quarter-scale Cape Cod Cat is BIG, but still fits in a subcompact when broken down. Construction is all wood, from stem to stern. people like wood. They like to feel it, see it, even smell it. I know I’m onto something when my wife wants to hang around the garage awhile enjoying the aroma of some birch or cedar I’ve just cut. Wooden boat models are for those of us who would sculpt a full-size Herreshoff sloop, or Lyle Hess cutter, or maybe a Concordia yawl, if we could swallow the cost in time and funds. For most of us, it’s enough to create the classic forms in the same woeds and construction methods, if we wish, in miniature. In fact, the fashioning of the wood soon becomes the enjoyment, while finishing the project is incidental. We’re satisfied with progress as our hands slowly bring the dream into reality; completion will come, with time. But time has to be your friend here, even with the miniatures. The young or the impatient, won’t be building accurate replicas in wood, in any scale. Too much complexity, again, and too much demand on discretion, taste, and emotion. Ironically, perhaps, considering some of the mundane tasks wooden boats have been designed for down through time, there seem to be few examples of ugly craft. Even the lowly dugout canoe, crafted as it was with crude implements (though admittedly skilled hands), not only serves its function well but is pleasing to the eye. In fact, as one follows the adaptations of a particular craft through the years, it seems that as it gets closer and closer to its ideal in function, it oftentimes takes on so much character and appeal as to now be more Continued on page 56 The roomy cockpit easily accommodates Big Olaff, on hand to take over tiller duties in case of a radio control failure. WINTER 1988 45
By WILLIAM WHITTEN … Having to stitch cloth sails can be a thing of the past. Here’s another choice, along with instructions for doing it yourself, without much effort . . and with lots of color, too! ] i ere is a way to produce colorful, inexpensive, and easily made sails for your model yacht. They are made from Micafilm, a mylar/scrim laminate widely sold for covering model airplanes, as marketed by Coverite, 420 Babylon Rd., Horsham, Pennsylvania 19044. It is similar, though a bit heavier, than the mylar used by commercial model sailmakers. Micafilm is easy to work with and comes in numerous colors and several weights and finishes. While this article will detail making flat, single-panel sails, there is no reason that the same material can’t be used for multiple panel sails made by most sailmakers. The shaped, paneled sails are thought to be a bit more efficient, but the flat ones often do remarkably well and are said to be useful over a wider range of wind conditions. Give sailmaking a try; you might just like it. To make a suit of sails you’ll need one or more rolls of Micafilm, a surface to work on, some poster board for patterns, and a few simple tools and odds and ends. The Micafilm comes in 29 x 65-inch rolls, more than likely enough for both a main sail and a jib, unless the boat is really large. An E/C 12 suit should just fit, but it may be a bit tight. As the material is available in several colors, you might want to get more than one roll and use different colors for each sail. The transparent colors sparkling in the sun make for a most colorful and easy-to-distinguish boat. The transparents are a bit lighter weight material than the opaques, and are better suited 46 to light winds or the smaller models. The solid color 1.1 ounce is good for larger boats or sails for heavier winds. The work surface needs to be large enough to lay the largest sail out flat with some clearance all around. A long table or possibly a door taken off the hinges would be excellent. Cover the surface with poster board or something similar to avoid ruining the surface when you cut out the sail outlines. A dismounted door can be laid on an unused bed or in a pinch, even a noncarpeted section of the floor can be used for a work surface. The only tools needed are simple: a long straightedge (preferably six feet long and metal), scissors, a model knife with No. 11 blade or a single-edge razor blade or two, and a small soldering iron. A pair of eyelet pliers and eyelets are useful, as is a sewing machine, but not essential. A small metal ruler and a pen will be handy for drawing the patterns and trimming the corners. If you’d rather not sew the seams or * don’t have a sewing machine, buy a roll of Storm Window Mounting Tape at the Portion of author’s “Micafilm Fleet” (I to r): modified Star 45, Land Sailer, two-masted schooner, and 36/600 “‘Yardstick’’ converted to trimaran (with Micafilm sails made by John Amen). US BOAT & SHIP MODELER
Note: Dressmaker’s cardboard cutting board (shown in lead photo) or an uncovered section of floor can be used as a working surface. FOLD & CREASE LINE I prefer the port (left) side, as that should, in theory, favor the starboard tack. Every little bit helps, right? After the main is roughed out, do the jib the same way. Save the excess material; it will be used later for reinforcing the corners and sometimes for sail numbers and decorations on a sail of contrasting color. You are now ready to start work on the actual sails, beginning with the main. Lay the Micafilm blank out flat on the work surface, with the dull (scrim) side up and the long straight side along one edge of the work surface. This side is the luff and will have about an inch of the edge folded over to en- 1/2″ DOUBLE-SIDED STORM WINDOW TAPE CORNER EYELETS AND REINFORCEMENTS MICAFILM – DULL SIDE UP POCKET FOR BOLT ROPE OR STAY WIRE homecrafters store or possibly K-Mart. It is 1/2-inch wide by 15 to 20-feet long and is used to attach clear plastic sheeting to the outside of windows, sort of a “poor man’s storm window.’ The brand I use is Frost King, but there are probably others. One roll should be more than enough to do the average suit of sails, with some left over. If you happen to buy an older roll of Micafilm packed ina clear plastic box, you can use strips of the box for sail battens. It now comes ina plastic bag, so you’ll have to dig up a bit of thin, flexible plastic; try finding aterm paper folder with a clear plastic covering or something similar. Draw full-size patterns on poster board. Draw the triangular shape first and bend the long straightedge to draw the sail roaches. Make the patterns the size of the finished sail; don’t try to allow for what will be folded over at the luffs. That will be figured out later. When the patterns are finished, lay the Micafilm out on the work surface, shiny side up. Lay the long straightedge down along each long side and trim a bit off each side to make sure it is perfectly straight. Lay the main sail pattern down with the straight side parallel to and a couple of inches from one edge. Cut around the triangle, leaving at least a couple of inches on all sides; a bit more if there is plenty of room to do the jib pattern the same way. Remember, the jib pattern should be oriented so that when it is placed along side the main, both sails will have the shiny part of the Micafilm on the same side of the boat. It’s a tossup which side is best, but FOOT ROUND close the bolt rope or jackline. If you plan on using dress hooks or some other type of sail mounting, then about a half The author’s trimaran/Yardstick equipped with custom made sails by John Amen. WINTER 1988 inch will do. Take the long straightedge and pencil and drawa light line all the way down the luff, parallel to the edge. For a bolt rope make it 1.4 to 1.5 inches from the edge, for a jack line use 1.2 to 1.3 inches, and for the others use one inch exactly. (This assumes you will be using the half-inch wide tape on the luff seam. If you use a different width tape or plan to sew the seam, you will have to adjust the width of the fold accordingly. You can sew over the taped seam but it isn’t necessary; the tape is plenty strong.) Fold the edge back to the line and crease along the fold line. This fold is important; make sure it is perfectly straight or the sail may not set properly on the mast. Next, partially flatten out the fold and lay the long straightedge about a half inch from the pencil line to hold if flat. Lay a single long strip of the storm window tape with one edge along the pencil line; make sure it is straight. Leave the tape backing on and rub down with Continued on page 51 47
PHOTOS BY ROSE PEACOCK & BOB HAWLEY ae Heavy traffic at the start of a 50/800 heat at the Buckeye Classic III, Dayton, Ohio. This is judges’ eye view of start line. Trophy winners, front (I to r): Sandy Littlejohn, Mike Shupp, Dick Hein. Back (I to r): Leo Seciliot, Charles Scales, John Odell, and Barney Kemter. The BUCKEYE CLASSIC By BOB SHATTUCK … The secret’s out . AMYA sailing competition is alive and well in Ohio. One-Meter, 36/600, and 50/800 classes raced at this third annual classic in Dayton. ne of the best-kept secrets in the model sailboat racing circuit is an annual race in Ohio called the ‘‘Buckeye Classic.’ For many years, competitive sailing in Ohio was dormant. Three years ago, the dry spell was broken and the first Classic was held. Through the combined efforts of the model sailboat clubs from Cleveland, Columbus, Dayton, and Pickerington, the Buckeye Classic has grown to be a truly memorable weekend of sailing that has attracted model sailboat enthusiasts from as far away as Arizona. This year’s Classic proved to live up to its reputation. For the first time since 1978, a nationally recognized regatta was held in Dayton, Ohio. Hosted by the local club, the Miami Valley Model Yacht Club, the regatta was met with great success. Under the direction of the regatta director, Al Zier, from the Cleveland club, over 30 determined and competitive skippers met in Dayton, Ohio, on Father’s Day weekend to test their skills. The Classic featured races in the 36/600 Class, the One-Meter Class, and the 50/800 Class. With near-perfect weather, the racers tested their strategy and equipment against each other. Several very close battles ensued as the winds shifted in strength and direction. Several interesting and innovative ideas were seen. Mike Shupp from Michigan sailed his original design onemeter boat. Built out of that space-age material, balsawood, his boat featured the absence of any side stays and proved to be very light and very fast. Jim Kemter, the youngest entry at 14 years of age, used his father’s 36/600 Mistral to sail in the One-Meter Class by adding a removable extension to the transom in order to meet the one-meter class specifications. pak Barney Kemter (left) presents Victor Soling 1-meter kit to Dick Hein, Michigan, 50/800 winner. Dick’s wife Pat is AMYA Secretary. 52 Sandy Littlejohn, 36/600 winner, receives prize from Barney Kemter, Commodore of Pickerington Yacht Club. US BOAT & SHIP MODELER
| : , — Mees With the largest number of entries in the One-Meter Class, 15 heats were sailed. Those in attendance were treated to some spectacular duals between some topnotch sailors. Shupp’s boat proved to be unbeatable with his consistent first-place finishes in every heat he sailed. At the end of the 36/600 heats, Barney Kemter and Leo Seciliot were in a dead tie for second place, and a tiebreaking heat was run. Barney pulled a surprise at the start by changing toa starboard tack just seconds before the bell, forcing Leo and the others to alter their approach to the starting line. This gave Barney a sizable lead which he was able to maintain and break the tie. Al Zier must have been expecting heavy winds in Dayton, as he sailed his Huson 36, which loves the stronger winds on Lake Erie. At the end of the two days, Al Zier presented some magnificent trophies to the winners. As the Buckeye Classic was designed to be a fun event and promote sailing in the Ohio region, Al then presented over $1,100 in prizes among all the participants. These prizes were donated by industry sponsors such as Airtronics, Ace R/C, Amen Design Group, A. J. Fisher, Midwest Products, Proedge, Pop-Up Mfg., Pettit Paints, Carl Goldberg Models, Ray Ozmun, Victor Model Products, Hobby Lobby, and others. Many of the sailors, for whom this was their first experience with the Buckeye Classic, were quite surprised to receive valuable prizes WINTER 1988 State Boat Points Michigan Michigan Ohio Michigan Own Design 5 Cobo Mss: Hiding in shade of his hat, Leo Seciliot proudly displays trophies for 3rd in 1-Meter, 3rd in 36/600 classes. Certificate is for suit of sails from John Amen. O11 Sandy Littlejohn, Michigan, checks his 50/800 boat prior to start of Buckeye Classic II! regatta. Ohio Skipper ONE METER RESULTS 1. Mike Shupp . Charles Scales . Leo Seciliot . John Odell . Dick Balk 6. Jim Kemter 36/600 RESULTS 1. Sandy Littlejohn 2. Barney Kemter 3. Leo Seciliot 4. Al Zier 50/800 RESULTS 1. Dick Hein 2. Charles Scales 3. John Odell 4. Don Peacock 5. Ray Knight Mistral 6.25 Magic Dragon Mistral 625 10.25 Magic Dragon Mistral LS Ohio Michigan Ohio Ohio Ohio Magic Dragon 6 Michigan Michigan Michigan Ohio Ohio Mistral 12.5 10.75 Magic Dragon 12 Huson 36 20 Magic Black Magic Magic Magic 7.5 10.25 19 22 22 Dragon Dragon Dragon Dragon Tubing Tools Cutter handles round brass, copper or aluminum tubing in sizes up ‘o 5/8 O.D. A specially designed nylon body reduces grip friction to make cutting easier. Cuts without crimping, too Tubing benders handles tubes up to 3/16 O.D. V-block clamp holds securely for cutting, drilling, filing, etc. Send 25 cents for our price list ahd tubing, shapes, wire and tool catalog. K & S Engineering, 6917 W. 59th St., Chicago, Illinois 60638. Telephone: 312/5868503. FULL LINE METAL SPECIALISTS
on the water among all the white ones. ES ear 2 a So King Regatta. . Continued from page 31 Associates was encouraged by how well all the other aspects of the event were conducted. They feel an event like this does have the potential to be financially successful. Plans are now being made to conduct the Second Annual R/C Unlimited Gold Cup next August. This type of event can definitely be a “win-win’’ situation for model boaters, spectators, and the promoter. oF Rey“t & es ADULTS: $3.00 CHILDREN (6-12): $1.00 w/adult Socies* SENIOR CITIZENS: $2.00 FOR INFO. CONTACT NEW PAVILION & EXPO HALL WESTERN WASHINGTON FAIRGROUNDS PUYALLUP, WASHINGTON P.O. BOX 73939 OR BOB BEAN Evenings: (206) 848-0160 R/C Society Si Stiletto (206) 847-1279 PUYALLUP, WA 98373 FREE PARKING Sponsor by theed ht, Rainien DON SWEASY canara Hydro 67-80 Engine Class (PACIFIC TIME) J) Fast and stable State-of-the-art-design A Aerodynamic lifting body A White gel coated fiberglass A Hull and decks factory joined A Choice of colors A Isolation engine mounts Dagger Boat Works 2392 New London Turnpike S. Glastonbury, CT 06073 203/568-8778 or 203/633-0398 even if they didn’t win their class. Many contestants are already planning their return to this fun-filled weekend in Ohio. Pi e i PLE ETM Micafilm Sails. Continued from page 51 plastic strips held on with the storm window tape. Somewhere between 1/4 and 1/2 inch wide is good. The larger the sail, the wider the batten should be. Make it as long as the rules allow, or about 1 to 1-1/2 inches longer than the roach on that part of the sail. I prefer them on the back (dull) side of the sail, but the front is okay too. Round off the corners of the battens so they won’t rub a hole in the sail material. Rub down all the seams again and oversew them if you want to. Install the bolt rope or dress hooks or cut small notches at intervals on the luff for jack- 54 line attachment. Now all that’s left is to apply sail numbers and class marks (or other decoration) and attach the sail to the mast and boom. Sail numbers and decorations can be made from a contrasting color of Micafilm, glued_on with what is called a “glue stick.” It looks something like a lipstick and is found at the drug or stationery store. The Dennison brand seems to work better than most and allows the numbers to be removed by soaking with a wet rag. Construct the jib in the same manner as the main sail. Most jibs don’t have battens, and the luff fold measurement will be the same as for a jackline. Make it enough so you can slide the jibstay in easily. Give sailmaking a try. It’s easier to make a suit than it is to describe how to do it, and the colored sails look great out Those interested in obtaining plans information for R/C Unlimiteds can send a self-addressed, stamped envelope to Newton Model Marine, 14518-167th S.E., Renton, Washington 98056. ° SO a a Waterlines. .. a a Continued from page 34 through a solid substance if there was no slip! Therefore, if the hull speed is V knots, the propeller advance speed would be [1216 x V] inches per minutes at zero slip. Let’s say the propeller has a pitch of p inches and it is turning at N revolutions per minute. It would therefore advance (at zero slip) at the rate of [p x N] inches per minute. Obviously, this equates to the above [1216 x V]! Therefore, we may solve for the propeller pitch at zero slip, or 1216x V = pxN and p = [1216 x V]/N. A propeller must slip, and a representative propeller actually “advances” only 80 percent of its measured pitch. Allowing for this, the design pitch should be p = [1520] x V]/N. Do not confuse slip and efficiency. Sometimes a propeller with very little slip is actually less efficient. Generally, as slip goes down, diameter goes up, often requiring a lot of power to turn the propeller, which lowers overall efficiency. Steam propellers are generally po- wered by an engine turning at low revolutions. This immediately tells us that the diameters will be relatively large compared to propellers used on directdrive internal combustion engines. Those readers who have built microfilm indoor model airplanes will recall the half-wingspan props that sometimes had pitch-to-diameter ratios greater than two! Outdoor rubber models were of ratios one and more, while glow and ignition engines were generally .5 and less! Most full-scale steamers up to 100 feet have pitch-to-diameter ratios of two, more-or-less. Large ships have lower pitch ratios for reasons of economy, and models seem to be around 1.5 or so. A commercial four-inch three-blader was obtained from Coles’ Models (see the US BOAT & SHIP MODELER
Coles’ ad in this issue) and is planned for Puff. It has a six-inch pitch, which is a ratio of 1.5. In summary, we can calculate the hull speed knowing the waterline length, the propeller pitch knowing the speed and shaft rpm, and select a propeller having a diameter equal to 1.5 times the propeller pitch. For convenience, Figures 2 and 3 are provided to eliminate the chore of calculations. I suppose the only question remaining is, “Will my engine turn this propeller?” This is a subject that will require considerable space to reasonably discuss. For now, assuming a fairly easy-to-drive hull, considering hulls of length between 2 and 20 feet, estimate the horsepower required to be 1 horsepower for each 2,000 pounds of displacement, or out-of-water weight. If all goes well, Mother Nature will handle the rest. She is a cool cat and helps us a lot, if we don’t try to fool her! I bought a couple more very useful reference books. The first is Elements of Steam Engineering by Spangler, Greene, and Marshall, originally published by Wiley & Sons in 1903. This excellent reprint is by Lindsay Publications, P. O. Box 12, Bradley, Illinois 60915. The book is an ideal start for a steam reference library. It explains the basics of boilers, engines, and auxiliaries. It describes the operation of these components and further provides the functions of these components and machines in theoretical low-key. The authors assume the student will be encouraged by this book to research the desired detail in other sources. An example is the section describing the various link systems of changing valve motion of the engine (the so-called Reverse Gear) to allow reverse engine direction. The Stephenson, Gooch, Marshall, and Joy motions, and others less well-known, are diagrammed and appropriately discussed. The actual engineering detail, if desired, may be found elsewhere, such as in the other book purchased from the same publisher. This special-purpose 170-page book, Slide Valve and Link Motion describes the practical design of linkage and valve gears for all applications; marine, stationary, portable, and locomotive. It was written by William Auchincloss in 1872 and 12 editions were published by Van Nostrand Company before its Lindsay reprint four years ago. As mentioned in the preceding paragraph, if the section on reverse gears “‘turned on’ your desire to design such a gear for your particular engine, this book would pro- vide the means of performing such design. Details such as the description of the methods by which a given linkage WINTER 1988 R/C YACHTS Experience the thrill of 12 meter acts “m= with Victor Cup Sertes yachts. Eack are! mae semi scale models of the most famous of the international 12 meter racing yachts destzmed specially for R/C sport or competition satlimg. Complete kits (less ballast) i STARS & STRIPES | : length 392in sail area 598 sq in q $ 85,00 att ‘ AUSTRALIA II 39in length sqin sailarea 598 $85.00 suitable forAMYA Olympic 1 Meter competition Additional kits; SOLING 1M length 39.3in. $70.90 length 36 in. TAHOE IT MINI SOLING lJength 30 in. length 232in. SNIPE $6000 $45.00 $3590 WHY THE HQ 500? The new ROBART HQ 500 Electronic Throttle has been designed for the utmost in advanced electronic throttling in electric powered Radio Controlled aircraft cach kit add$4.00 shipping For complete details addressed send astamped envelope. business VICTOR Model Products and boats. 11715Adenmoor Ave. Downey, Ca. 90241 The HQ 500 is a standard proportional speed control with high speed and neutral adjustment. It holds an should be suspended to accomplish a certain result, and the associated movements of the eccentric rod attachment are diagrammed and calculated, includ- efficiency rating of over 98% and is optically coupled A number of timesaving aids, reducing laborious calculations and geometric constructions, are provided, such as the tabulation of the angular positions and deluxe models, the ROBART HQ 500 Electronic ing adjustment procedures. of the crank-arm corresponding with the various positions of the piston during its stroke! Both these books are highly recommended to the reader. Lindsay has many, many titles on absolutely intriguing subjects in their ‘‘Lost Technology Series.” These titles are exceptional to readers of all three magazines of RCMB Publications. It is hoped that Lindsay will make these titles available to the readers of those magazines! The article on Puff will surely be for glitch-free radio operation. The HQ 500 weighs less than 1.9 ounces making it ideally light for installation in electric model aircraft and boats. While most “other guys’ offer a bunch of economy Throttle performs just as well for both stock motors and with the high-voltage Cobalt series of electric motors available today. Utilizing advanced MOSFET technology, the ROBART HQ 500 works safely with battery packs of as few as 6 cells (7.2 volts) and up to the larger packs of 24 cells (35 volts!). And it does it without damage to a single component and without the addition of extra heatsinks or fuses. The HQ 500 measures only 1.25″ x 2.25″ x .625″ and it comes with a Futaba “J” connector for the receiver and a Tamiya connector on the battery side. All ROBART HQ Electronic Throttles are backed by our exclusive limited lifetime warranty too. So before you invest big bucks in an electronic speed control, check out the new series of High Quality Electronic Throttles from ROBART. They’re available from your favorite Radio Control hobby supplier. If not, write ROBART for information today. ready for the Spring ’89 issue of US. Boat & Ship Modeler. Until then, we wish you all fair winds and a clear star to steer by! e ST Evergreen. . . .Continued from page 23 weight. The Fisher Canard was the first really successful model canard to break records formerly held by outrigger designs. The design concept of the canard is intended to maximize quick corner- ing and rapid acceleration out of the turns. The canard does not require a turn fin. It measures 36.5 inches in HQ 500 SPECIFICATIONS: Type: Voltage: Amperage Capacity: Advanced Mosfet Technology 7.2—35 Volts DC Up to 120 Amps Weight: Power Dissipation: 1.9 ounces 600-1000 watts Size: Voltage Drop: Optically Coupled 1.25 x 225 x .625 inches 07 @ 10 Amps Adjustable Neutral and High Speed robart PO. Box 1247, St. Charles, IL 60174 65
does to an offshore deep vee. The engine bearers are factory-installed and drilled for the motor mount and the Ask Jon Elmaleh how well he likes his Nautical Commander. He should know it inside and out since he helped devel op it… and also won the European and U.S. Marbleh ead class championship with it! No longer do you, the boater, have to settle for a radio that has a Stick configuration designed to fly a plane or drive acar. Now you can have a system that is configured in a mechanical setup that is compatible with your requirements as a boate r: twin vertical sticks for throttles/ Sails and a single horizontal stick for rudder. More importantly, you have the utmost in quality and dependability of operation. The system’s RF link desce nds from the Ace Silver Seven, long recognized as one of the most troubl e free systems available today. Would you want to trust your boat to anything else? Five proportional channels (three on the sticks and two on auxiliary levers) are available, four of which have servo reversing switches. Sanyo ni-cd s throughout with dual charger. A user installed Dual Rate is available for rudder function. Less Servos, Connectors to Suit available wooden transom plate is also glass ed in place. This model has also been successful ly run as an outboard deep vee. Bobb y Tom, K & B’s Service Manager, had good success with the Leecraft 40/60 : Deep Vee and a 7.5cc Outboard. In September of 1988, Bill Hornell, a memb er of the APBA R/C Model Racing Commission’s Technical Committee, used a Leecraft 40/60 Deep Vee to establish R/C Model Racing Commission records in both heat racing and 10-lap offshore racing in the 7.5cc engine category. Prices for the three boats are as follows: Fisher Canard, $265; Fisher Sport 40, $285; Leecraft 40/60 Deep Vee, $179; Hardware Kits, $98; and Radio Box Kit, $35. A deposit of 50 percent is required at the time of ordering. For more infor mation on these boats, contact Tom Dudley, 4112-60th St. East, Tacoma, Wash ington 98443, or call (206) 922-1486. Se Cape Cod Cat. Continued from page 45 Jon Elmaleh won the European and U.S. Marblehead Championships using our Nautical Complete Catalog $2.00 Commander!! 20G550 Nautical Commander $159.95 SEE YOUR DEALER FIRST! If he can’t help you then you order direct from us by sending the full price plus $2.00 handli ng fee to: Ace RIC 116 w. 19th St. P.O.Box 511H6, Higginsville MO 64037 or call (816) 584-7121 length and 20 inches in width. The center section is 4.5 inches. In appea r- ance, it certainly does not resemble the traditional three-point hydroplane or the outrigger. The Fisher Sport 40 is a conventional three-point hydroplane measuring 37 inches in length, 18 inches in width, and with a 10-inch tunnel width. It was designed to meet the class require- ments of Sport 40 or D Sportsmana s it is called in the IMPBA. The Fishe r Sport 40 from Evergreen Model Boats features the latest modifications for easier and more dependable launching as well as better overall handling. A full- 56 length cowl is provided. The engin e bearers, fuel tank compartment, and turn fin plate are factory-installed. The Dunlap Racing Team has raced against Fisher Sport 40s for the past two years, and I can attest to the fact they are very competitive. In fact, many of the design ideas on our wood Frank Sport 40 were incorporated from the Fisher Sport 40. The Leecraft 40/60 Deep Vee is probably the least well known of the three boats. It hasn’t been readily available since it was first released back in 1983. The boat has more resemblance to a full-scale competition jet hull than it valued for what it is than what it does. The recent resurgence of interest in wooden runabouts and the evernostalgic steam launch would bear this out; in the sailing-craft spectrum there may be no better example than the Cape Cod catboat. “B. Scott,’ as shown here, is a model of just such a type. The catboat was widely used on the East Coast as a lobster/fishing/work boat 50 or so years ago and is now finding favor asa pleasure craft due to its roominess, stabil ity, and shallow draft. A true American- grown original, the design has almost a cult following on the East Coast, thoug h the type is not frequently seen anywhere else in the world. The pronounced sheer and broad beam combine to produce what I consider to be a very appealing, almost tuglike appearance. It was found that the yacht market has a number of manufacturers making contemporary catbo ats in fiberglass, and a full-range of plans for the home builder in wood are available. The decision was easy; I would build a catboat. Other priorities and economic constraints dictated it would be less than full-scale. The model ended up quarter-size and somehow still fits (de-rigged, of course) within my subcompact for transporta tion. Construction is mostly mahogany and birch, with the carvel planking in pine. Gaff and boom are ash; the mast is fir. And yes, that one would have been easier ona lathe. Next time, maybe. … She has now been to the local ponda US BOAT & SHIP MODELER
couple of times, enough, apparently, for Big Olaff to develop some finesse with the tiller and mainsheet. Surprisingly, she is not slow, and the gaff rig drives to windward better than expected. Trouble is, now my wife is missing the smell of wood shavings, and I’m The Hobby Box’ W ith 3 years of solid experience and 35 wholly owned stores, The Hobby Box has already established itself as the leading hobby retailer in the missing the fun of making them. Editor’s note: After reviewing the above article and photos, and deciding to publish it, we anticipated requests for construction plans and building instructions. An 1nquiry of the author brought the following Southeast. The American consumer is spending more and more time and money on their leisure activities, and the national hobby market is already estimated at $4 billion! response: “No veal plans for ‘B. Scott’ exist. The general hull form was scaled up from a small Laughing Whale kit; with topside, sail plan, and interior details influenced by the full-size Marchall 22, the Hess 16, Menger Cat, and my own dockside photos e of likeable old wooden boats.” FRANCHISES NOW AVAILABLE 7 consumer interest in ®@ Take advantage of the surge ofand planes; plus the Radio Controlled cars, boats | steady demand for models, trains, puzzles, games and other hobby supplies. es site selection, WM Franchise support package includ inventory recommendations, interior design and advertising support. [eS i Choice locations now available. floating dock which started slowly sink- MINIMUM CASH REQUIREMENT $50,000.00. FOR FURTHER INFORMATION PLEASE CONTACT OUR Seattle…..- Continued from page 37 ing as more and more people rushed onto the dock. The U.S. Navy finally came to our rescue and herded the people back to the pier. Too late! Everyone already had wet feet. Wet feet or not, everyone had fun. The crowd loved it, FRANCHISE DIRECTOR. Jim and Scott thoroughly enjoyed themselves; even the camera crews had something more interesting to test their equipment on than passing seagulls. Oh, yeah, who won? That should be obvious, everyone won! Both Jim and Scott were presented with the models they ran. R/C boating was exposed to thousands of people both in the pits and in TV coverage. And the hobby won because anything that helps the sport, helps the hobby and the modelers, in the form of better equipment and better competition. SS ° Strictly Sail. . Continued from page 22 another version which was also a heavy weather boat. It had a finer entry forward, and more of a curve orfullness to the un- The Hobby Box Marketing, Inc. 1355 Bennett Drive Longwood, Florida 32750 E SS EE (407) 332-1313 naa aa S Fa half inch. 2. Removed some of the fullness from the underwater sections aft of the center of the boat. (This improves light atr per- formance to the detriment of heavy air changes I made, if my memory serves Me right were as follows: 1. Reduced freeboard slightly, about a ? tHE GOLDEN LNN: EKMA CITABYDHIC performance.) 2 Rounded the cross sections (to reduce wetted surface and displacement—RAC). 4. Went to a sharp plumb bow from the waterline to the deck. This helps keep the bow from digging in duringa puff. 5. All-up weight kept to about 12 pounds. Any lighter and windward per- formance suffers. light air per- These changes improved derwater sections aft. In heavy weather tt nce significantly. I sailed this boat forma of would stick about 1/3 of its length out e ofyears, never placing worse the water and plane like a speed boat. I fora coupl and rarely placing first. fourt almost sailed circles around Bob Harris than wherehalong the line I lost the fierce Some was once with it duringa race. The wind e spirit. (Another possible exabout 25 knots that day. The problem competitiv is that Forest had homed in tion plana with it was poor light wind performance. all-around boat and had Talso had other versions that would al- on the bestpriat e compromises in evways be first to the windward mark and made appron consideration. He then desig ery all the‘other boats would pass it going meeting another boat at any downwind. Frustration piled upon frus- risked regat ta that was the precise given tration. the wind and wave coneen betw h matc II. Wind [finally did improve upon the on that day.) By the way, I would rate the Wind II as ditionsare my recommendations on your Here a medium to heavy weather boat. The WINTER 1988 | Wind Illa modifications: Continued on page 59 Build your own SHOWCASE OF DISTINCTION Structural framing and mounting ac- cessories of exquisite taste and of the highest quality. Custom cut to your own dimensions with complete instructions for easy assembly. For complete details send a selfaddressed, stamped envelope to: H. Hickmann 1455 Montegor Cincinnati, OH 45230
Now you can own the source book of radio control modeling in- formation — the Radio Control Buyers Guide! In more than 300 pages, and thousands of product listings, this all-new 12th Edition of the Ra- dio Contro! Buyers Guide provides the up-to-date information every radio contro! enthusiast needs — whether you’re a beginner or a NATS champion. There’s no other R/C book source like it! #24626 ® Aircraft e Cars @ Boats e Radios e Systems @ Engines ® Hardware © Books ® Videos @ Finishing materials e Accessories @ RC dealers @ Plus much more! $11.95 ORDER TODAY! —_ a eS ae Wi) SS253-9477 Kalmbach Publishing Co., 1027 N. 7th St. Mitweuine= ‘ YES! Please send me copies of the Radio Control Buyers Guide! Pec= p=” cony (J Charge my credit card Chargeto: (Mastercart SS)” Sess _ Wee Card# | Name Exp. date _ Street re ” _ Signature City, State, Zip | Include for postage and handling: U. S. $1; foreign $1.50. Make payment in U. S. funds. Wisconsin residents add 5% sales tax. Se iia ee needless to say you can imagine the damage, but all is repaired. The Sport 40 seems to be handling very well and very fast. “T will be racing it in the club race on June 26. There are two Top Gun boats in the club, so we will see how we do. I tried to run with an Octura X-455 prop SE SE SS eS ed Strictly Sail. . Continued from page 57 1. Ican’t tell about the underwater lines aft. Iwas surprised at how much suction even a little fullness creates in that area. I suggest that you look critically at this. 2. I agree with cutting the transom it would have interbut could not get it on the pipe, sonow away. I never did it as arrangement . Tam running the X-450 three-blade and —_fered with my winch a Prather 235 two-blade. It seéms to be ubeak I have not timed it, so it’s ard totell. 3. I used decks made from iron-on corners on the cowling. Everyone who line to be about a half inch up the bow. has seen the Sport 40 really likes it. Thanks for writing, Joe. Sounds like you’re having a good time with your D.F. Sport 40. If you have any problems building a competition-type boat or have some questions about one, write me a letter. I am also looking for suggestions on topics to write on for future articles. My address is: 8907-34th Ave. So., Tacoma, Washington 98409. For a reply, please include a self-addressed, stamped envelope. Until next time, just remember to ° GO FAST, TURN RIGHT! WINTER 1988 18 or 36-inch receiver antenna for R/C cars and pag a ae The stuff is light — poats. Connec tors, vertical F and really tough. sharpen the bow slightlytheto you will 4. I would “The pictures I’m sending weight. Also, when reduce show how I mounted the pipe outside, —_furtheris at rest,theI would want the watermodel the rounded I that see will also you Well, that’s enough for now; good racing.” Vertical whip antenna replaces any of the bow This would avoid the slapping om the water duringa light chop. ° 5. One thingI learned: there is really no best all-around boat for racing. You actually need two or three, one for each set of cae vesivatye ines -eHes Batoly Darel 0G : steel Stainless spring whip only 1/32 diameter for minimum wind resistance. Available at your local dealer. weather conditions. For those readers interested in the fundamental design process for the M Class, I highly recommend a recent series of four articles which was published by Chris Jackson in the English magazine Model Yachting News. The author is Gerhard Mentges, who is a naval architect by trade and quite up to date on the latest thinking on hydrodynamics and hull forms. The HAYES PRODUCTS 143825 Com merce Wy. Garden Grove, CA 92643 59
T & SH IP A BO MODELER THE COMPLEAT MODEL NAUTICAL PERIODICAL! ‘ The REAL how-to maga- zine on all types of mod- el boats and ships; R/C, steam, electric, sail, rac- ing, sport, static and : operational scale. Also construction articles on all types, with full-size plans and patterns available, complete with reprint of building instruc- tions. SUBSCRIBE NOW (Starts with next published issue). ! i] ! U.S. Only (includes APO and FPO): One year(4 issues) – $12.95 Two years(8 issues) -$24.85 I ! 1 | I I I | i I 1 ! I I I 1 i I i] i] Overseas (also Canada and Mexico): One year only-$21.45 includes postage & handling. Payment must be in U.S. funds, drawn on a Name Sig. Address trate City Visa or M/C No. (Add 5%) Zip Exp. Date BACK ISSUES AVAILABLE – Limited supply. $4.00 per copy. U.S. add 50¢ per : i] English quarterly is available by send- ing $20 to: Chris Jackson, Model Yachting News, 33 Yorke Gardens, Reigate, Surrey RH2 9HO0, England. Don’t send a check or money order, cash is the only way Chris can effect the transaction. The articles may be available as either back issues or reprints. If any of you out there have unpublished designs sitting on your drafting table, why not consider sharing them with the other builders and skippers? I would be more than happy to consider publishing anything that is contributed, provided that the data is complete; ie., hull has fin located, bulb size shown, rudder and mast located, and sail plan is included. I can help with putting the design into the computer so that the lines are fair, provided that the stations are clearly drawn. If the design has been built, a photo of it would be a good addition. MISCELLANEOUS For those of us who insist in sailing in cold and wet weather, BC. Inc., 1077 S. 930 W., Payson, Utah 84651, provides the “Radio Glove.’ It keeps the transmitter dry and allows one to see where trim sticks are through the plastic win- dow. At $35.45 it will keep you toasty warm. I really like mine! I’m pleased to report that Glen Hor- 60 < . U.S. Bank. copy, outside U.S. add $1.50 per copy for shipping. U.S. BOAT & SHIP MODELER, 898 West 16th St., Newport Beach, CA 92663 vath, whose 10-R scow lines were published in the Fall ‘88 issue, has succumbed to the call of domesticity and signed aboard a new first mate! Congratulations to you both! EC/12 fleets are springing up. Contact the following for further information: Jim Thomas, 4221 Lynn Terrace, Fort Worth, Texas 76180; Kevin Saunders, 2920 W. Markham, #1, Little Rock, Arkansas 72205; and Maury Thoresen, 12824-48th Avenue NE, Marysville, Washington 98270. While you have the stamps and envelopes out, remember to send in your $20 dues to the American Model Yacht- ing Association, 1884 Campus Court, Rochester Hills, Michigan 48309. AMYA’s quarterly newsletter just keeps getting better and better under the steady hand of Editor Gene Dunham. The technical articles form a good basis for both the beginner and the expert. The regatta reports will keep you up on who is winning and who is still hitting the marks and doing ‘‘720’s In the meantime, drop me a line and tell me what is going on in your shop or on your lake. Readers often ask me where there are activities to be found. I can tell them where the nearest AMYA club is, but maybe you are thinking of starting a club and want to contact other potential skippers. Con- tact AMYA and send them a couple of bucks for a printout of skippers in your state. It’s a good way to learn who is already sailing. Mail to: Rod Carr, 3011177th Ave. NE, Redmond, pitcamges Lei 98052. = ss Radio Waves. . Continued from page 14 play whenever the transmitter signal is lost due to interference or for any other reason. At that time, your model will go into a pre-programmed control position, such as low throttle/slow turn, or simply stop where it is! Sizes and weights? Always important. Though the transmitter looks massive, it weighs only 30.6 ounces. The companion FP-R113iP PCM receiver measures 1.75 x 1.125 x 0.625 inches and weighs 0.73 ounce. Battery power for the receiver can be Ni-Cd or alkaline cells from 4.8 to 6.0 volts, of through an electronic speed control from the main driver battery pack. There is a choice of servos: $132, or the new series S-9301 or S-9601. Full-size drawings of each servo are included for easier familiarization, the other pertinent information includes: S-132: Weight, 1.1 0z.; torque, 33.4 oz. in.; speed, .16 sec., 60 deg. US BOAT & SHIP MODELER
NEW SHIP DECKING & WOODS SCALE MODEL craftsman ...in Basswood, for the true Northeastern’s handsome ship decking is authentic in appearance, 4994 easy to work with and really saves time! Available ITEMS... in .050 thick laminated sheets with 4 choices of spacing representing caulking between boards. Our extensive line of scale model hardwoods are used by hobbyists and professional prototype modelmakers around the world. + Ship decking in 3” x 22" lengths with spacing in % 6", Yao", Ya" and 6” « Carving blocks up to 24" lengths + Belaying pins » Scale sheeting * Dowels */e/’ to 1” * Double beads » Wood strips from .012 and up * Wood for mastheads, hatch covers, etc. * Mahogany, cherry and walnut also available in many items Satisfaction quaranteed or money back [ N Gacaees MIORTHEAS|TER Methuen, | EN SCALE MODELS INC 30cc Hydro 1. Alan Hobbs, 1900 2. Paul Kitano, 1600 3. Mark Adams, 1150 4, Dr. G. Pinsonneault, 625 5. Ken Booher, 275 Team Marathon 1. Jaycox/Wise, 100 Laps 2. Grimes/ Caspari, 33 3. Gillett/Pearson, 10 S a S a Continued from page 43 The theory used by a yacht racing skipper is not only to go fast (and quite often this is secondary), but to place his yacht in a favored position in relation to the other yachts. If you study the rules and use them to your advantage (this is known as racing tactics), you’ll be able to figure out all kinds of ways to get your boat to the front of the pack. Then you discover one of the other skippers has the same thing in mind and finally comes the dawn: you have found yacht racing! CONSTRUCTION Gather the materials and start con- struction by marking the outlines and cutting out all the plywood parts. Mark the centerline for the deck parallel with the grain and one edge of the sheet of plywood. (About eight inches from the edge.) Locate each station along this line. Use a square to extend the stations ex- actly 90 degrees to the centerline. Measure out from the centerline and WINTER 1988 > Mass. 01544 put a pencil dot to correspond with each station measurement. When this is finished, open your new box of nails, grab the 1/4-inch square spruce or pine, and start nailing it down next to (outside) the pencil dots. Start at the stern (not the pointy end) by placing the 1/4-inch square even with the first dot and pound in the first nail. Even it up with the next dot and pound in another one and so on ’til the edge of the 1/4-inch square is bent around connecting all the dots. If it doesn’t form a smooth curve and looks lumpy, check your measurements and relocate the nails at the bad spots. When things look okay, mark the outline (connecting the dots), remove the 1/4-inch square strip, and repeat for the other side of the deck. Using the same system, lay out one of the two side pieces. Cut these parts out, a little oversize, and block-sand down to the line. Use the first side panel for a template to mark out and cut the second side. SIDES When both sides are cut out, clamp or tape the sides together. Drill 1/16-inch diameter holes 1/8 inch in from the keel edge (check to make sure you’re drilling along the KEEL EDGE), spaced 1/2 inch apart. Reduce the spacing to 1/4 inch for the first two inches at the bow. Unclamp the two sides and bevel off the sharp corner on the inside edge of the keel seam. Re-clamp the pieces and sew them together by double-stitching with carpet thread near the bow and stern. A simple, single-looping stitch is used throughout the remainder of the seam. When this is completed, lay it aside and start on the deck; quit playing with it, ——T DECK Locate the hole for your freezer com tainer between stations 24 and 28, and size the hole so the tapered contaimer will be a snug wedge fit into the deck with about a half inch sticking out the top. Lay down some wax paper or Handi- Wrap to protect your building board. Place the deck on the wax paper with the pencil-marked centerline up. Glue the first 1/4-inch ply keel brace block 14 inches from the stern and the second block six inches farther forward. Bevel the front ends of the two 3/16-inch square spruce pieces so they will fit together at the bow. Nail them to the deck with about ten 3/4-inch 20GA nails per side. The outside of the strips should be flush with the outside edge of the deck. Leave the heads of the nail up about 1/16 inch so you can pull them out later. If you are going to use resin for bonding it’s not necessary to glue the stringers down. The resin will seep under the stringers when the sides are bonded to the deck. DECK/SIDES BONDING It will require at least 25 pounds of pressure at the keel seam area to hold the sides out against the deck stringers, so find something to do the job. (Note sandbags in photo.) Make sure you use something that won’t fall off the inverted V-bottom keel seam. When that problem is solved, mix two ounces of resin and squash the sides down on the deck so they contact the stringers. Hold them down with one hand and paint the keel seam (use an acid brush) in the area that you are go- ing to place the weight. Then pick up 75
TOLEDO THIRTY-FIFTH ANNUAL RADIO CONTROL EXPOSITION TOLEDO SPORTS ARENA ONE MAIN STREET TOLEDO, OHIO APRIL 7, 8, 9, 1989 presented by the Weak Signals R/C Club, Toledo, Ohio the strip of wax paper we forgot to tell you to have on hand and place it over the seam, and then the weight on top of that. Continue painting the keel and deck seams with resin. When the resin has set up, measure exactly 14-1/4 inches from the stern along the keel seam (14 inches projected) to mark the trailing edge of the fin keel. Place another mark six inches forward for the leading edge. Now cut a slot 1/4 inch wide between these two marks. Lift the assembly off the building board and check the keel for a proper fit into the keel brace blocks by peering through the gaping hole in the back end. The fin is permanently bonded later, after the weight has been at- A. J. FISHER INC. Mfgr’s. of Quality Scale BRASS ship and yacht model fittings since 1925. Binnacle, Capstans, Wheels, Telegraphs, Searchlights, Turnbuckles, Travelers, Cleats, Working Blocks, etc., etc. Prints and kits of Great Lakes & Ocean going vessels. Model Yacht prints. Books. Illustrated Catalog $2.00 1002 Etowah Ave. Royal Oak, Mich. 48067 76 ADVANCED TICKETS may be ordered by sending a self-addressed stamped business size (4%x9%) envelope to: TICKETS, 38235 Castle, Romulus, MI 48174. All orders above 5 tickets must include extra postage. U.S. orders must include a 25 cents, per order, handling charge. All foreign orders must include 50 cents, per order, handling charge, but only need send an addressed envelope. We will provide the necessary postage. Express Mail Orders Will Not Be Accepted! Include a check or money order in U.S. funds made payable to the ‘‘Weak Signals R/C Club.” Ticket prices are: $4.00 per day for adults and $1.00 per day for children, 12 and under. (Please specify number of each.) Deadline for ticket orders is March 31, 1989. All sales are final and non-refundable. TICKETS ARE ALSO AVAILABLE AT THE DOOR. Exposition information is available by contacting tached and finished. KEEL WEIGHT The easiest way out is to purchase a four-pound fishing weight. If you live in trout fishing country, the guy at the sporting goods shop will think you are crazy, so instead, buy five pounds of bird shot from him. Then go to the supermarket and purchase something that comes in a 12-ounce cylindrical vinyl or cardboard container (about 2 to 2-1/2-inch diameter) and some modeling clay at the dime store. Remove the top from the container, dump out the contents, and force clay down to the bottom. The clay is used to form the pointed end of the teardrop weight. Use a kitchen knife to form the clay. Cut a 1/4 x 4-1/2-inch slot in the container and insert the fin. Use masking tape to seal the seam between the container and fin. Mix a half ounce of resin and pour this mix into the container. Roll it around to seal the clay. When this has cured, mix six ounces of resin with a minimum amount of catalyst. Pour this into the container, followed by the lead shot. Fill the container right up to the top with the shot and resin. If the resin generates too much heat during the curing cycle, it may fracture. Submerge it in a bucket of cold water if it seems to be getting too warm. The container and clay is stripped off, and the front end is rounded off with rough sandpaper, disc sander, or file. The final smooth finish is acquired by using plastic filler or multiple coats of resin. When completed, the fin and bulb should weigh 4-1/2 to 5 pounds. If you are lucky enough to find a fourpound fishing weight, then cut the fin to fit the contour of the weight. The weight is first glued to the fin using resin that has been thickened with talc, milled fibers, or plaster of Paris. After the resin has set, reinforce the joint with two strips of cloth (approximately 1 x 4-1/2 inches) on each side. (The keel should be filled and sanded to a smooth finish.) Wayne Yeager, co-director, at the ticket address or by phone—(313) 941-6661. “We Will Have Our Traditional Swap Shop and Saturday Night Auction” COMPETITION CLASSES NON-MILITARY SPORT SCALE PLANE (AMA Rules) MILITARY SPORT SCALE PLANE (AMA Rules) PRECISION SCALE PLANE (AMA Rules) PATTERN PLANE SPORT MONO-PLANE (non-scale models only) SPORT BI-PLANE (non-scale models only) OLD TIMER FREE FLIGHT R/C ASSIST R/C SAILPLANE — (non-scale models only) (No Engines) HELICOPTER R/C CAR COMPETITION BOAT MILITARY SCALE BOAT PLEASURE POWER BOAT WORKING VESSEL-UNARMED FIN KEEL/HULL BONDING Apply the resin to the ends of the legs of the fin and slip it through the slot in the keel seam. Seat the legs into the two U-shaped keel brace blocks on the under.side of the deck. While the boat is resting upside down, tape the joint between the hull and fin with 1/4-inch or 1-inch masking tape. Mix one ounce of resin. Turn the boat right-side up, supporting it by the fin keel, and, starting at the stern, pour the resin down the in- side of the keel seam. Lower the bow so the resin will run down the full length of the keel seam to the deck. Then clamp the fin in a padded vise, and position the boat so the excess resin will settle around the fin/hull seam. RUDDER AND SHAFT Press a 6-inch length of 5/32-inch OD brass tubing into the slot in the rubber blade. Tape the slot on one side, turn it over, and pour resin in on top of the shaft. When cured, remove the tape and fill the other side with resin. After the second resin application has set, sand and finish. SHAFT LOG Cut a 3-inch length of 5/32-inch ID brass tubing. Drill a 3/16-inch hole, located on the centerline of the hull, 2 inches from the stern. Insert the tube and secure it with resin. The tube should protrude 1/4 inch above the deck. TRANSOM Use the actual boat stern as a template to mark the transom piece. Sand the edges so it fits fairly tight. Insert it from the inside. Tack, glue, or tape it in place. Mix 3/4 ounce of resin. Hold the boat, stern down, and pour it on top of the transom. Roll it around to glue the transom and then support the boat on edge so the excess resin will drain down one of the side seams. When the resin has jelled, mix a half ounce of resin and reinforce the other side seam in the same manner. EXTERIOR FINISH Block sand the complete boat. Sand U.S. BOAT & SHIP MODELER
Fibreglass hull deck, cabin of this 61” 1/4scale gas powered RC boat model. We also build fibreglass kits for the 42” harbor tugDouglas Greg”/1/soth scale Delta Queen, 196th scale C-2 Cargo Ship and two R/C sailing yachts. Catalog. photos, prices~$ 3.00 via ist Crass HARTMAN FIBREGLASS R/C Box 86, 23 3meLrose St. ARGENTA, IL.c2501 hy “CHARGER” EXPRESS CRUISER mave InUSA since 1962 ~ 217-795-2275 (Ee off all the exterior thread stitches using 80-grit paper wrapped around a hard block. Coat the hull and keel with surfacing resin, block sand, and either paint, varnish, or add a second coat of resin for a final finish. INTERIOR FINISH Mix four ounces of varnish with two ounces of thinner. Pour this inside and roll it around to seal the interior. Drain = =| Jo Producle? 3 ie INTRODUCES “TOP OF THE LINE” QUALITY MARINE HARDWARE AT HIGHLY COMPETITIVE PRICES. SPECIALIZING IN : – SQFETY HANDLES – STRUT ASSEMBLIES = RUDDER NSSEMBLIES – SQUARE ORIVE NUTS & the excess out the hatch. MAST FLEH CABLES ~ CUSTOM MADE HNROWARE The mast is fashioned from 7/16-inch diameter x 48-inch hardwood dowel. Since 36 inches is the most commonly available length, it is necessary to join two lengths of dowel with a four-inch piece of 7/16-inch ID brass tubing. A one-inch length of the same tubing is pressed onto the bottom of the mast to prevent it from splitting. Saw a 3/8-inch deep slot in the bot- tom of the mast and drill for a 1/2-inch No. 2 screw located 1/4 inch from the end. The screw fits into the small slots in the mast step fitting and enables you to change the mast location easily. Use a small nail to mount the model airplane tail wheel hub 1-1/2 inches from the bottom of the mast. It must rotate freely. GOOSE NECK FITTING AND MAIN BOOM Sawa slot 5/8 inch deep in the end of a 14-inch length of 7/16-inch dowel. Insert the brass elevator hinge (Perfect Brand) and drill a pilot and clearance FOR ORIGINAL HULL DESIGNS @ MAST AND RIGGING POSITIONS The multiple mast and rigging positions are used to trim the boat out for different wind velocities. An explanation, that may be oversimplified, is to move the sail area (or force) forward in strong wind, and aft in light wind. Play around with the different positions and MISCELLANEOUS RIGGING All other rigging is self-explanatory. Consult the parts list and isometrics for materials and location. JAM CLEAT must remain in the arm to prevent the If you use plastic material for the sails, it is not necessary to sew them along the leading edge. Plastic tape is sufficient. (Also see article on Micafilm Dacron and nylon can be cut with a WINTER 1988 58 Domesie-—tst Cass $3.0: St Cass So. Amer. & Eur.:—Airmail $10.00. Surface $4.00 Pac. Area:—Airmail $13.00: Surface $4.00 Those wanting additional plans for warships, liners and merchant marine send an additional $1.00 for the Wiswesser catalog. TAUBMAN PLANS SERVICE INTERNATIONAL 11 College Drive – #4G Dept. RCMB note the effect. small solder gun with a sharpened end. their locations. SAILS Dianc WITH FIRST SEND $1 GREFUNDSSLE FOR CSTELOS sails.) with four 1/4-inch wood screws. Refer to illustrations for details on fittings and 29 MUCH MORE The combination mounting bracket and shaft is made from a 3-1/2-inch length of 5/32-inch OD brass tubing. Heat the tubing to acherry red and then allow it to cool naturally (don’t dunk it in water). This will soften the tubing so you can flatten and bend it. Center the one-inch Du-Bro steering arm and the two 5/32-inch ID wheel collars on the tubing. Adjust the collars so the tiller rotates free with a minimum of side play. Do not over-tighten the set screws, as it will distort the tubing and hole for a 1/2-inch No. 2 wood screw. Spread the other half of the hinge out and form it around the mast. Fasten it 1988 starts my 8th year in business. As in preceding years, | have come out with a bigger and better catalog — 137 pages of illustrated plans, 20 pages for R/C accessories, components and KITS, 20 pages of books-PLUS-ship modeling hints, listing of ship modeling clubs, information on researching cause the tiller to bind. The set screw Jersey City, N.J. 07305 (when sending inquiries, please use a S.A.S.E.) brass bushing from rotating in the nylon body. Flatten the brass tubing and bend it down to form the legs. Then bend the ends out to form the mounting tabs. The legs should be 3/4 to 1 inch long. You will have to shorten the steering arm to clear the deck and drill a new hole for the nylon clevis. Replace the protruding set screw in the steering arm with a flush-fitting set screw from a wheel collar. Position the arm down and drill a 1/6-inch diameter hole clear through the steering arm body and 5/32-inch OD brass tubing. The hole will be very close to the set 77
ORDERING INSTRUCTIONS All full size plans ordered from US Boat & Ship Modeler include a reprint of the constructio article, if building instructions were part of the article. Send to: US Boat & Ship Modeler Plans Service, 898 West 16th St., Newport Beach, CA 92663. No. US4881 FERRY TERMINAL ~ $6.50 Goes with the Staten Island Ferry (same scale) for docking maneuvers. Use with any boat of similar size, Walt Musciano No. US4882 PEA POD SAILBOAT $12.50 Full-size deck and side patterns, plus keel, rudder, etc. of original plus hop-up modifications by Ken Cashion. Tom Protheroe. No. US4883 SEARCHER SUB Small electric powered, two-man, $5.00 non- scale R/C submarine of simple design and construction. By Graham Goodchild. US. orders, including APO and FPO, add 20% of total order for shipping and handling. Overseas orders (includes Canada and Mexico) add 50% of total order. Remit payment by International Money Order or U.S. funds, drawn on U.S. bank. Please, no cash or C.0.D’s. Mastercard or Visa include card number, expiration date, and signature. Add 5% to credit card orders. California residents add 6% sales tax. MINIMUM ORDER $10.00 Dime Store _ 1 Spool of carpet thread. 1-1/2 Yards of sheet plastic (sails). 1 Half-pint plastic freezer container. Sporting Goods Store 1 4-pound fish sinker or 5-pound lead shot (see text). 20 Feet 60-pound test Dacron line. 1 Bicycle spoke and nut or fish swivel. Hobby Shop screw, so start your drilling from the set screw side of the steering arm. The 60-pound Dacron fish line should run through the hole without snagging. Mount the jam cleat so the string lines up with the center of the wheel hub on the mast. RADIO INSTALLATION Press the freezer container-radio compartment in place (The container was merely a press fit in the prototype PEA PODS, so that it could be shifted from one experimental hull to another. Almost no water got inside the hull. For amore permanent installation, put the container in place with a bathtub sealer, such as Dow Corning Silicone Rubber, before installing the transom.) Insert a spacer block of appropriate thickness in the bottom of the container using double-stick foam tape. Next, double-stick the receiver, servos, and battery pack to the spacer. Finally, install the Ny-Rods. Drilling holes slightly undersize and forcing the tubes into place should be sufficient for a waterproof seal. Set up the linkage from your servo to the jam cleat so neutral stick position on the transmitter will hold the string and forward stick deflection will release it. Before test sailing, refer to the sailing section of the article to refresh your memory on the use of this particular sail control system. Good sailing! BUY LIST Lumber Yard 1/2 Sheet of 1/8-inch imported Luan plywood. 3 7/16-inch OD x 36-inch hardwood dowel. 1 Small box 3/4-inch 20GA nails. 78 16x 12 x 1/4-inch plywood (keel). 13x 7x 3/16-inch plywood (rudder). 2 3/16-inch square x 48-inch spruce or pine. 1 1/4-inch square x 48-inch spruce or pine. 1 12-inch length 5/32-inchOD K&S brass tubing. 1 12-inch length 5/32-inch IDK & S brass tubing. 1 12-inch length 7/16-inch IDK & $ brass tubing. 2 12-inch length 5/32-inch K & S brass angle. 2 Small Du-Bro steering arms. 2 5/32-inch ID Du-Bro wheel collars. 1 Perfect brass elevator hinge. 8 Perfect line connectors. 1 14-inch Ny-Rod. 2 Plastic clevises. 1 Small tail wheel hub. 40 Inches 1/8-inch flat rubber. 24 1/4-inch No. 1 wood screws. 3 1/2-inch No. 2 wood screws. 1 3 x 3-inch 1/16-inch plastic. 5 Small eyelets. 1 Pint Francis resin. 1 Two-channel surface, stick radio.® WETS Cap’n’s Log. . . Continued from page 7 deckhouses were trimmed with black, and the davits and most of the deck machinery was also black. The ladders and rails were painted silver, and the smokestacks were black with a silver “S.” And last, I would like to thank you again forfeaturing a model bunker boat. Tam very much lookingforward to receiving my plans and my copy ofyour Winter 1987 issue. Model building is something I’ve never done too much of, but 1t’s always been at the back of my mind. And who knows? Perhaps someday soon we’ll see a little Helen Euphane come steaming up Indian Creek to Kilmarnock Wharf, just like her big sister did, many years ago. Recently we saw the nearly-completed plug from which Dwight Hartman will be making molded fiberglass hulls for the 60-inch L.A. Bunker Boat from our enlarged set of plans (No. US3883 Big Bunker Boat, $23). Dwight will also be molding hulls for the purse boats and striker boat, as well as a few miscellaneous parts, such as the ventilators. These fiberglass sets will be available from Hartman Fiberglass RIC, Box 86, 233 Melrose St., Argenta, Illinois 62501, sometime in early 1989. We’ll keep you posted, or simply keep an eye on his ads in USB&SM. LOOKING FOR We receive quite a few letters from readers trying to find construction and/or lines drawings of various boats and ships. Not having enough first or second-hand knowledge to be able to answer all of these requests ourselves, we’ll pass the information on to our readers under this heading, in hopes that someone can lend a hand. We’ll list the item being looked for and the name and address of the “‘lookee,’ and we’ll let our readers take it from there. Information on plans, prints, history, etc. of the three Christopher Columbus ships: Charles Fuller, 82 Spring Haven Dr., Flat Rock, North Carolina 28731. Plans for a two-masted, 50 to 70-foot Pacific NW-built fishing schooner of the 1850-1890 era: Rob Johnston, 114 W. 14th St., Port Angeles, Washington 98362. Plans and other info on the U.S. Customs Steam Packet, as modeled by Fred Eastman, Milbrae, California, shown on page 16 of our Winter ’87 issue: Glen M. Larsen, PO. Box 876, Calimesa, California 92320. Information about model boating activity near the home of: George Hanson, 8187 English Elm Circle, Spring Hill, Florida 34606. Plans for a stern wheeler: M.E. Gladwell, 17 Lee Farms Dr., Montgomery, Alabama 36108. (See first paragraph in “National Organization” below.) Plans to go with a wooden boat kit by Veron, of England (now out of business …or relocated) for a 42-inch yacht called the “Huntsman 28”’: John Rule, phone number only, in Houston, Texas, area (713)467-2399. NATIONAL ORGANIZATION In the Spring ’88 issue we brought up the subject of having a national organization of scale model boat and ship builders, similar to the IMPBA and the APBA in model boat racing, ROAR in model car racing, NMPRA for model aircraft pylon racing, AMA (Academy of Model Aeronautics), etc., where, US BOAT & SHIP MODELER


