

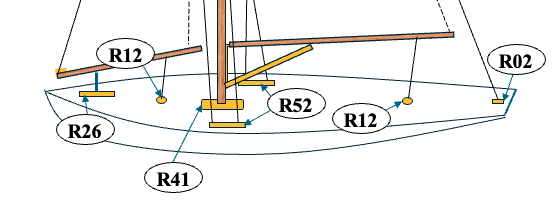
Deck fitting placements on a sloop.
The relationship between the rig and the location of the deck fittings is very important to the operation of a model yacht. Therefore, the placement of the fittings on the deck, their location, is critical.
Scenarios
If you are ready to position your deck fittings for a new boat or a restoration, you have one of the following scenarios in front of you:
- A boat you are building.
- You have plans that show the location of the fittings.
Suggested action: Continue your project following the plans. - You have an older set of plans that show you only the mast location on the sheer plan. A little more problematic.
Suggested action: See the article “Placing Your Deck Fittings.”
- You have plans that show the location of the fittings.
- You have a boat hull and deck with holes in the deck where the deck fittings where placed. This is a workable situation.
Suggested action: This is a nice situation to be in. Lay out the hole patterns on a piece of paper. The jib rack will probably have two rows of holes indicating that it was tee-shaped. Size will be determined by the length and width of the hole patterns. The shroud racks will either have one or two rows of holes in a line. One set indicates an “L” shaped rack while two rows indicate a tee-shaped rack. The final fitting length and width will be from ¼ inch to 3/8 inch longer and wider than the hole patterns.
- You have a boat someone started and did not finish.
There may be clues inside the hull.- Look for the king plank.
- Look for the shroud plates under the deck just forward of the hatch opening at the sheer.
- Look for indicators (pencil markings) on the deck that may show the location of a jib rack, mast step, deck fairleads, and the backstay bracket.
- Look for a larger deck beam in the area where the mast step would be positioned on the deck.
Suggested action: If you find any of these indicators you will be able to put the puzzle back together by identifying fitting location and potentially size. If you end up with missing data refer to the article “Placing Your Deck Fittings” starting with the position of the mast.
- You have a boat hull missing the deck but with obvious holes where the fasteners penetrated the shroud plates and the king plank. A workable situation.
Suggested action: You will be able to construct fittings and determine their locations based on your findings. Draw the hole patterns and determine the type of fitting that would go in each particular location. See the suggested action for 2. - You have a boat hull missing the deck and you have a few indicators in the hull.
- There is a compression strut or reinforced deck beam indicating the approximate location of the mast.
- There may also be the tensioning wires that go diagonally from the keelson to a position where the shroud plates would go.
Suggested action: If you have either of these scenarios you have the first clue to locating the remainder of the deck fittings If you find any of these indicators you will be able to put the puzzle back together by identifying fitting locations and potentially size. If you end up with missing data refer to the article “Placing Your Deck Fittings” starting with the position of the mast.
- You have a boat hull missing the deck and there are no indicators.
- You have just become an advanced builder. Good luck
Suggested action: See the articles:- “Placing Your Deck Fittings”
- John Henderson’s articles
- You have just become an advanced builder. Good luck
We tried to identify most scenarios. You may encounter something other than those variations described. The descriptions may help you sort out what you have and determine the fittings and locations. If not, please refer to the article “Placing Your Deck Fittings.”
Advice
Of course, you may also reach out with questions and requests for advice using the Contact Form. Complete the form (note that it is a beginner question), and submit. Someone will get back to you in a timely manner.
Do not rush in; take your time, and study the boat. Put the boat aside and go back to it often. Make notes and review them and the boat. Your original ideas will evolve as you study the boat and make notes. You will come up with a better strategy/plan if you follow this advice.
Examples
Gus Lassel Marblehead Showing Deck Fitting Placement
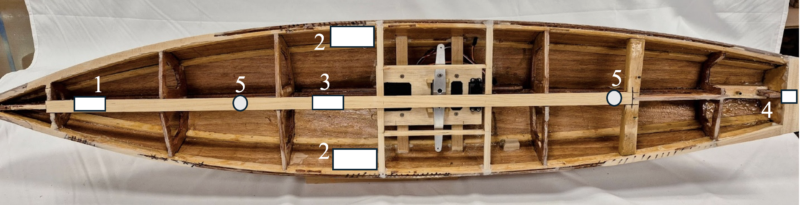
This is a Gus Lassel hard chine Marblehead. The original is in the American Model Yachting collection in the Mystic Seaport Museum. It has been started using the measurements taken off of the boat at Mystic but never finished.
Our reconstruction begun with the addition of a king plank (R30) and the electronics board. There is enough information on this hull that we can, with some accuracy, locate the deck fittings where noted. Shroud plates (R51) need to be added where noted. The backstay bracket (R02) will be mounted on the deck very near the stern so the screws will engage the large block used for the transom.
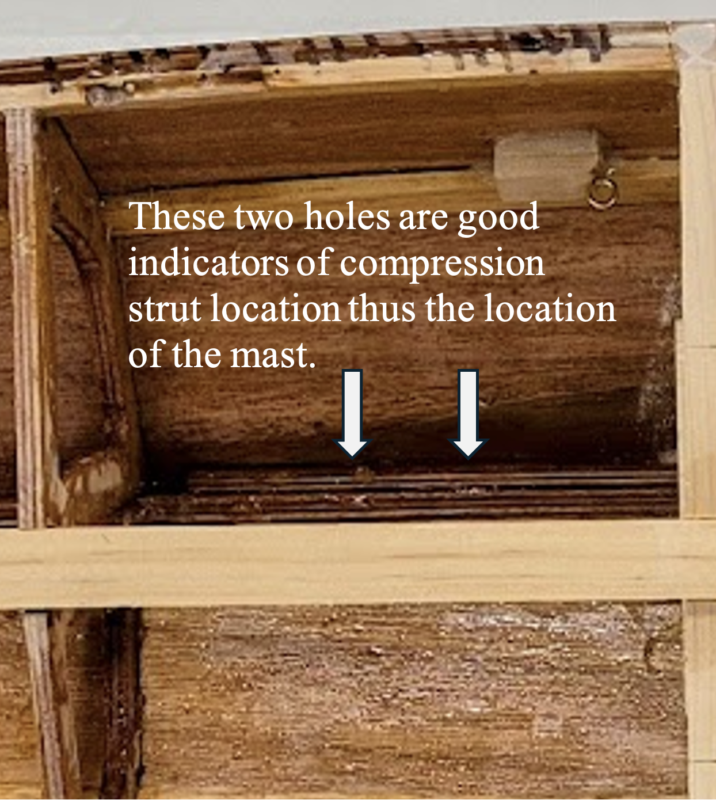
There is some slight flexibility of position for the fittings on this boat. Note the two screw holes on the closeup photo of this boat which are indicators of the position of the compression strut, which locates the mast step (R41). The following numbers relate to the location estimates for the various deck fittings on this boat.
- Jib rack
- Shroud rack and shroud plates
- Mast step
- Backstay bracket
- Deck fairleads
Cypher with a Full Complement of Deck Fittings
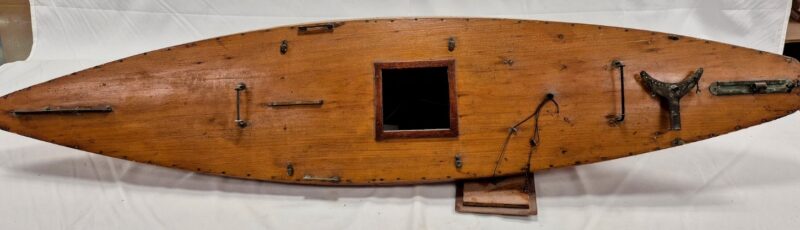
This is a very close copy of Cypher, a boat designed and built by Francis E. Courtis of Marblehead in 1932. This boat has all of its deck fittings; it was built for and sailed as a freesailed model yacht.
Note that the jib rack (R26), shroud racks (R52), and mast step (R41) are unusually long. The is typical for the freesailed boat as large adjustments were made for beating up wind and for running down wind. The travelers provide an approximate location of the deck fairleads (R12). This arrangement on deck, with all of the fittings in place, takes most all of the guess work out of deck fitting placement except for fine tuning the locations. In this case you could use certain existing fittings, or you could replace them with fittings more appropriate for R/C sailing.
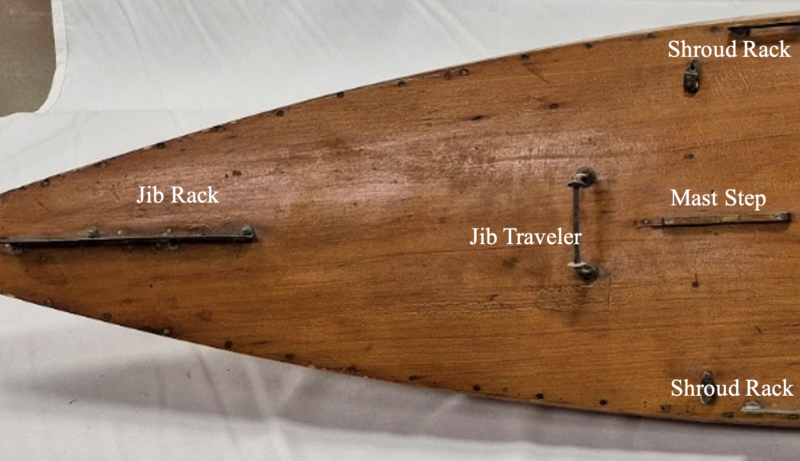
Classic Marblehead in Mid-Build with Some Indicators
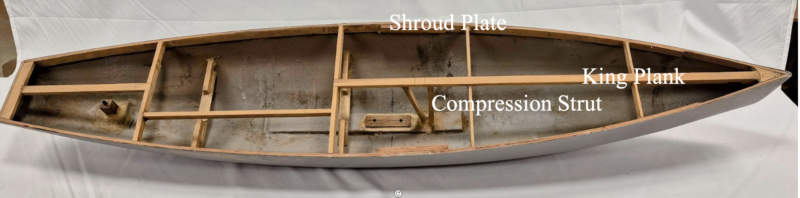
This is a classic Marblehead of unknown origin. There are no plans available: however, there are a number of classic Marblehead plans on the US VMYG website that may help with the completion of this boat.
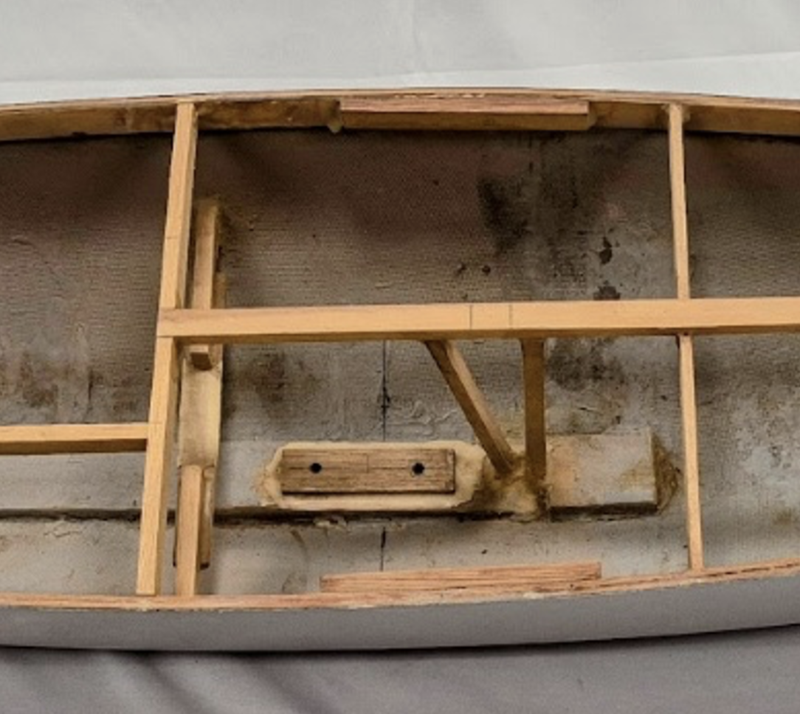
The construction had begun on this boat with a number if items in place. Most important to our discussion, you can see the compression strut, which confirms the mast location; the shroud plates, indicating the shroud rack locations’ and the keel bolt holes confirming the keel location. This boat has a fin and bulb keel.
There are a few observations that are a concern.
- The hatch opening is too far aft. This will necessitate the removal and addition of deck hatch beams.
- The king plank is too narrow to accept the fasteners for some of the fittings. It would be easy to scab pieces to the king plank where the jib rack (R26), deck fairleads (R12), mast step (R41), and the backstay bracket (R02) go.
- The cross members for the electronics board have been installed too far aft. This needs to be moved forward directly behind the compression strut.
A Traditional Marblehead with No Deck Fittings but Numerous Filled Holes in the Deck
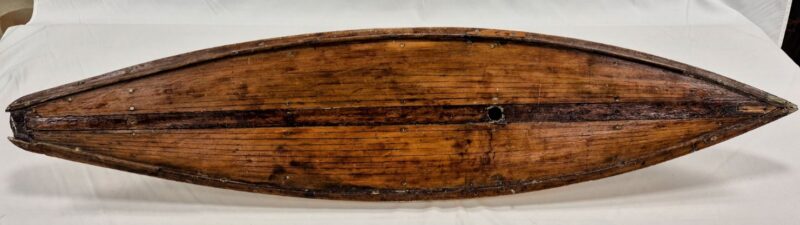
This is a Marblehead class boat of unknown origin. Restoration had been started but not finished. There are too many holes in the deck to count, indicating numerous fittings and the relocation of them.
All of the holes, except the mast hole (a keel-stepped mast), had been filled and finished over. This was obviously a freesailed boat with a simple steering mechanism used to control the boat. At first we thought that there was a bowsprit at one time, but after closer inspection we realized the area in question was where the jib club was fastened to the deck. On early freesailed boats, the forward end of the jib boom was attached to the jib club. This boat will need a hatch opening and additional deck beams around that opening. Holes on the boat will assist in placing the deck fittings.
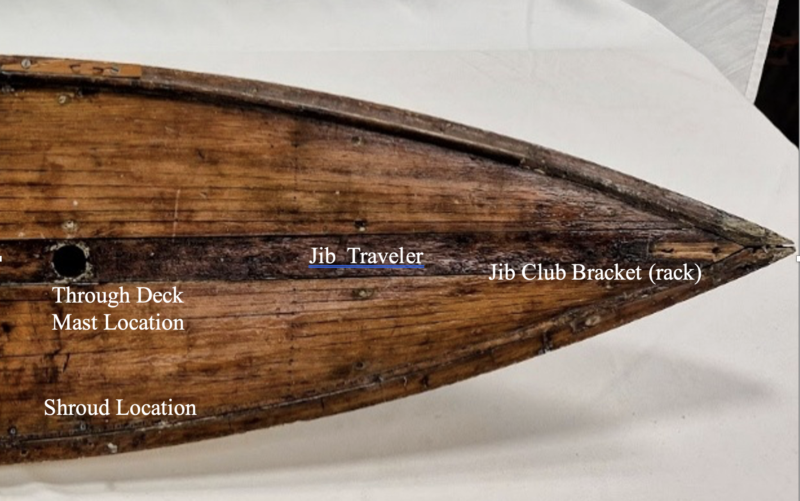
A Basic Boat with Not Much to Work With
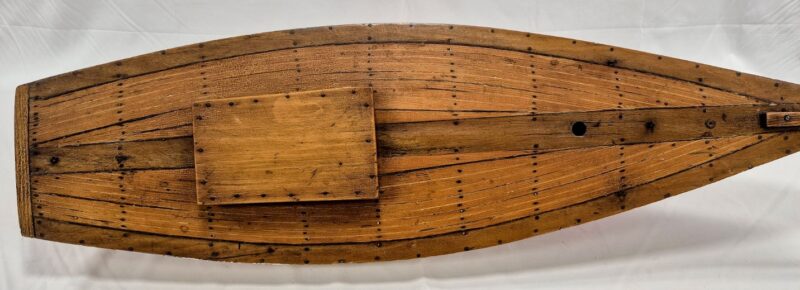
This is a very basic boat that was sailed a few times many years ago. It is a gaff-rigged sloop with a bowsprit and multiple jibs. There is a mast hole (keel-stepped mast) and four screw eye locations on the deck. Nothing else! Two screw eyes were for the sheet attachment and the other two for shrouds. The keel itself is very interesting and it will impact fitting location. A full-size plan of the rig will be helpful to determine sail size and the center of effort. The center of lateral resistance will also have to be calculated to complete the plan.