Article and photographs by John Stoudt
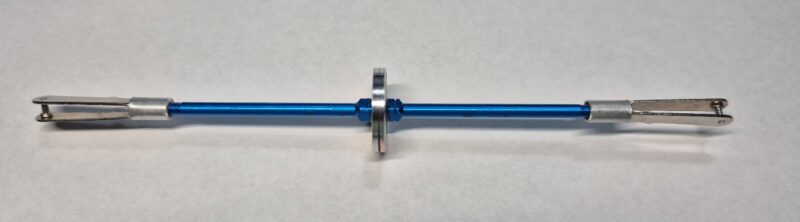
Some parts that we need for our building and rigging can be hard to find. The clevises that we have relied on for boom vangs were available in 2-56 and 4-40 threads. They are no longer available at a quality that works well for this fitting. The ones that are currently being sold are not as substantial as those that have been discontinued. They are made from a lighter gauge metal and are suspect under the loads they need to endure.
Our research has found metric parts for both the clevis and turnbuckle. The clevises are a metric M3 thread. And the turnbuckles are available in assorted styles and lengths, and in the same M3 thread size.
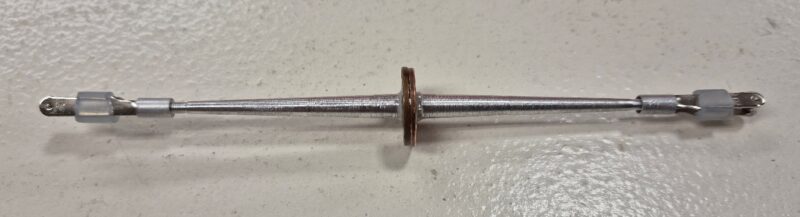
We’ve found an easier way to make a boom vang using these metric parts. The turnbuckle has a right hand thread and left hand thread, so we will need clevises with right- and left hand threads. But a left hand clevis is not available.
The turnbuckle is aluminum, and the clevises are plated steel. If you cross-thread the steel clevis and thread it into the aluminum turnbuckle, the fit is acceptable. There is no reason that the steel cross-thread would fail before the aluminum thread.
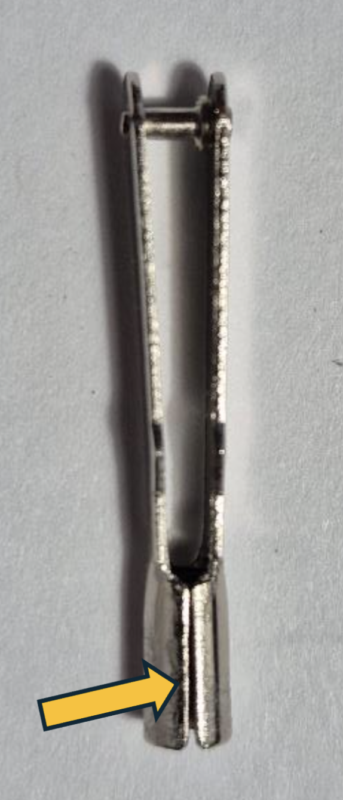
If you study the clevis, you will notice that there is a seam in the barrel end of the part (see Fig. 2.). This suggests that the clevis starts out as a flat piece of steel, the same way many of the AJ Fisher fittings did. The clevis is formed using a multiton press: the shape is stamped out, the threads are pressed into the piece, and then it is formed to its final shape.
The threads are stamped into the piece because it would be extremely difficult to cut the threads into the part once it has been formed into shape. The seam would allow the metal to flex as the thread was being cut, making for a very inferior thread. The stamped thread would be very hard because the metal is pushed together in the process. This makes what we are going to do more possible.
We are going to cross-thread the part using a left hand M3 tap. You can prevent the clevis from opening up and allowing the tap to slip by placing a piece of tubing over the round end of the clevis. Cut a 5/16-in piece of 3/16-in aluminum tubing and slide it onto the round end of the clevis. Secure it with cyanoacrylate (CA) glue. This will prevent the clevis from expanding, ensuring that you will cut enough thread.
I found that after cross threading (cutting a left handed thread) one of the right hand clevises and assembling the boom vang, the thread engagement on each of the RH- and LH-threaded parts was acceptable. Both clevises were tight and worked smoothly.
I made a vang from a 106-mm turnbuckle (blue) and a 130-mm turnbuckle (silver) this way and assessed them in two separate ways.
- Using a testing machine, 22 lb of load were placed on the blue boom vang and there was no noticeable failure.
- Using a luggage scale, 25 lb of load were placed on the silver boom vang. At that load, the clevis pin slipped out of the one leg of the clevis and the clevis released from the attachment point on the luggage scale.
In neither case did the left handed thread slip or fail in any way. Both boom vangs were assessed three times.
Materials
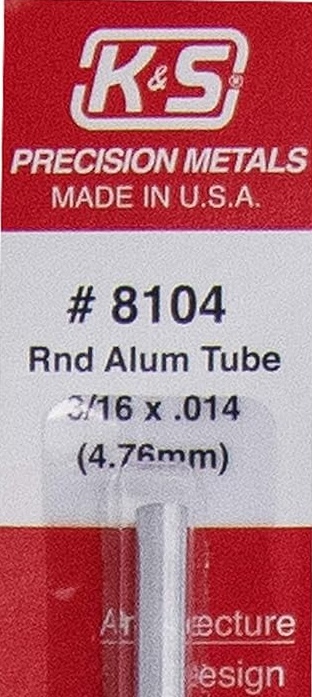
- 3/16-in Aluminum Tubing
- Cyanoacrylate (CA) glue (thin)
- M3 Quick Link Clevis (10 pack)
- Turnbuckle (M3 x 106 mm or M3 x 130 mm)
- Medical tubing
- Round disks (pennies work well)
- Two-art Epoxy and an appropriate thickener.
Note: There are many sizes of these turnbuckles. If you go to Amazon and do a search for R/C Dune Buggy Turnbuckles you will have many options. Look around to determine which size and color will work best for your boat.
Tools
- 5/32- and ¼-in drill bits
- Automatic center punch
- Centering square
- Electric hand drill or drill press
- Fine tooth metal cutting saw
- Left hand tap M3
- Right hand tap M3
- Scratch awl
- Small ball peen hammer
- Small bench vise
- Square and other jeweler’s files
- Tap handle
Procedure
- Cut two pieces of the 3/16-in aluminum tubing 5/16-inch long with a fine-tooth hacksaw.
- Clean up the cuts with a fine metal file and abrasive paper. Make sure to remove any burrs from inside of the tubing.
- With the small ball peen hammer, tap one piece of tube over the round end of each clevis.
- Put a drop of CA between the tube and the flat side of the clevis. The thin glue will wick into the seam between the clevis and the tubing. Be careful not to get the adhesive on the threads.
- Place one of the clevises into a small bench vise and carefully run the right hand tap (clockwise) through the treads to make sure the threads are open and smooth. Make sure to turn the tap back every turn to clear the threads.
- Next place the other clevis in the vise and follow the instructions on how to thread a hole.
- Use the left hand tap to make left hand threads in this clevis. Remember you will be turning the tap counterclockwise to cut the left hand thread. And you will be turning it clockwise to clear the chips of metal.
Note: Make sure you back the tap up each half turn to break off the metal chips. Use a lubricant (WD-40®) or cutting oil while you are cutting the threads.
- Run the tap through the hole until at least 1/8 inch is sticking out the other end of the hole.
- Make sure each clevis turns smoothly on the turnbuckle.
Note: Two pennies ganged together were found to work best when trying to rotate the turnbuckle. And they only cost two cents.
- Take two pennies (per turnbuckle) or other suitable small disk-shaped objects and mark the center using a centering square.
- Center punch each disk.
- For the smaller turnbuckle
- Drill the center holes with a 5/32-in drill bit.
- Use a square jeweler’s file to shape the hole square to fit this turnbuckle. Go slow and check the fit often.
- For the larger turnbuckle
- Drill the center holes with a ¼-in drill bit.
- Use various jeweler’s files to shape the hole hexagonally to fit this turnbuckle. Go slowly and check the fit often.
- Place the pennies on the turnbuckle and rotate them until they align best with each other.
- Apply thickened epoxy to the inside faces of the disks.
Note: When you mix thickened epoxy, mix the thickener until the epoxy has the consistency of peanut butter. You want the epoxy to stay where you put it. The mixture should not drip off of your stirring stick.
- Slide the pennies onto the square or hexagonal area of the turnbuckle you have and make sure there is a small fillet of epoxy around the joint between the disk and the turnbuckle.
- Adjust the disks on the turnbuckle so they are square to the centerline and wipe off any excess epoxy.
- Check the alignment, put aside, and allow the epoxy to cure.
- When the epoxy has cured, clean up the edges of the disks with a file.
- Place a piece of medical tubing over each clevis as a “locking” feature.
- Assemble your boom vang.