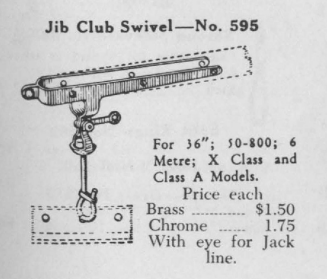
The jib club fitting [R24] was originally called a Jib Club Swivel and was available from any of the model yacht fitting suppliers. It was designed for freesailed model yachts where the jib pivoted at the front of the boom.
Adapting the Jib Club Swivel for remote control, where you move the jib swivel [R28] attachment back from the front on the jib boom 20-25%, means that the jib club fitting and the jib swivel cannot be a single fitting like it was in the freesailing days.
The jib stay [R22] and jib sail control loop [R10] are mounted to the jib at the lead edge of the job boom. This fitting can accommodate these two items nicely and is easy to install. A simple jib club fitting can be made from a piece of 1/16- ⨉ 1- ⨉ 12-in sheet brass.
Materials
- 1/16- ⨉ 1- ⨉ 12-in brass bar
- One 2-26 ⨉ 1inch flat head brass machine screw (hardware store item)
Tools
- Cordless drill or drill press
- Hacksaw or other suitable metal cutting saw
- Ruler and square
- Center punch (automatic)
- File, sanding block, band sander
- 3/32- and ¼-in drill bits
- Aviation shears
- Ball peen hammer
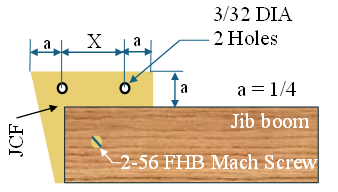
Procedure
- Measure X, the horizontal distance between the jib tack and the eyelet. NOTE: Each of these will be a slightly different size based on the boat you have.
- Using the layout for the jib club fitting shown in Fig. 2, you can determine the size of the fitting for your boat. Make a diagram with the correct measurements based on X from Step 1 and the height (thickness) of the jib boom.
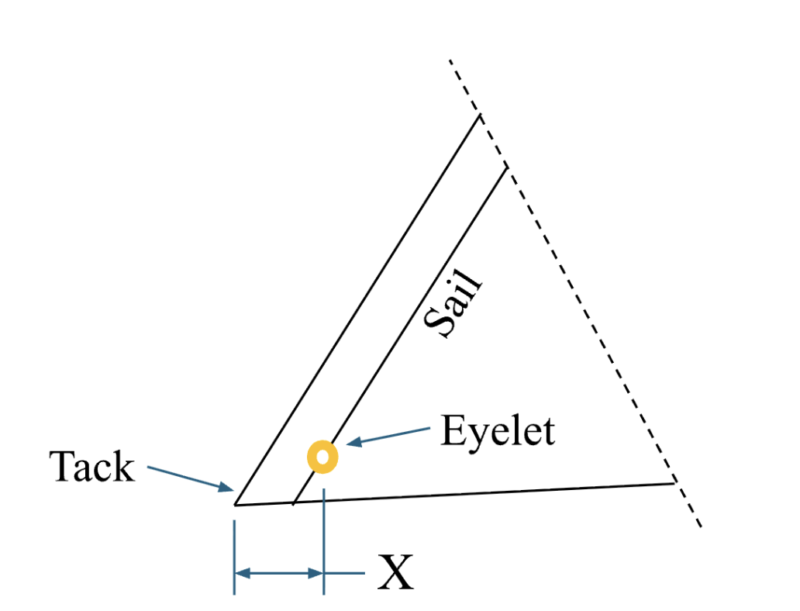
- Lay out the measurements on the brass strip.
- Cut it out slightly larger than necessary with the aviation snips.
- The cutting process will distort the brass slightly. Hammer it on a hard, flat surface. Always place the “belly” up and hammer the high spots flat. Do not hit the brass too hard as the hammering will put peening marks (dimples) in the metal.
- Sand/file the part to its final shape.
- Center punch the hole locations.
- Drill two holes with a 3/32-in drill bit. Do not drill the mounting hole at this time
- Using the ¼-in drill bit between your thumb and index finger, spin the bit and deburr each side of the two holes.
- Round off three marked corners (r) of the part using a file, sanding block, or band sander
- At this point your part is complete, awaiting insertion into the front of the jib boom.
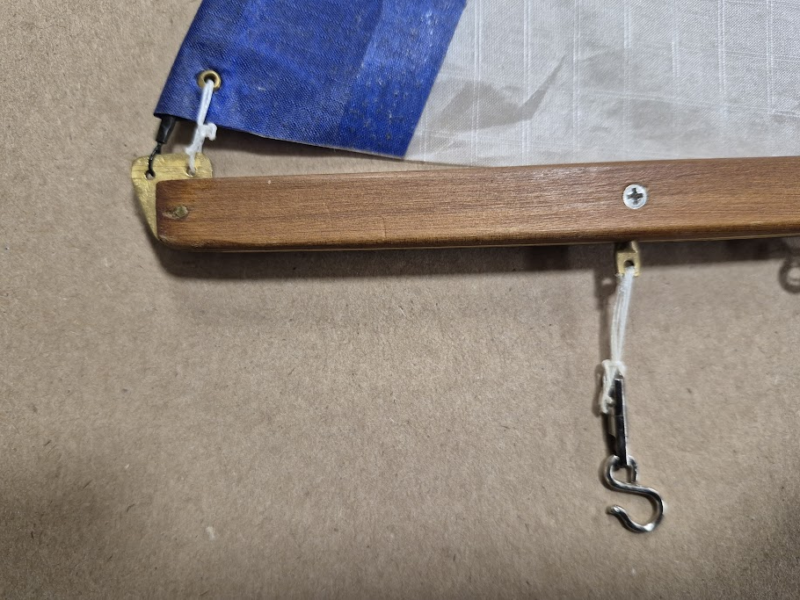
You will cut a tight slot in the front of the jib boom using a saw to accept the jib club fitting, epoxy it into place, drill/tap/countersink for the machine screw you are using, and install/trim/clean the end of the machine screw.